8 posts tagged with "release"

View All Tags

Excalibur v0.30.0 Released!

· 10 min read
Erik Onarheim
Maintainer of Excalibur

Today we are excited to announce the biggest and best version of Excalibur.js yet! We have a lot of accomplishments to talk about and a lot of thank you's to give!

Install the latest version today! Check out the full release notes

sh
npm install [email protected]
sh
npm install [email protected]

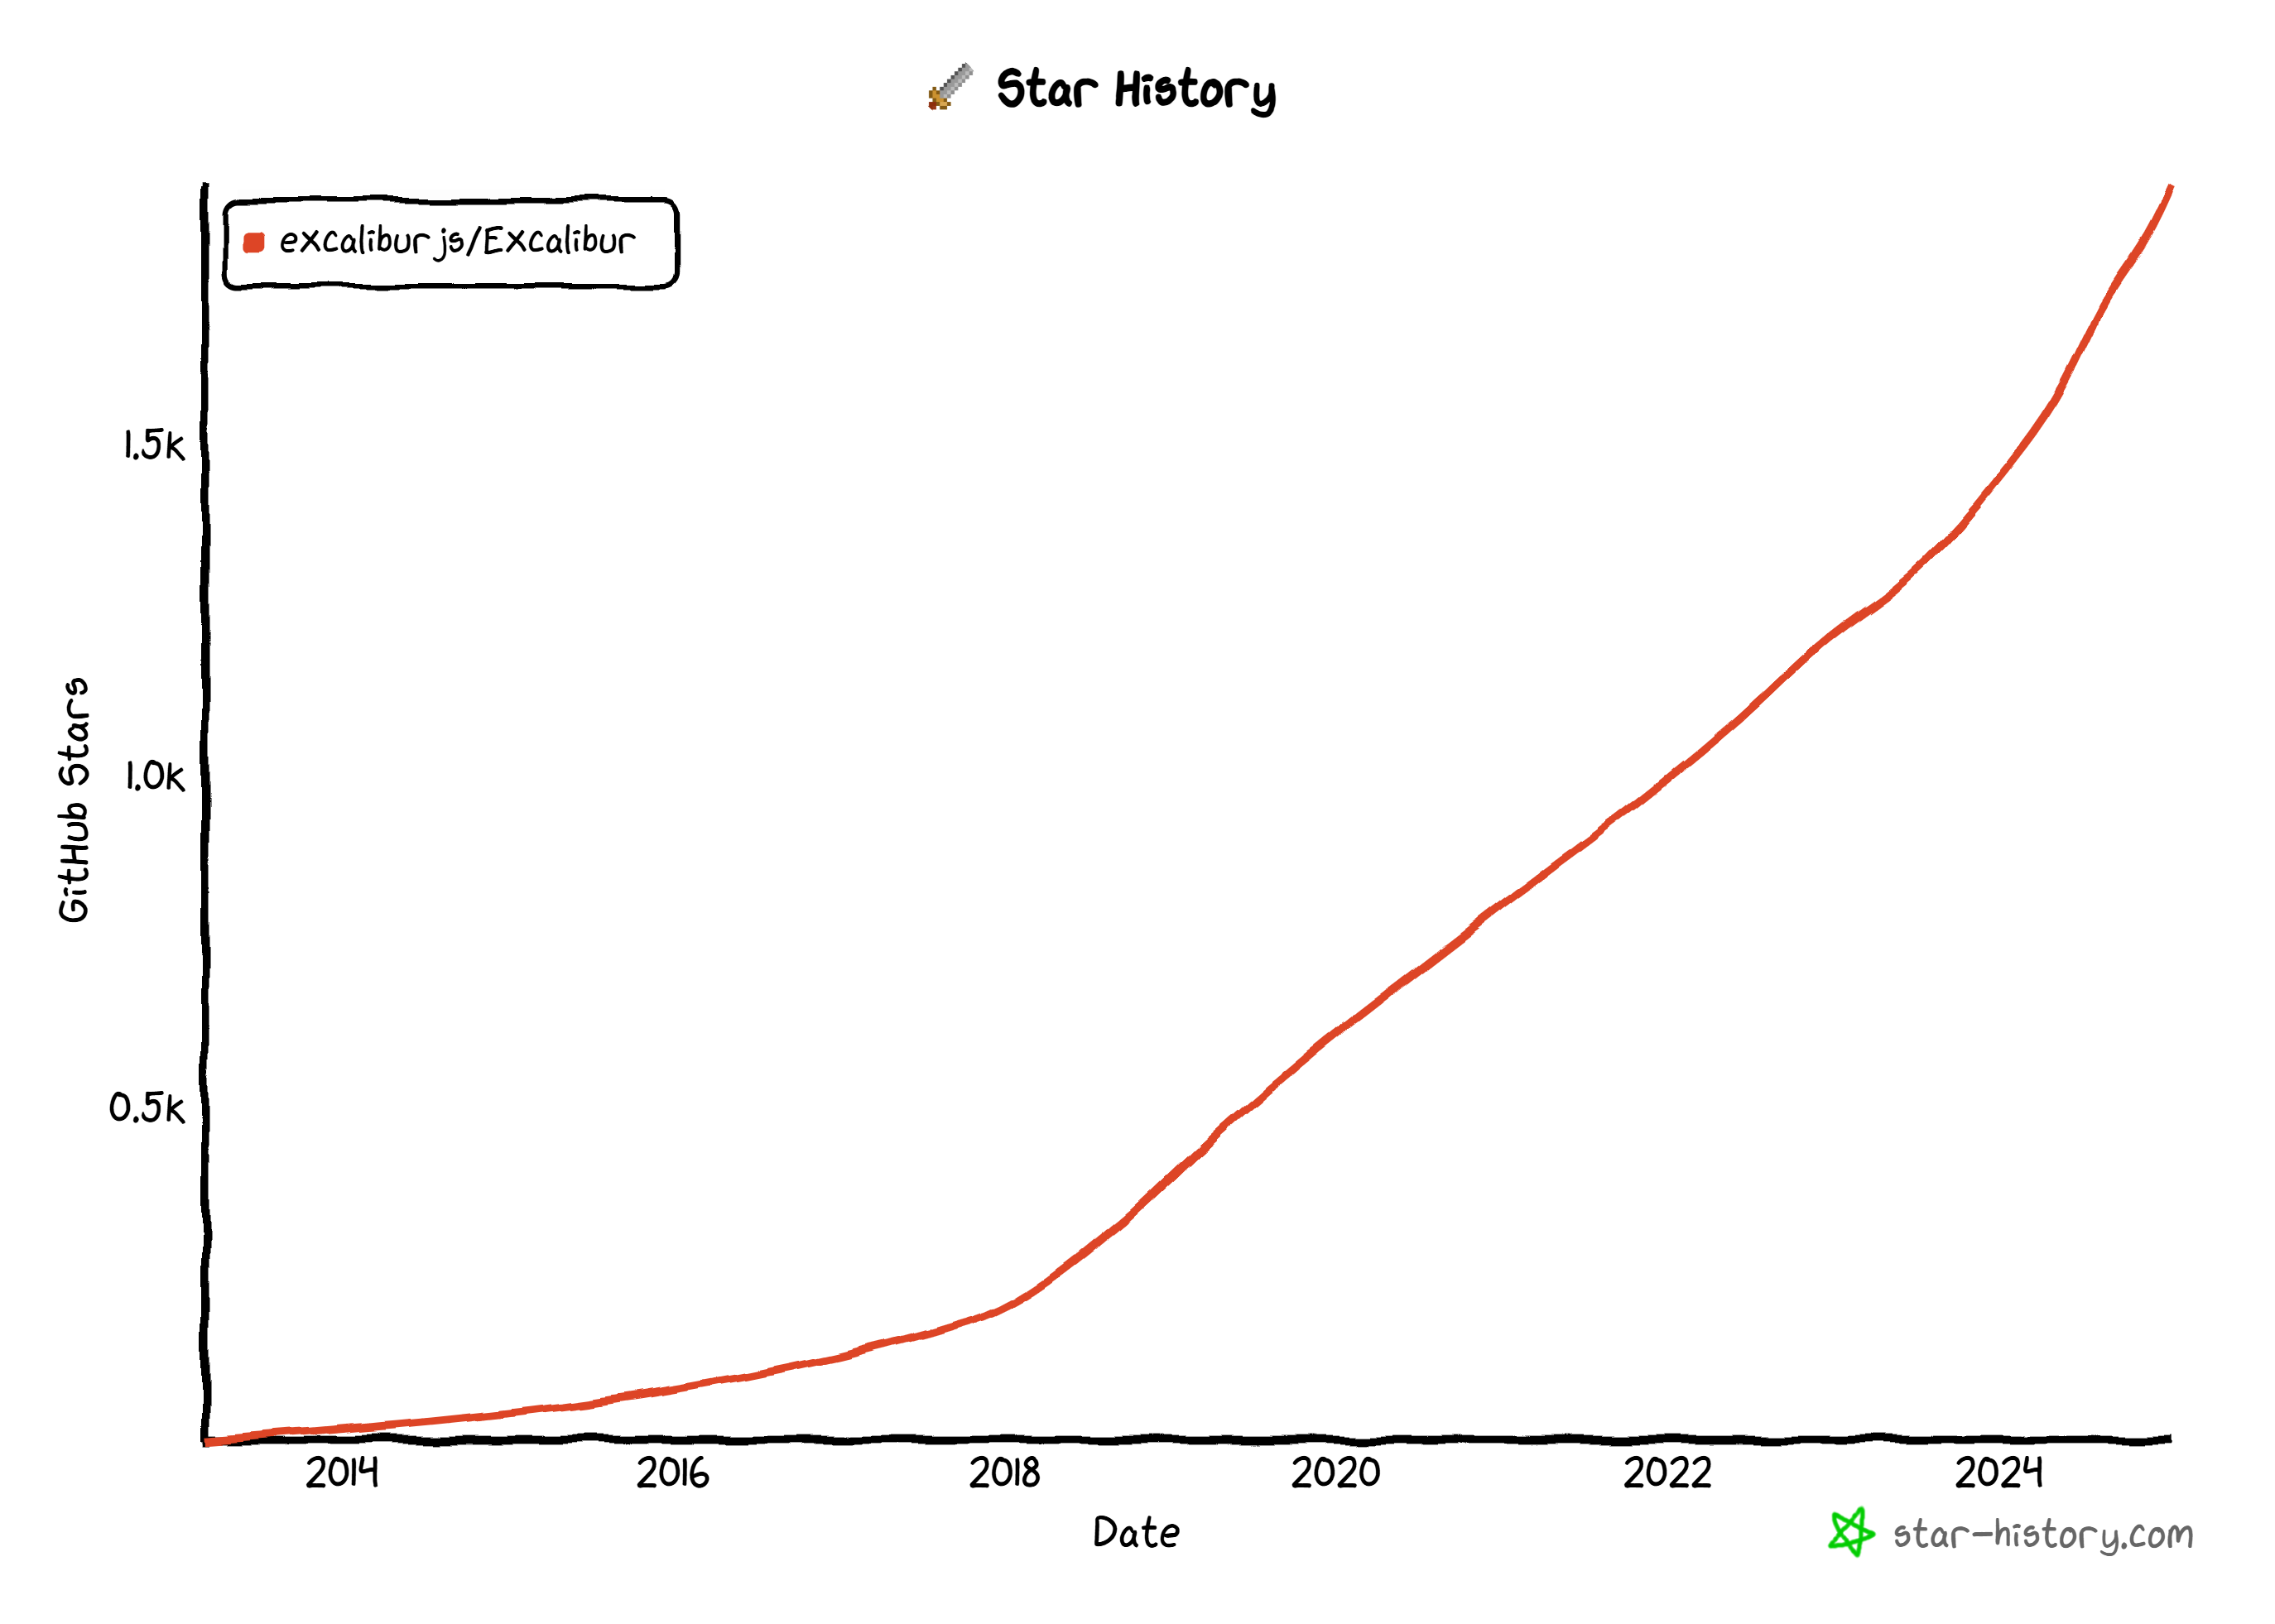
Project Health

At a high level:

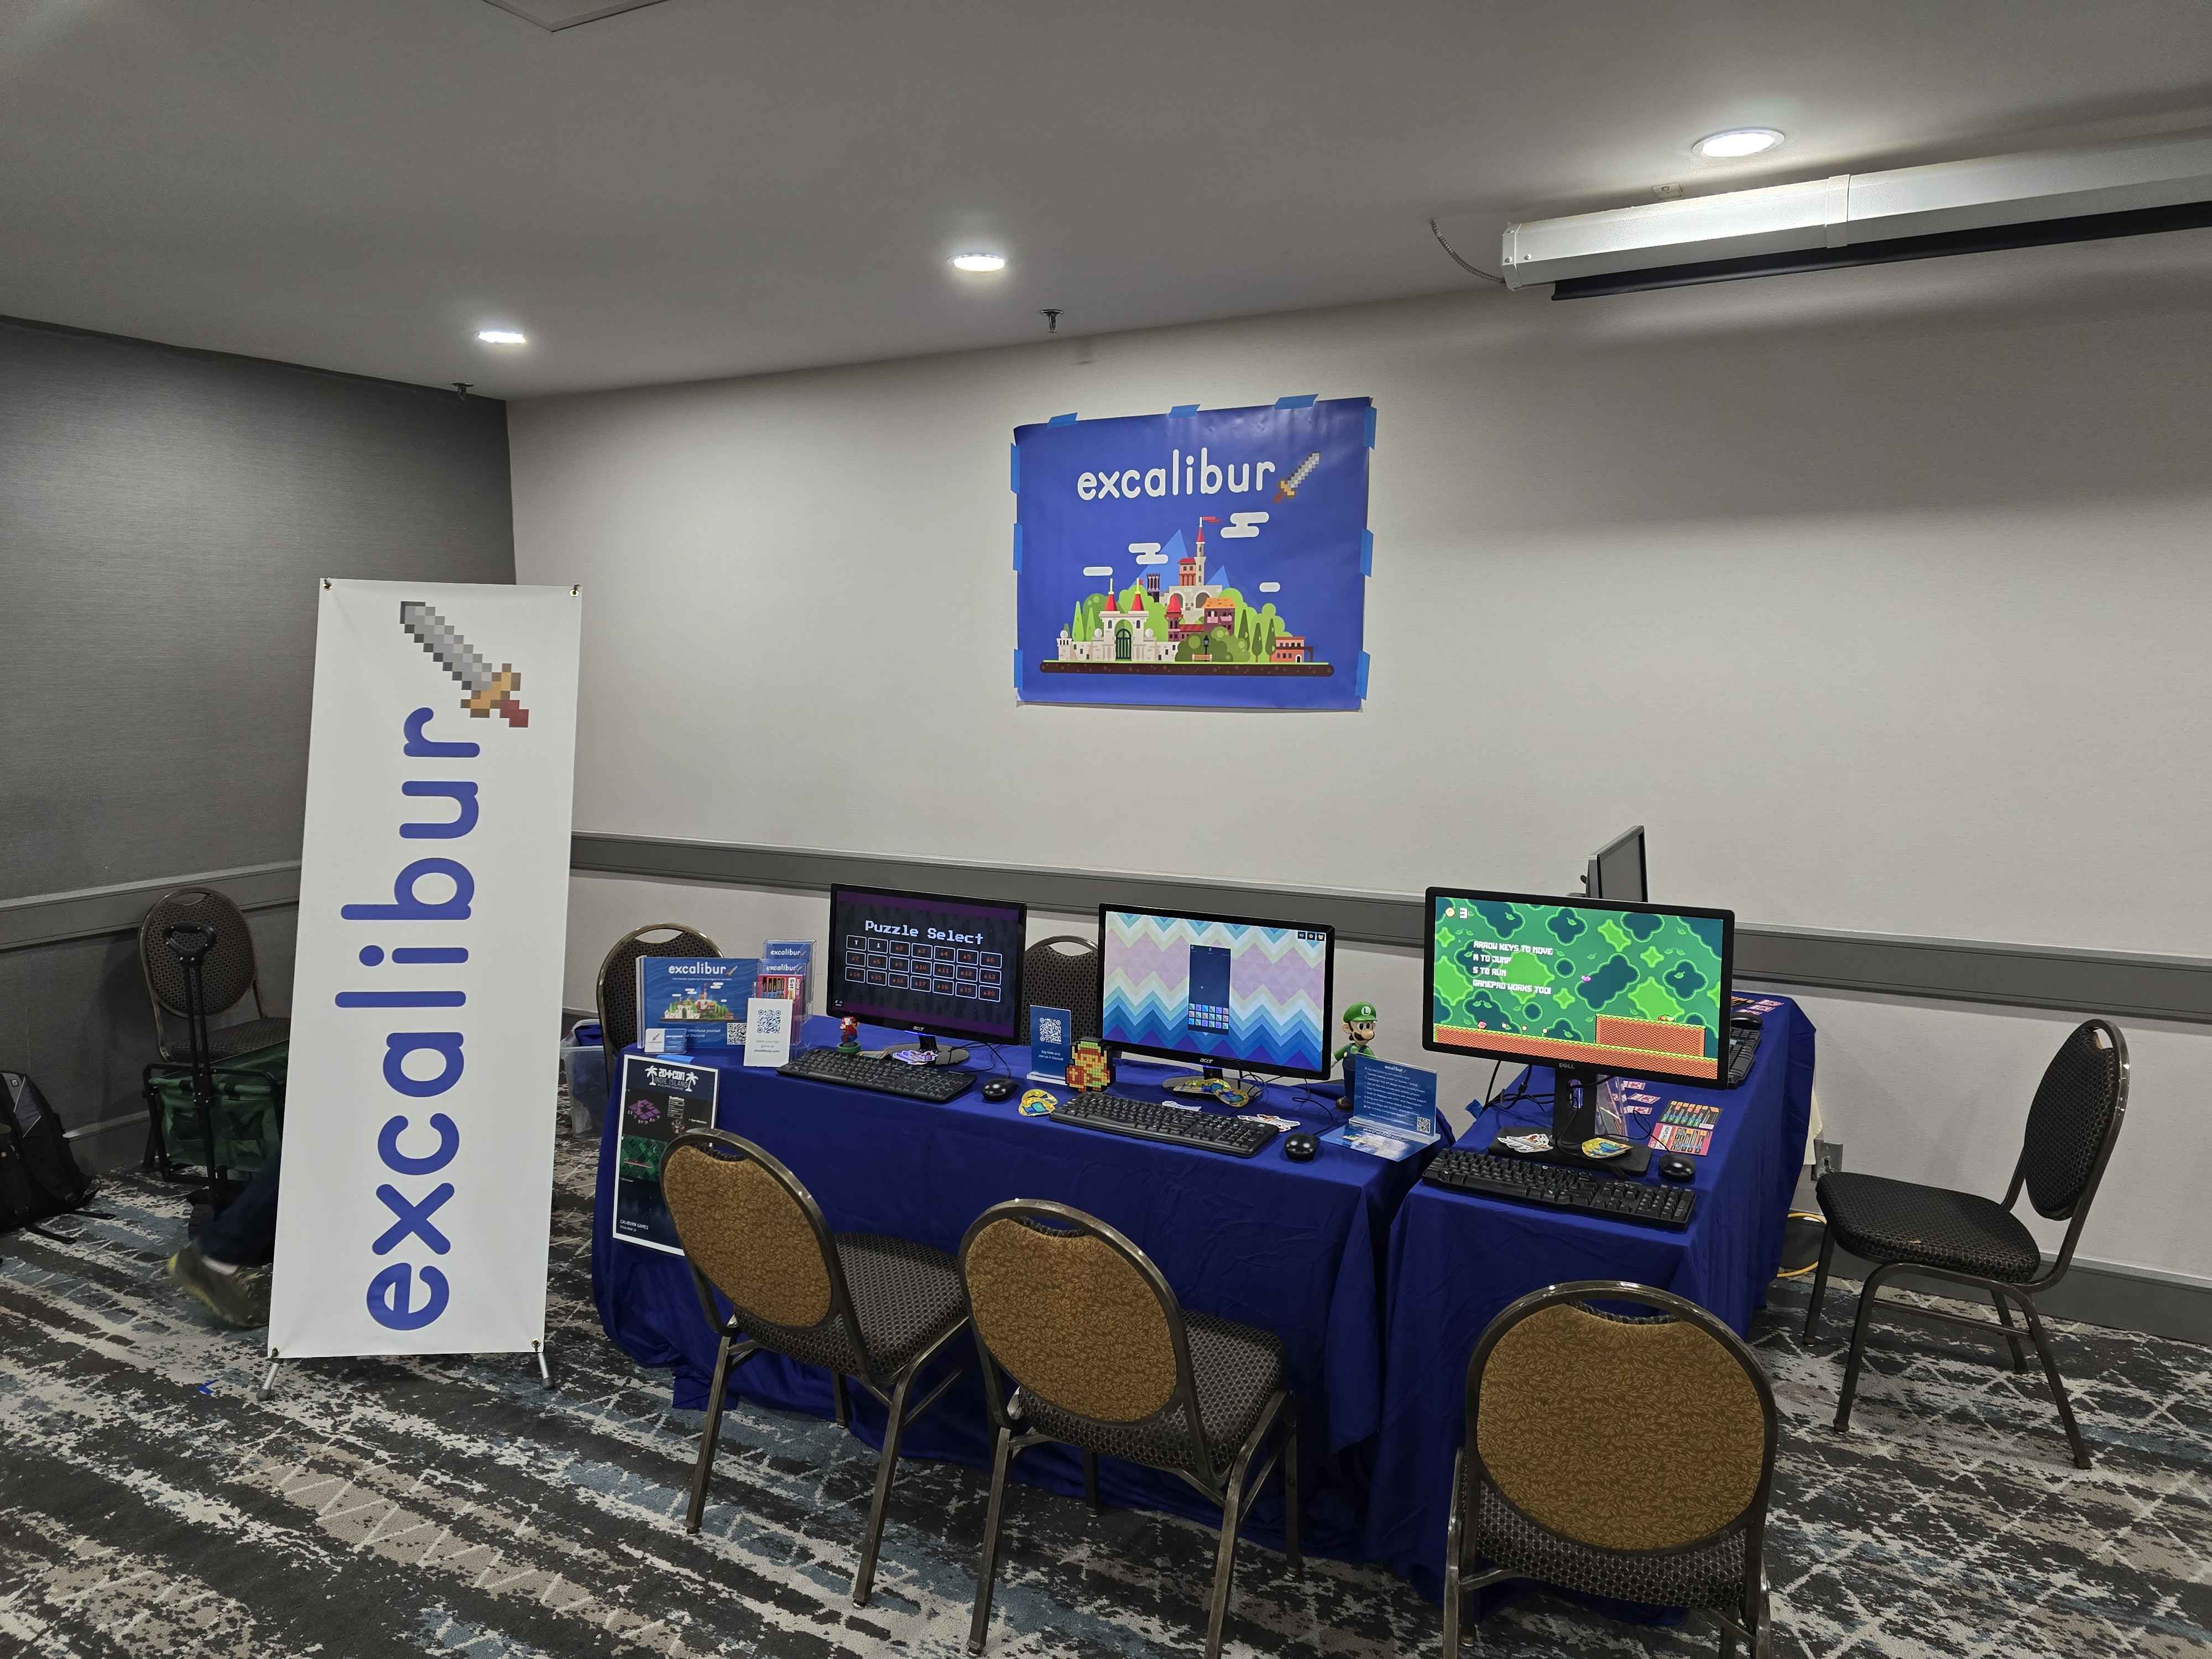
Also we did our first in person event @ 2D Con in Bloomington, Minnesota! We'll be at VGM Con this spring!

2d con

New "Excalibird" Tutorial

With this release we've added a brand new tutorial inspired by Flappy Bird. This was built from the ground up to help you write excalibur games like we write them. This tutorial is geared at building a sustainable project structure that can grow as your game design does. Check out the full source code and play it now. Big thanks to discord user .rodgort for all the helpful feedback.

New Quick Start

Did you know we have an Excalibur CLI to help you bootstrap games quickly? Check out our new quick start guide to get up to speed in record time with your new project in your preferred frontend tech (including vanilla.js).

sh
npx create-excalibur@latest
sh
npx create-excalibur@latest

We've updated all the Excalibur.js templates that power this CLI to the latest and greatest!

Did you know that community member Manu Hernandez built this? Send him a thanks on the Discord!

Quality of Life

Browser Extension

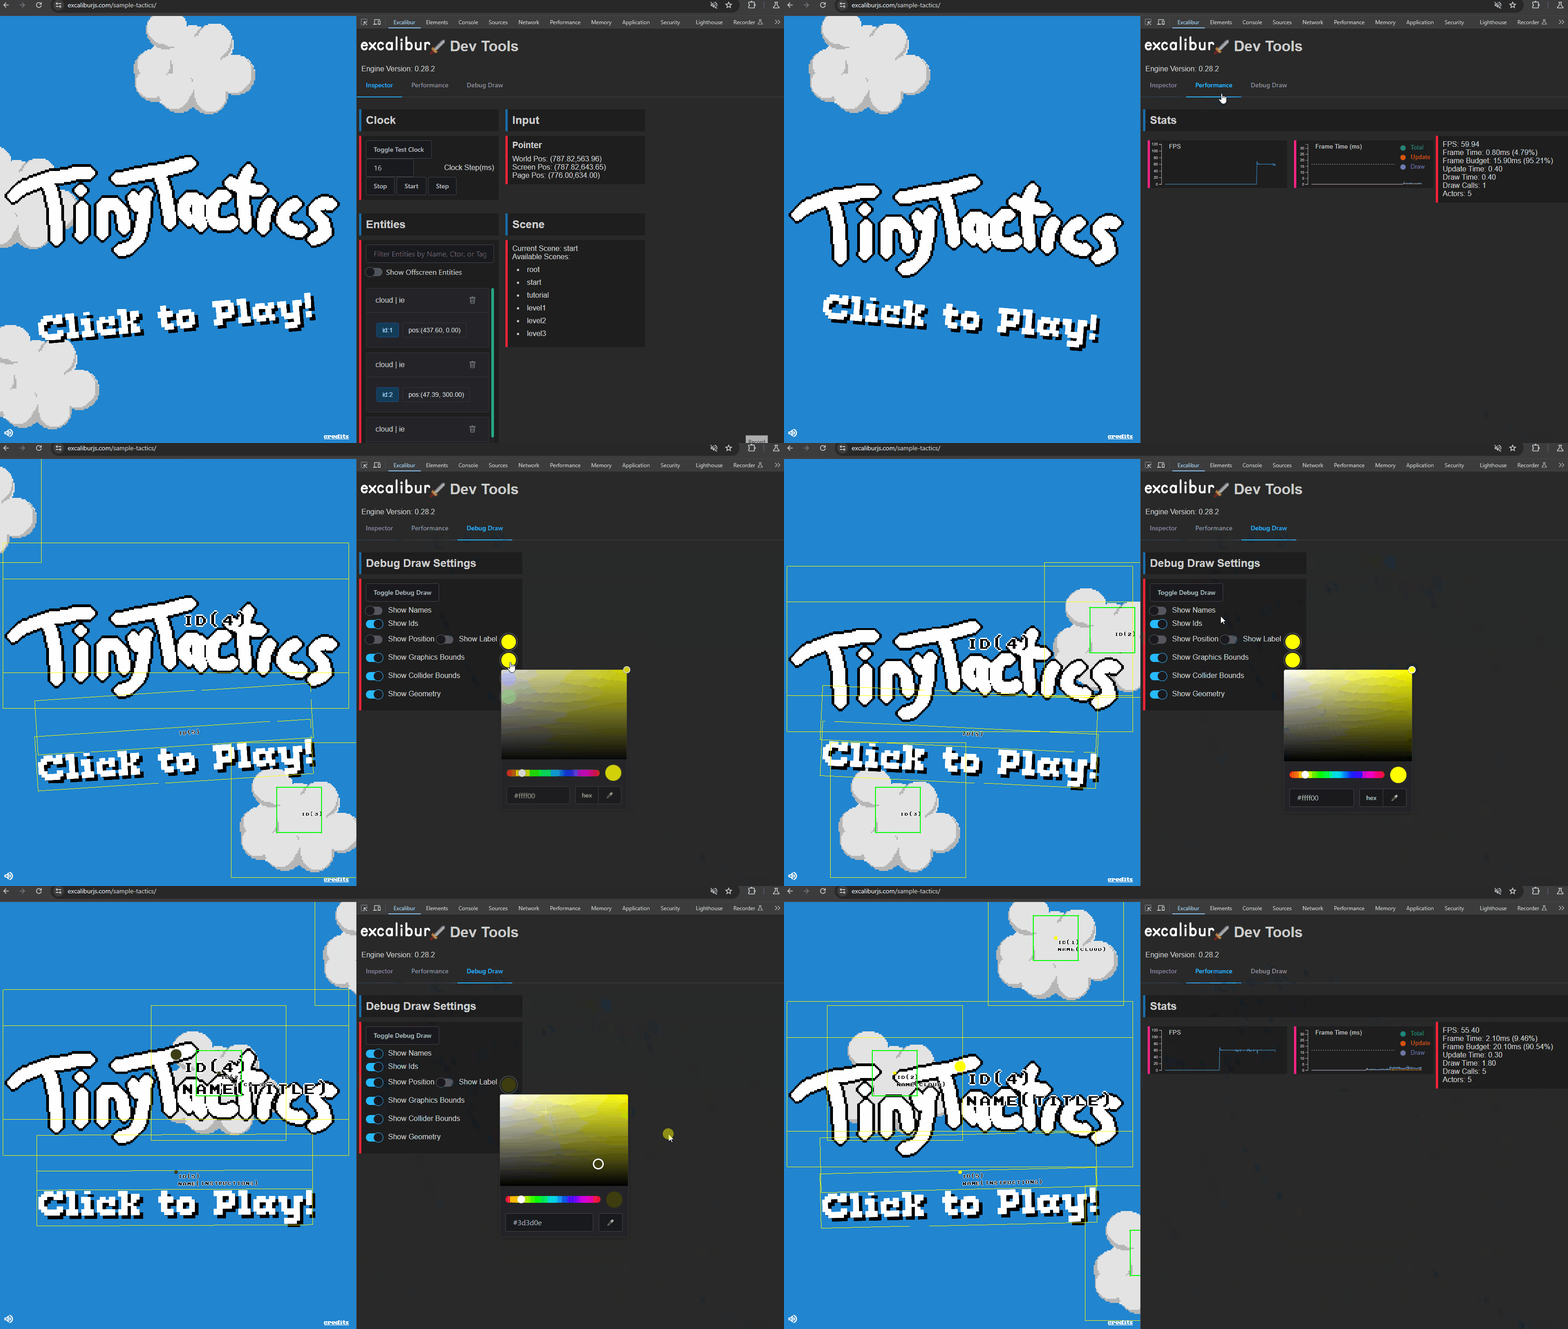
New Excalibur.js Dev Tools Extension is available in BOTH Firefox and Chrome

Extension in action

If you are looking to contribute, we have a big wish list of features for the extension

Development Excalibur Builds

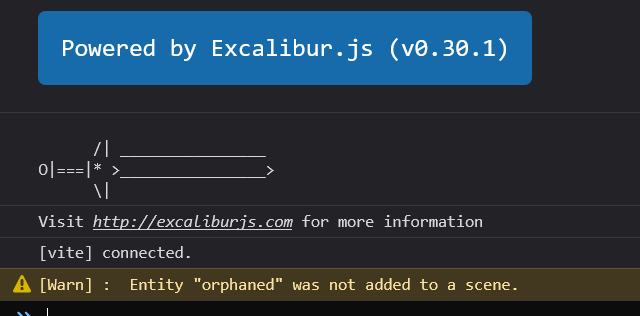
We are publishing new excalibur.development.js builds that have increased debug output to catch common issues while in development. For example if you forget to add an Actor to a scene (a common thing that I run into)!

typescript
const orphan = new ex.Actor({
name: 'orphaned'
});
// OOOPS! I forgot to add orphan Actor to a Scene
typescript
const orphan = new ex.Actor({
name: 'orphaned'
});
// OOOPS! I forgot to add orphan Actor to a Scene

warning logged on orphaned actors

When NODE_ENV=production these extra warnings are removed for you prod build!

This big quality of life feature was added by Matt Jennings!

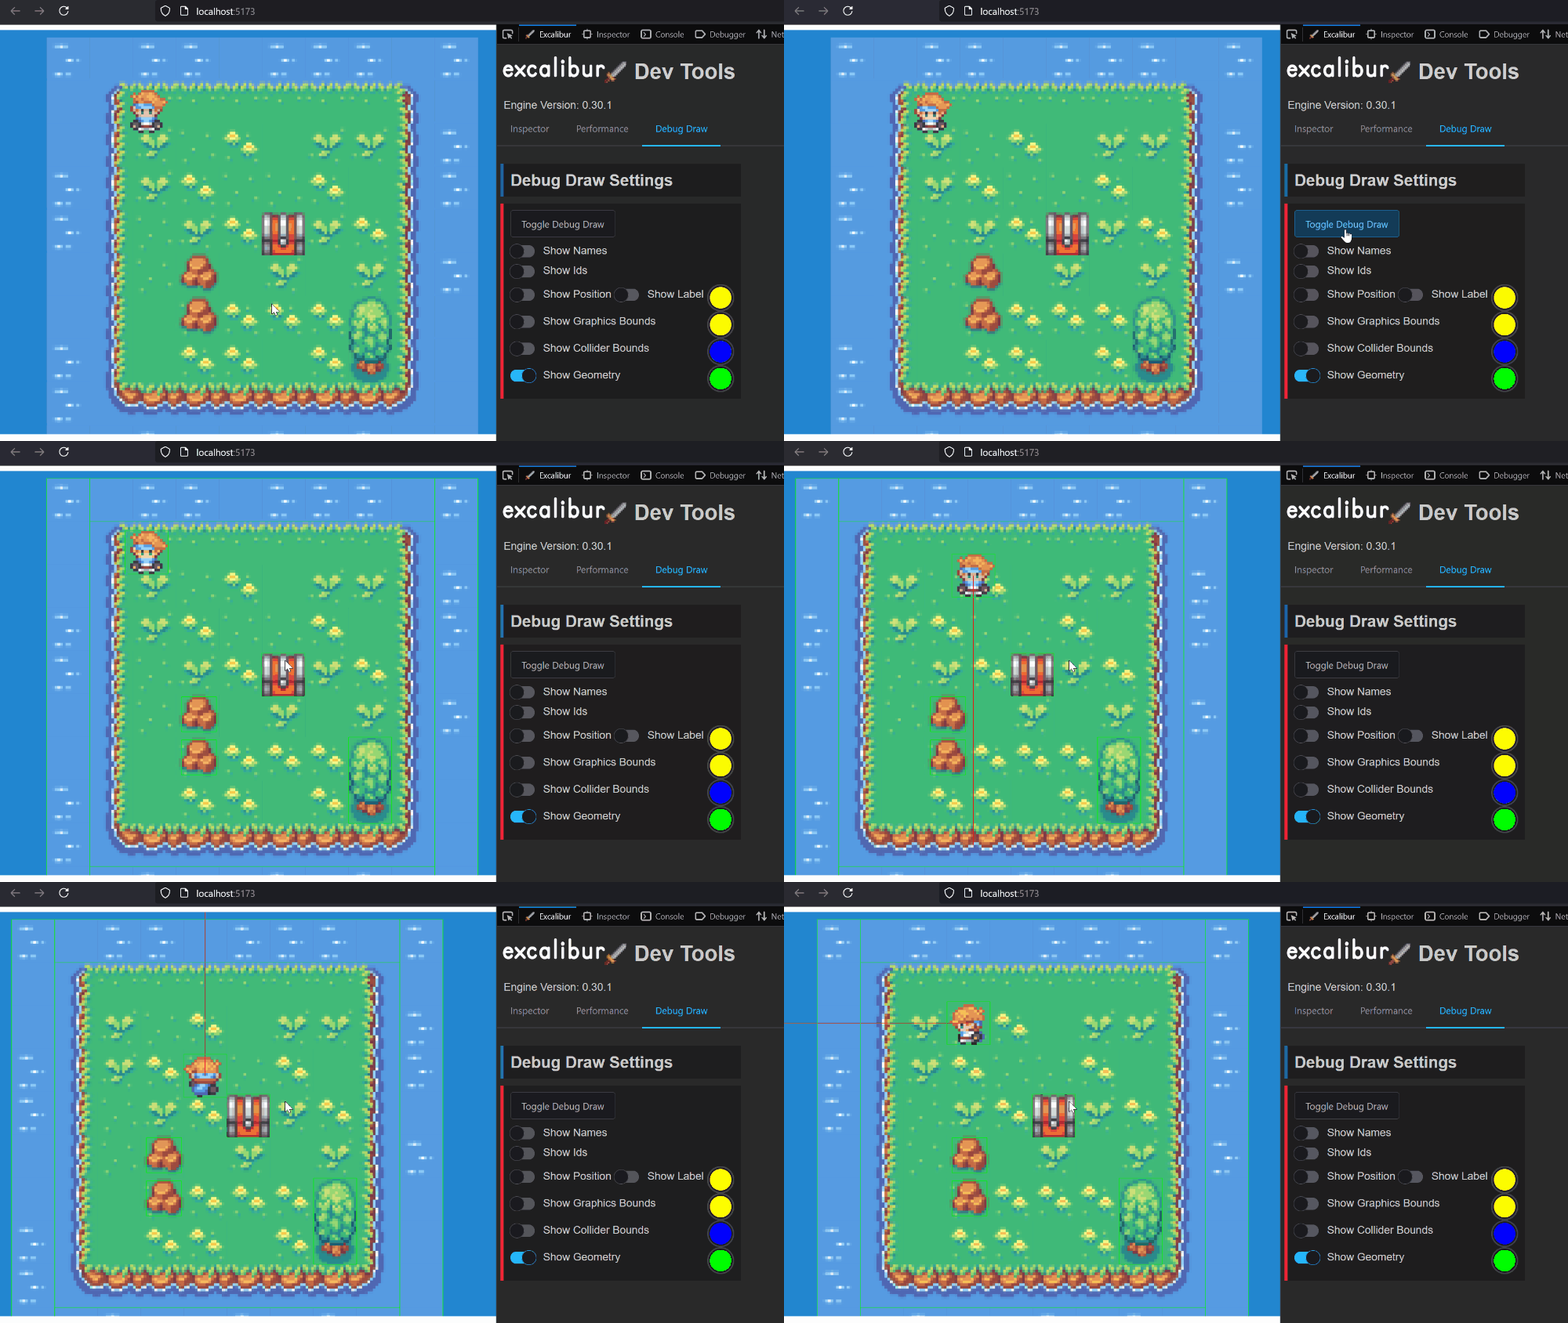
Static Debug Draw API

You can now use the ex.Debug.* API to do debug drawing without needing to know about a graphics context. These draws are only visible when the engine is in debug mode ex.Engine.isDebug.

This is great for check your points, rays, lines, etc. are where you expect them to be!

Another great feature idea from Matt Jennings.

typescript
onPreUpdate(engine: ex.Engine, elapsedMs: number): void {
this.vel = ex.Vector.Zero;
this.graphics.use('down-idle');
if (engine.input.keyboard.isHeld(ex.Keys.ArrowRight)) { ... }
if (engine.input.keyboard.isHeld(ex.Keys.ArrowLeft)) { ... }
if (engine.input.keyboard.isHeld(ex.Keys.ArrowUp)) { ... }
if (engine.input.keyboard.isHeld(ex.Keys.ArrowDown)) { ... }
ex.Debug.drawRay(new ex.Ray(this.pos, this.vel), { distance: 100, color: ex.Color.Red });
}

static debug draw api

New Samples

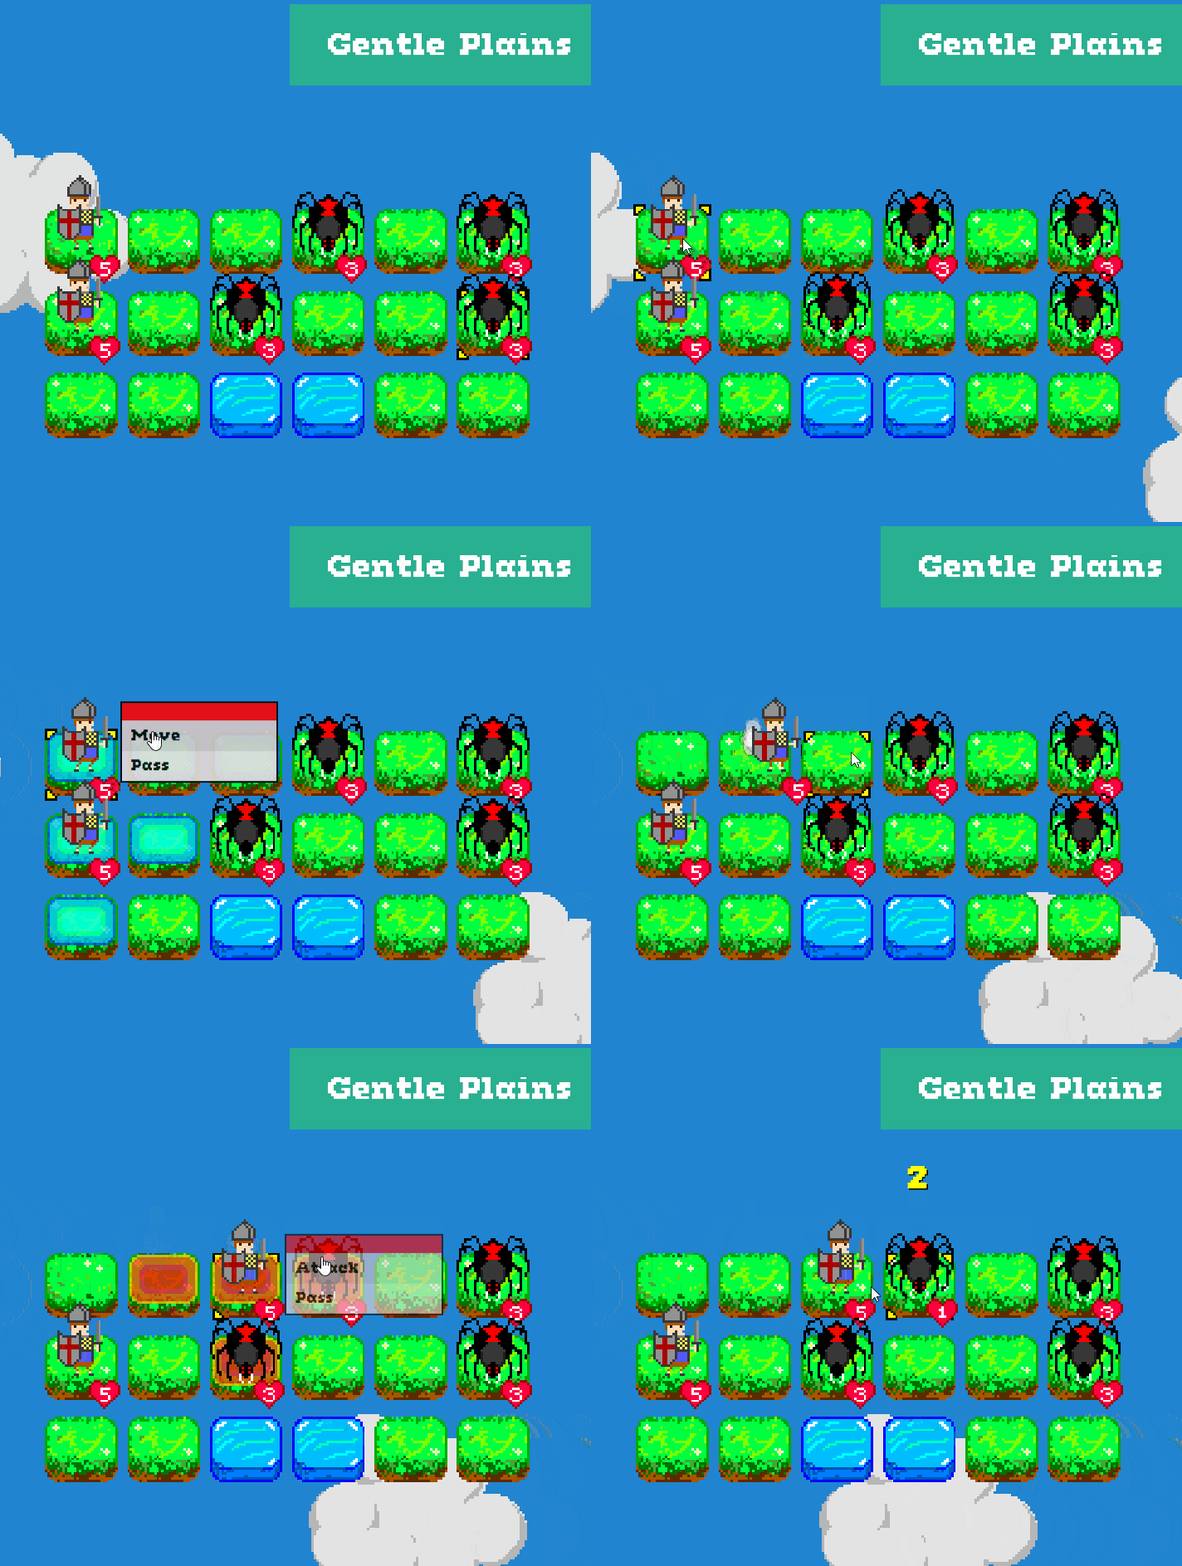
Tiny Tactics

High fidelity example of a tactics game, with multiple levels, AI, and pathfinding!

https://github.com/excaliburjs/sample-tactics

tiny tactics gameplay

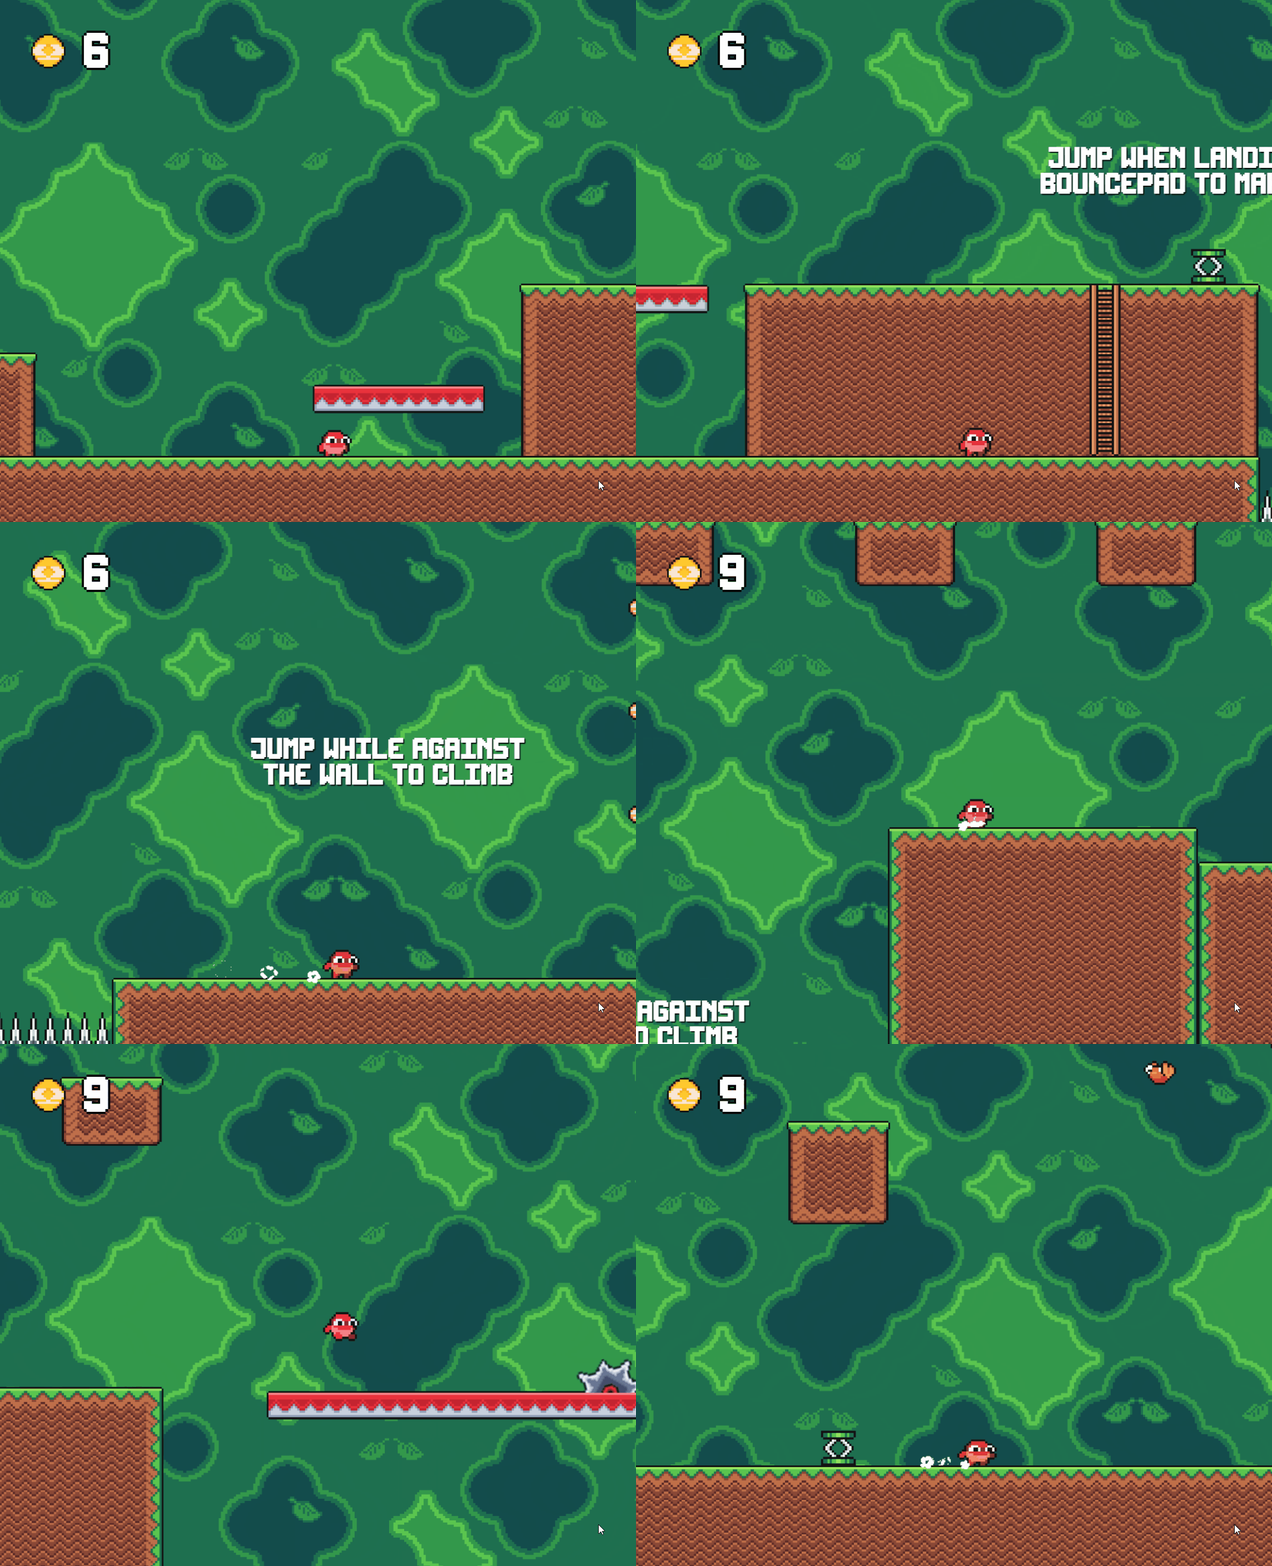
Jelly Jumper

High fidelity sample of a platforming game with jump physics inspired by Super Mario World!

https://github.com/excaliburjs/sample-jelly-jumper

jelly jumper gameplay

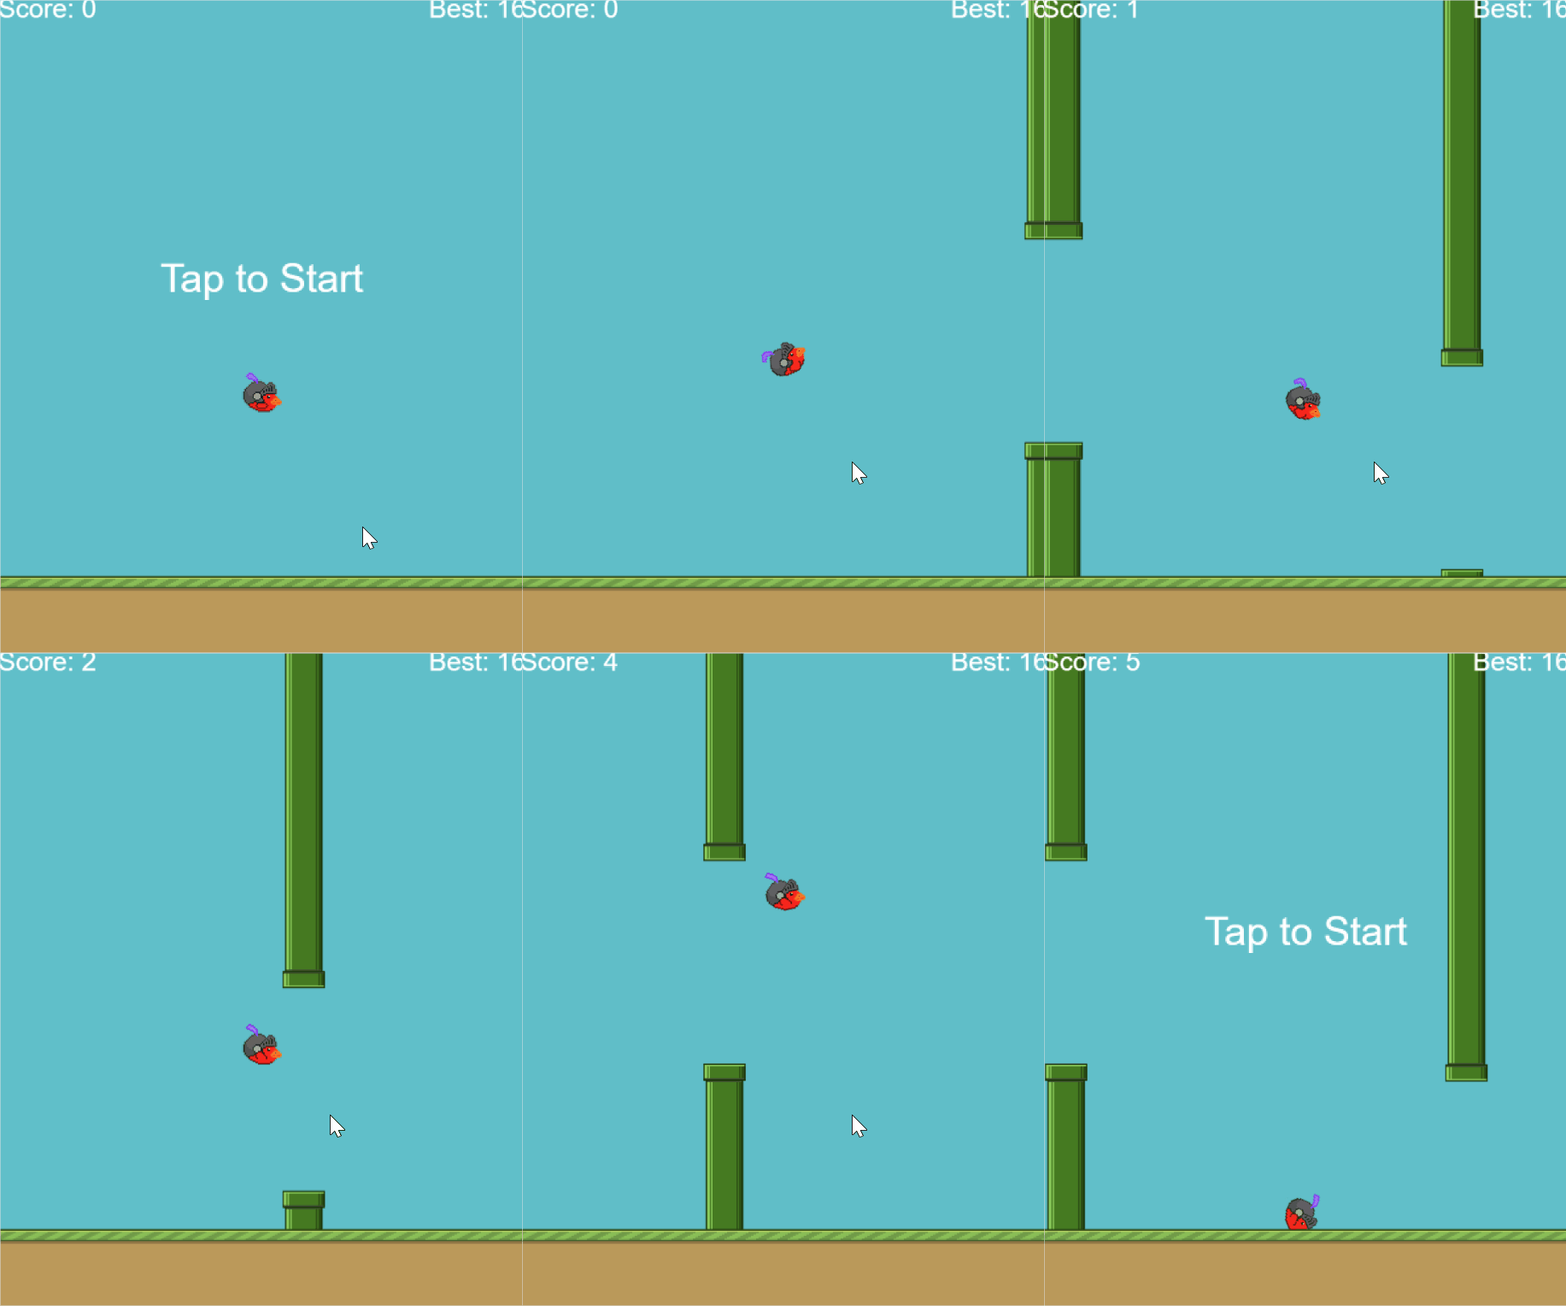
Excalibird

This is a sample clone of the popular mobile game flappy bird.

https://github.com/excaliburjs/sample-excalibird/

excalibird gameplay

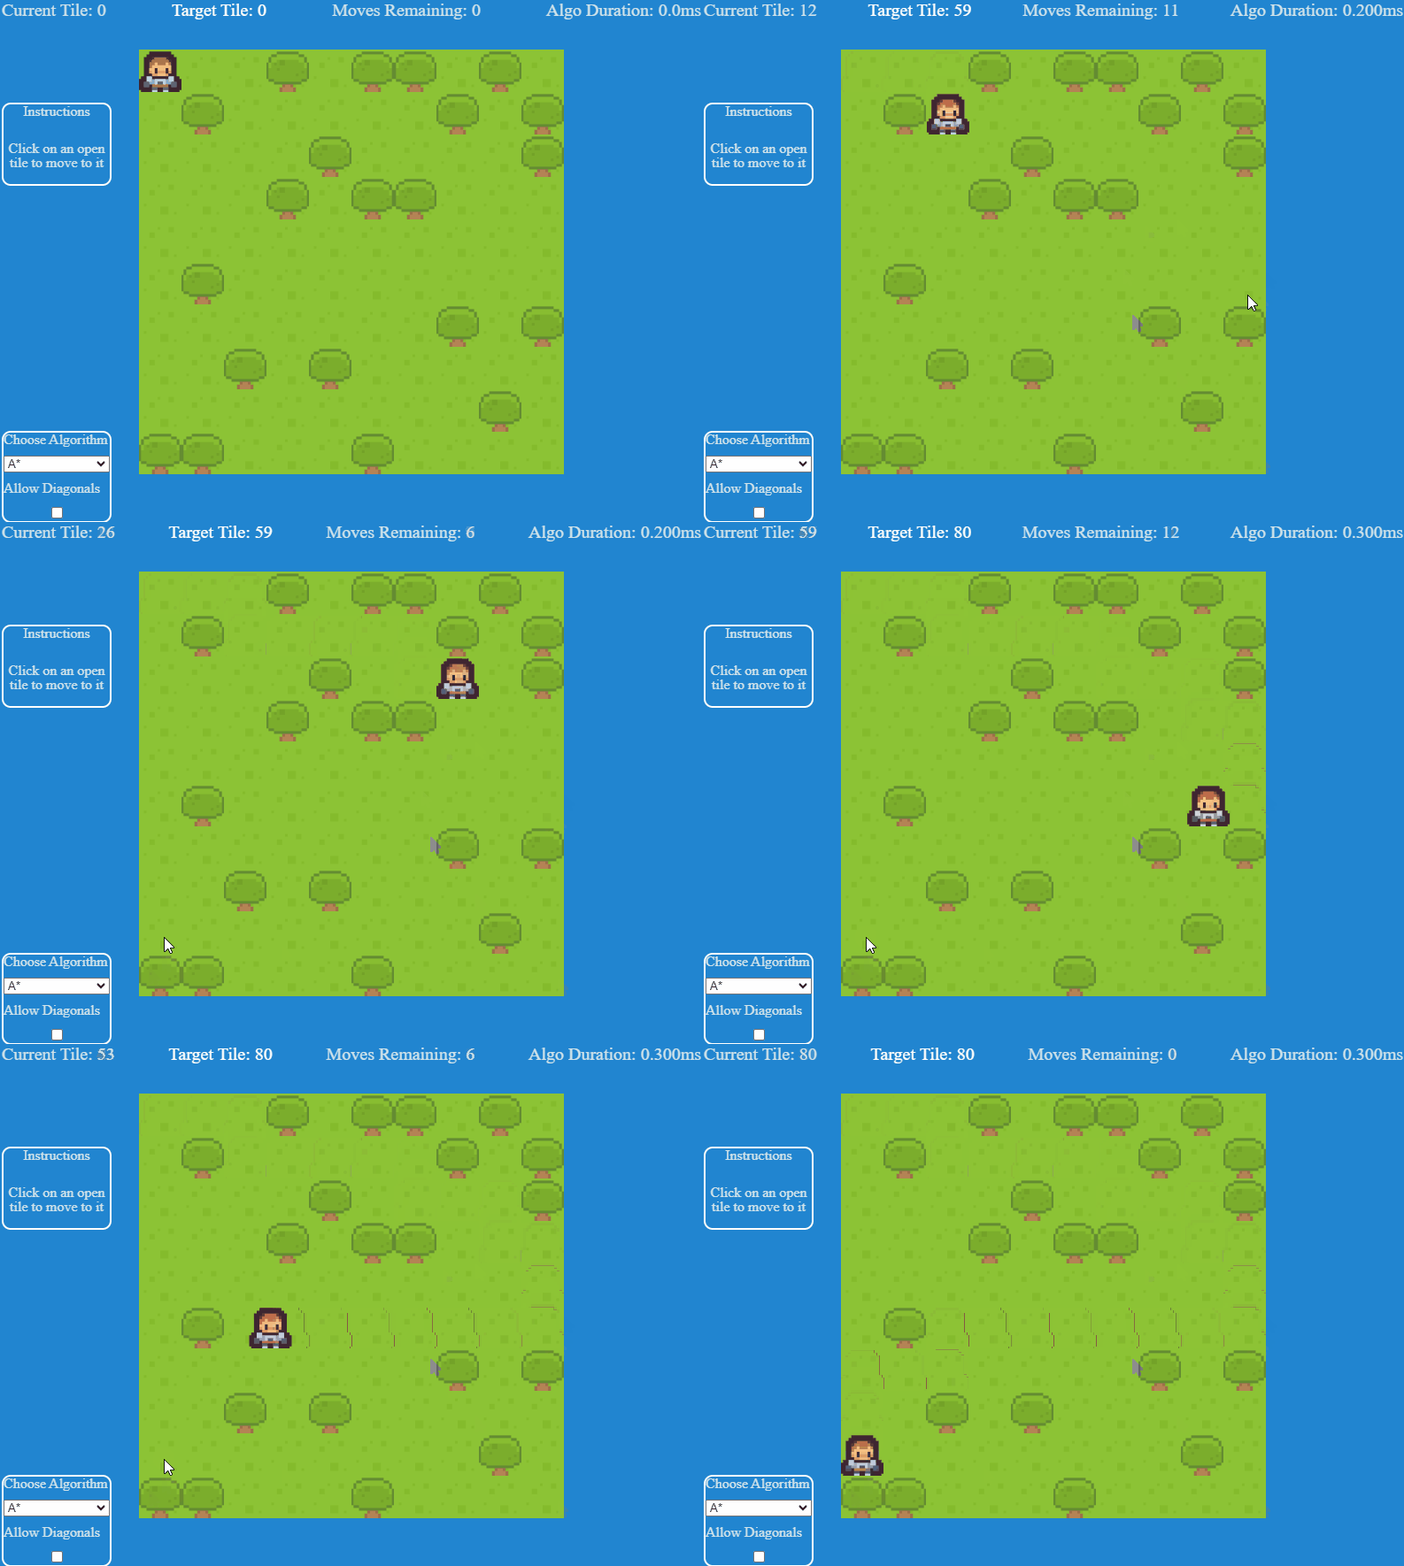
Path finding

Sample using the pathfinding plugin with A* and Dijkstra!

https://github.com/excaliburjs/sample-pathfinding

pathfinding exmaple

UI With HTML/CSS/JS

Example of how to build vanilla html/css/js UIs with Excalibur code. The main gist is to put an HTML layer above the canvas layer and use that for UI.

https://github.com/excaliburjs/sample-html

html example

JSFXR

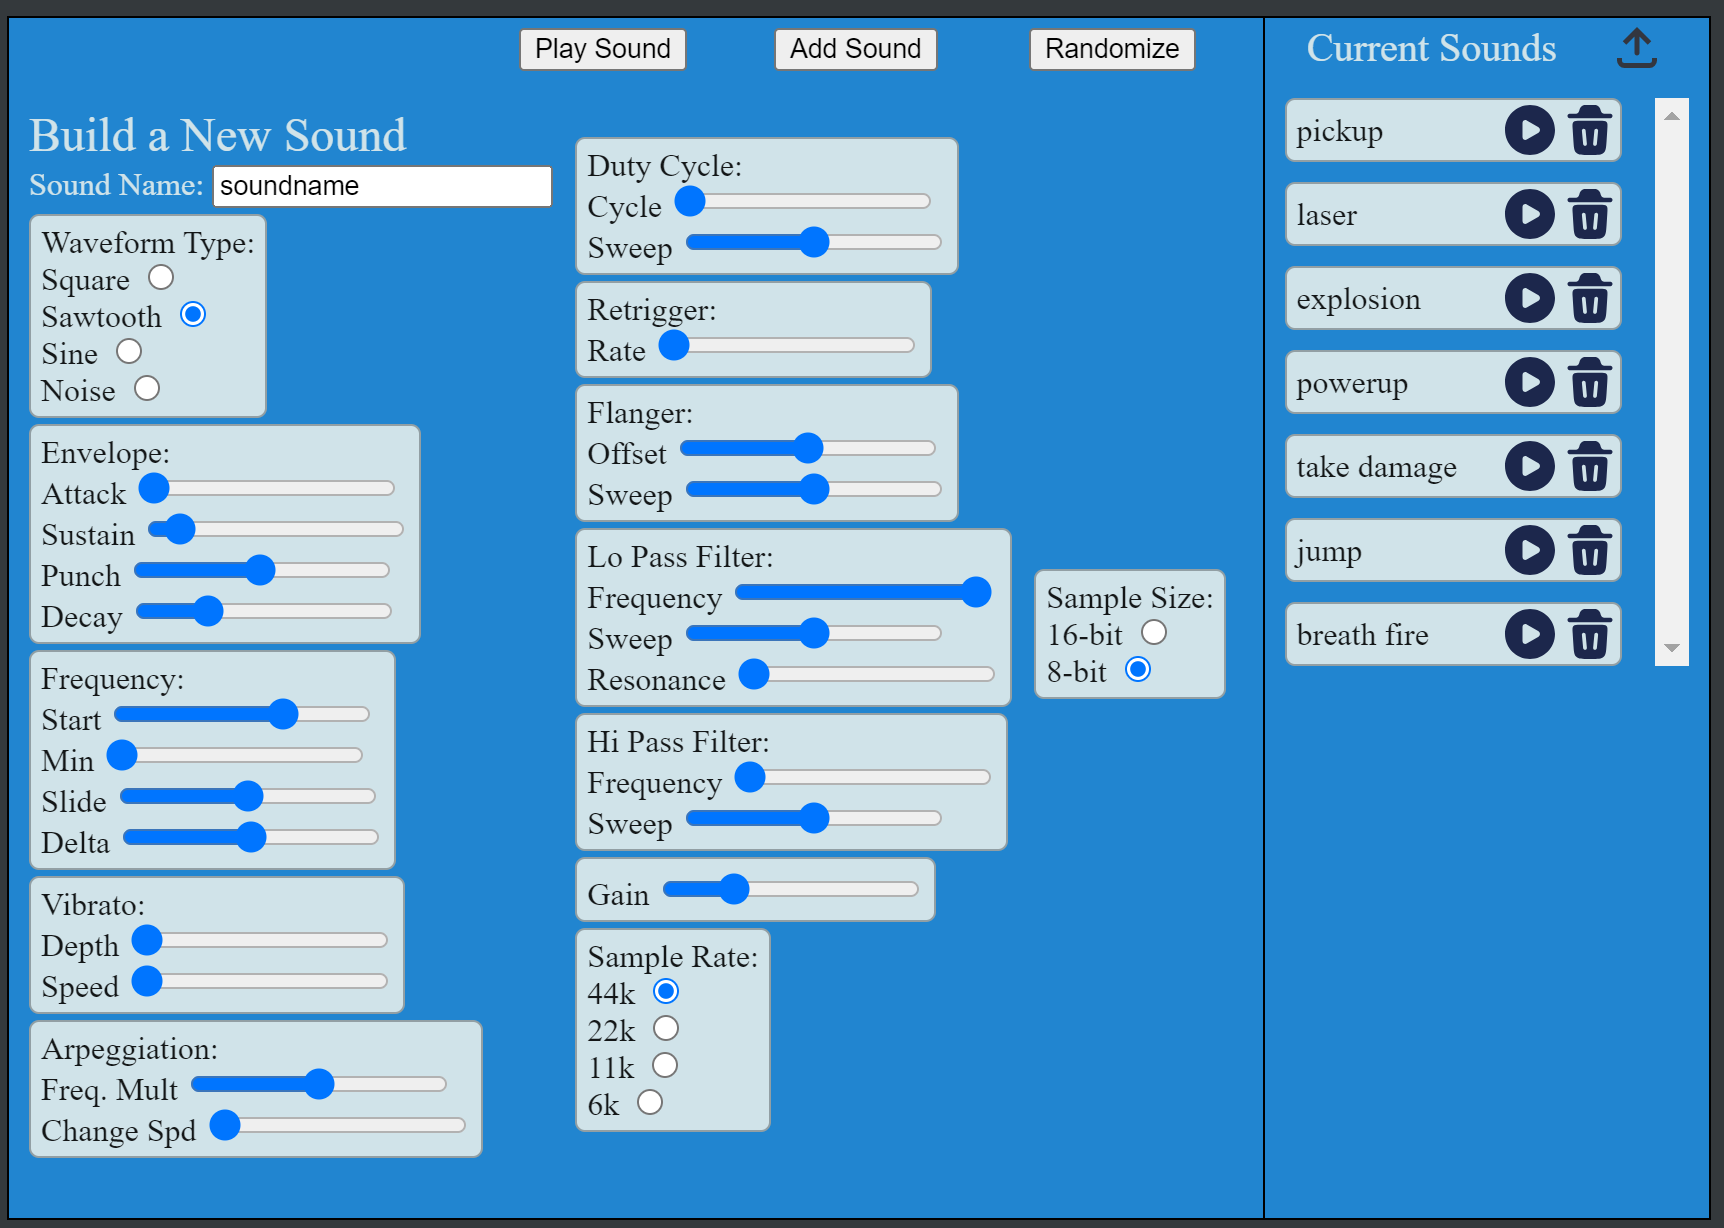
This is a quick demo project that uses the Excalibur-JSFXR Plugin to Create, Store, and Play generated sound effects!

https://github.com/excaliburjs/sample-jsfxr

jsfxr UI

New Templates

Check out our new Tauri v2 and Capacitor.js templates for building Mobile and Desktop games!

Tauri comes with a nifty Rust backend, so if that's your jam, this might be the thing to use to go to all the app stores.

Capacitor.js is the spiritual successor of Cordova and provides a number of cross platform plugins to build for iOS and Android apps at the same time.

Performance, Performance, Performance

This release really had a strong focus on improving performance across the board in Excalibur. Community member Autsider was a BIG BIG help in this area.

  • New Image Renderer that has 2x performance of draws
  • New "Sparse Hash Grid" Collision Spatial Data Structure that improves collision performance
  • Code optimizations to remove allocations in the hot loop where possible
    • Reduces javascript GC pauses
    • Improves general speed of the engine
  • ECS optimizations the speed up Entity queries

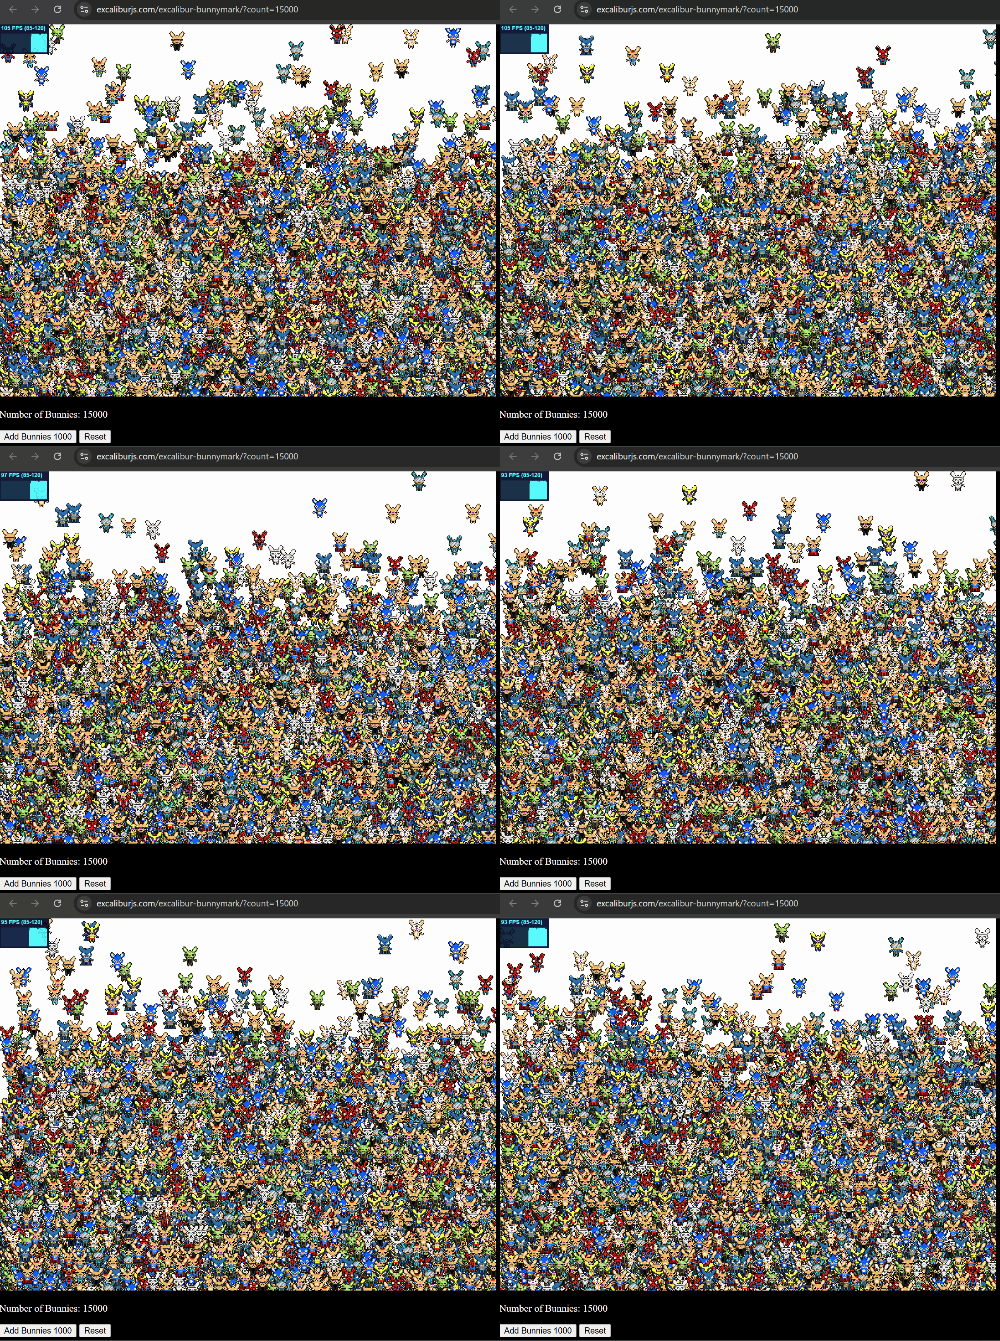
We also have a new Excalibur Bunnymark that stresses the renderer, I can get to 100k at 30fps on my Surface Pro Laptop!

bunnymark

New Features

This release is JAM PACKED full of new cool stuff, and a lot of it was directly designed by community discussions on the discord!

Check out the full release notes for all the changes

ImageSource from SVG and Canvas

You can now source images from SVG literal strings, SVG files, and HTML Canvas elements! This increases the flexibility of images that you can use to make your games. Plus SVG and Canvas rock 🤘

typescript
const svgExternal = new ex.ImageSource('../images/arrows.svg');
const svg = (tags: TemplateStringsArray) => tags[0];
const svgImage = ex.ImageSource.fromSvgString(svg`
<svg version="1.1"
id="svg2"
xmlns:sodipodi="http://sodipodi.sourceforge.net/DTD/sodipodi-0.dtd"
xmlns:inkscape="http://www.inkscape.org/namespaces/inkscape"
sodipodi:docname="resize-full.svg" inkscape:version="0.48.4 r9939"
xmlns="http://www.w3.org/2000/svg"
width="800px" height="800px"
viewBox="0 0 1200 1200" enable-background="new 0 0 1200 1200" xml:space="preserve">
<path id="path18934" fill="#000000ff" inkscape:connector-curvature="0" d="M670.312,0l177.246,177.295L606.348,418.506l175.146,175.146
l241.211-241.211L1200,529.688V0H670.312z M418.506,606.348L177.295,847.559L0,670.312V1200h529.688l-177.246-177.295
l241.211-241.211L418.506,606.348z"/>
</svg>
`);
const myCanvas = document.createElement('canvas')!;
myCanvas.width = 100;
myCanvas.height = 100;
const ctx = myCanvas.getContext('2d')!;
ctx.fillStyle = ex.Color.Black.toRGBA();
ctx.fillRect(20, 20, 50, 50);
const canvasImage = ex.ImageSource.fromHtmlCanvasElement(myCanvas);

GPU Particles

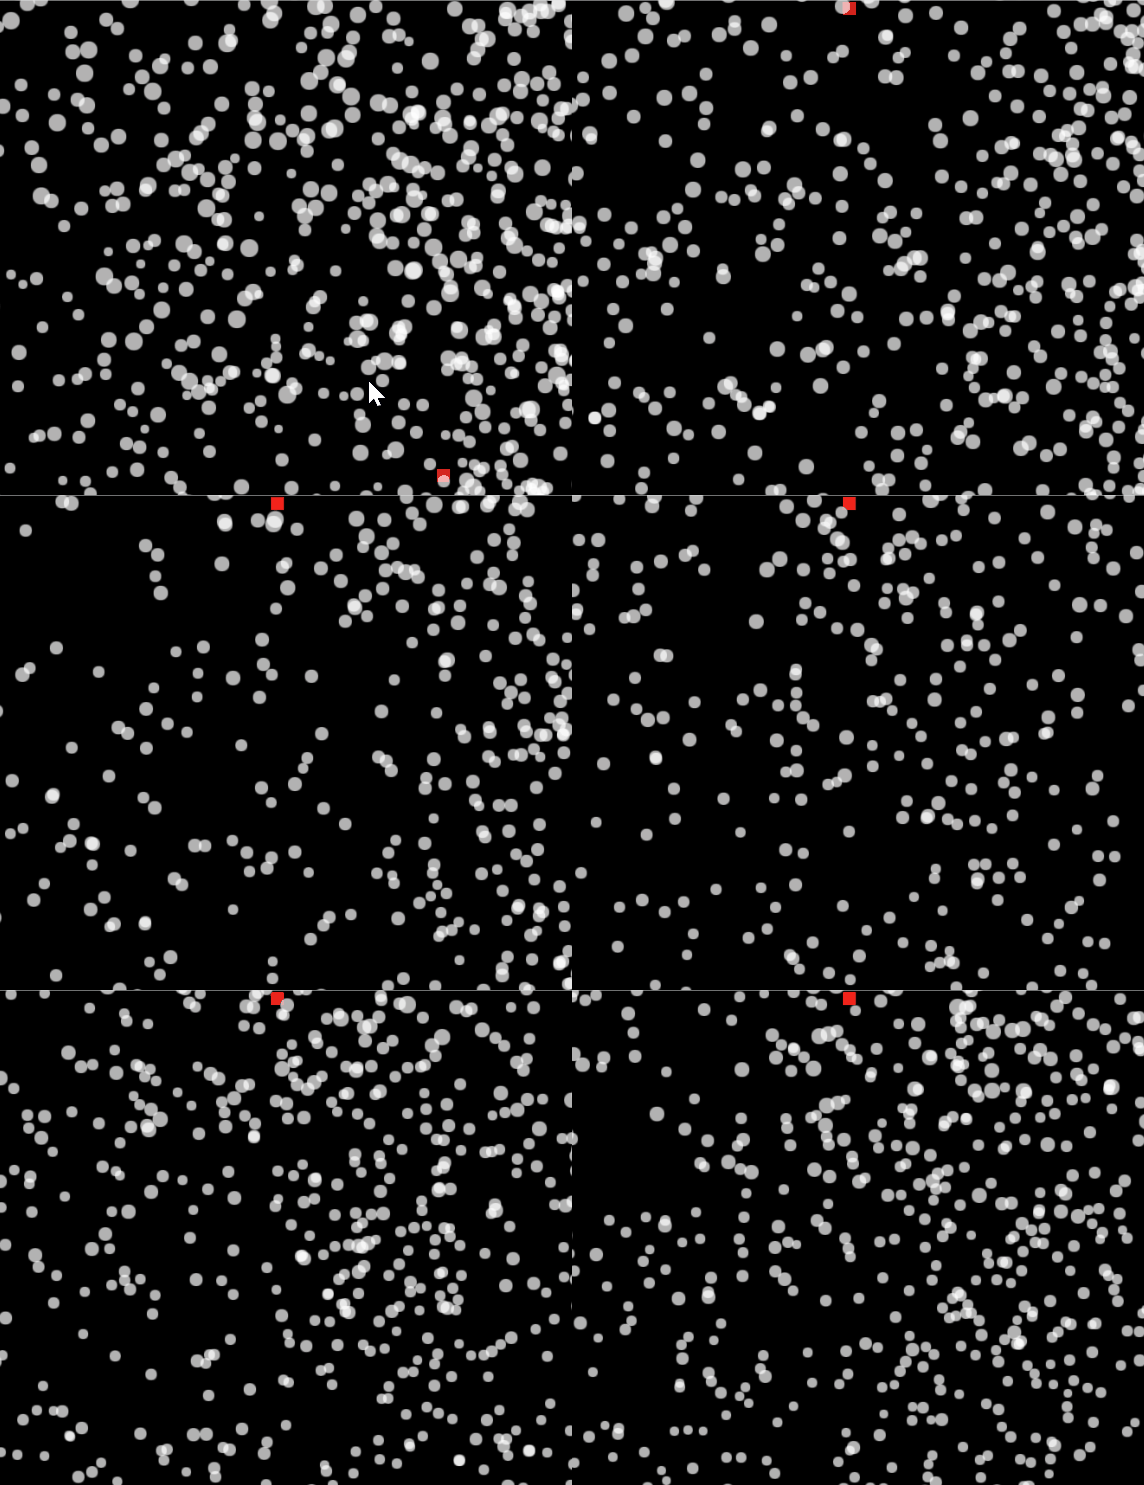
GPU particles give you the power to emit very large amounts of particles for low overhead. They have the same API as CPU particles.

typescript
var particles = new ex.GpuParticleEmitter({
pos: ex.vec(100, 0),
z: 1,
emitterType: ex.EmitterType.Circle,
maxParticles: 100_000,
particle: {
acc: ex.vec(0, 200),
minSpeed: 1,
maxSpeed: 5,
opacity: 0.7,
life: 7000,
maxSize: 5,
minSize: 5,
startSize: 15,
endSize: 1,
beginColor: ex.Color.White,
endColor: ex.Color.Transparent
},
radius: 600,
emitRate: 1000,
isEmitting: true
});

gpu particles

Slide Scene Transition

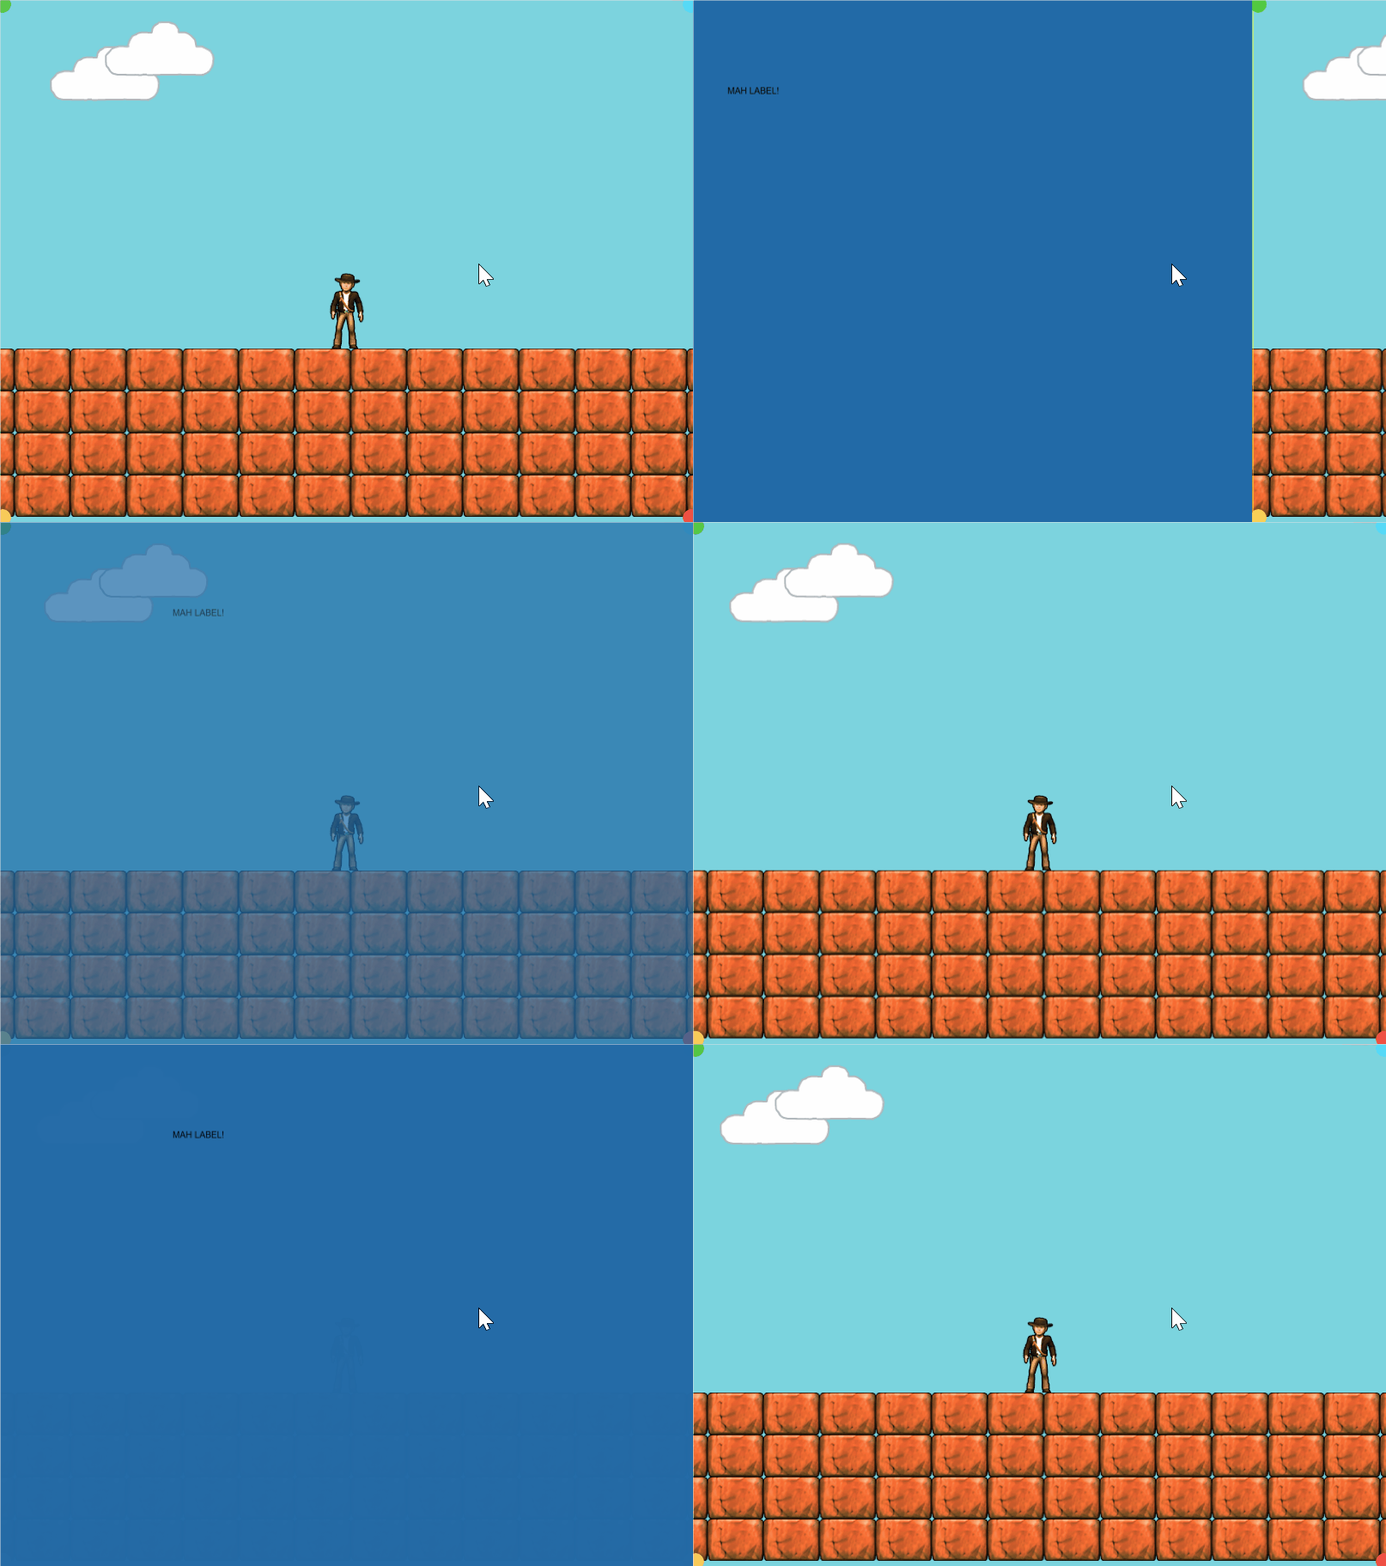
New ex.Slide scene transition, which can slide a screen shot of the current screen: up, down, left, or right. Optionally you can add an ex.EasingFunction, by default ex.EasingFunctions.Linear. Think the Legend of Zelda dungeon room transition

typescript
game.goToScene('otherScene', {
destinationIn: new ex.Slide({
duration: 1000,
easingFunction: ex.EasingFunctions.EaseInOutCubic,
slideDirection: 'up'
})
});
typescript
game.goToScene('otherScene', {
destinationIn: new ex.Slide({
duration: 1000,
easingFunction: ex.EasingFunctions.EaseInOutCubic,
slideDirection: 'up'
})
});

slide transition

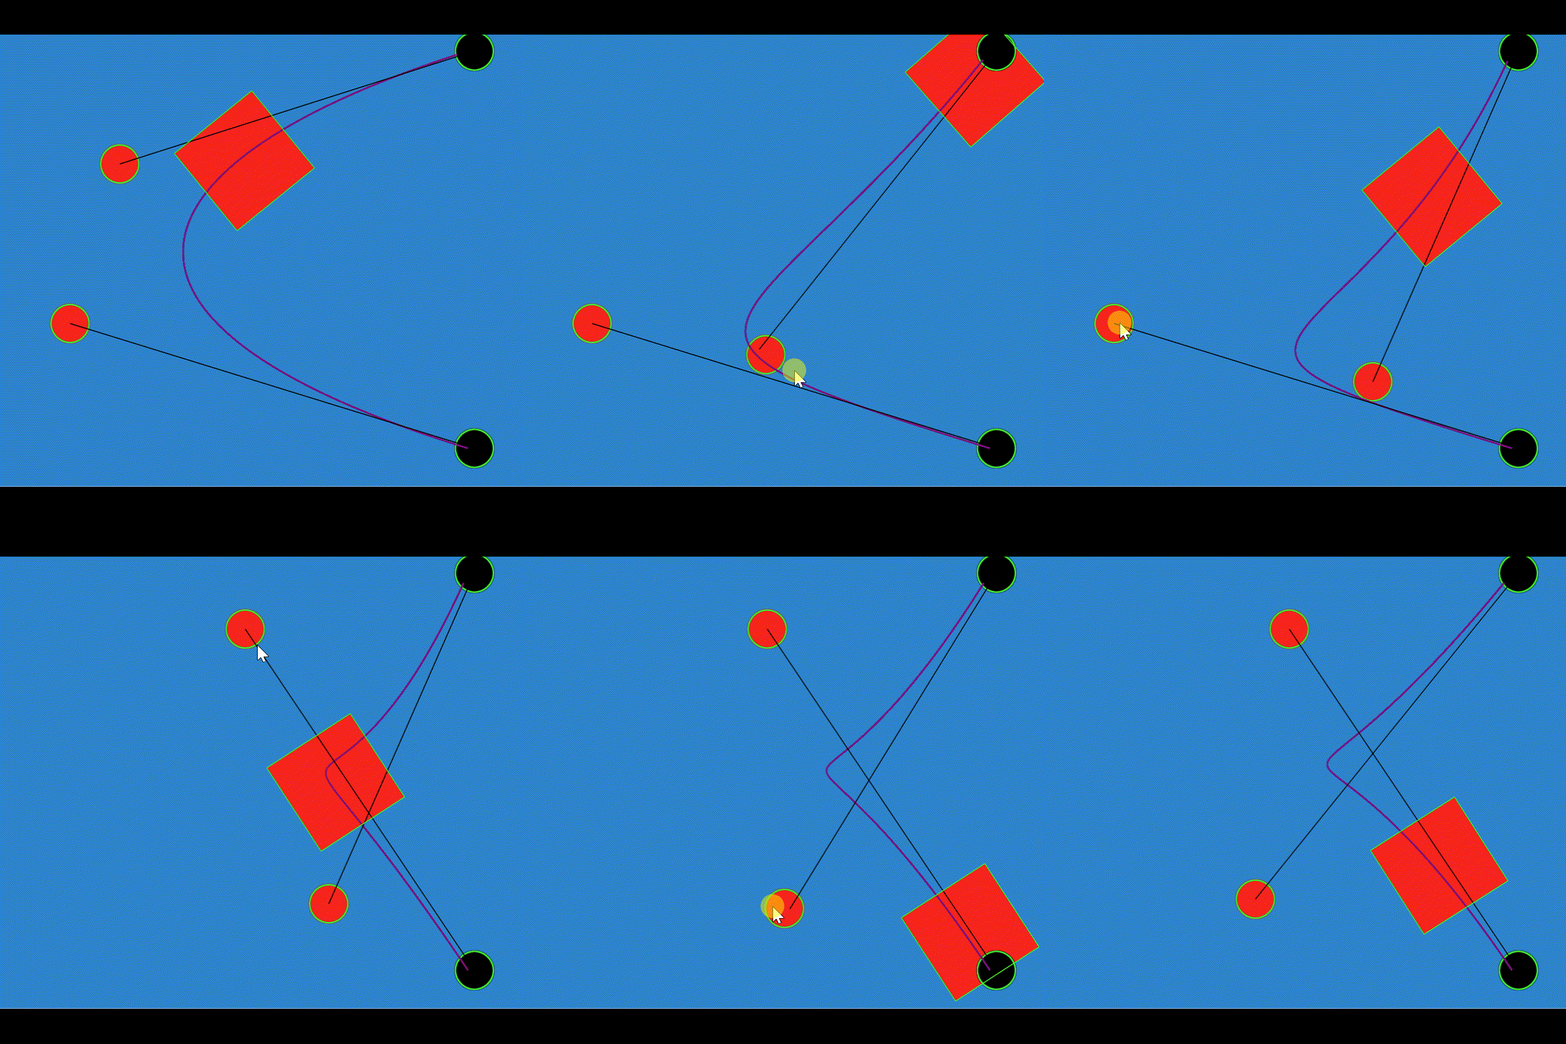
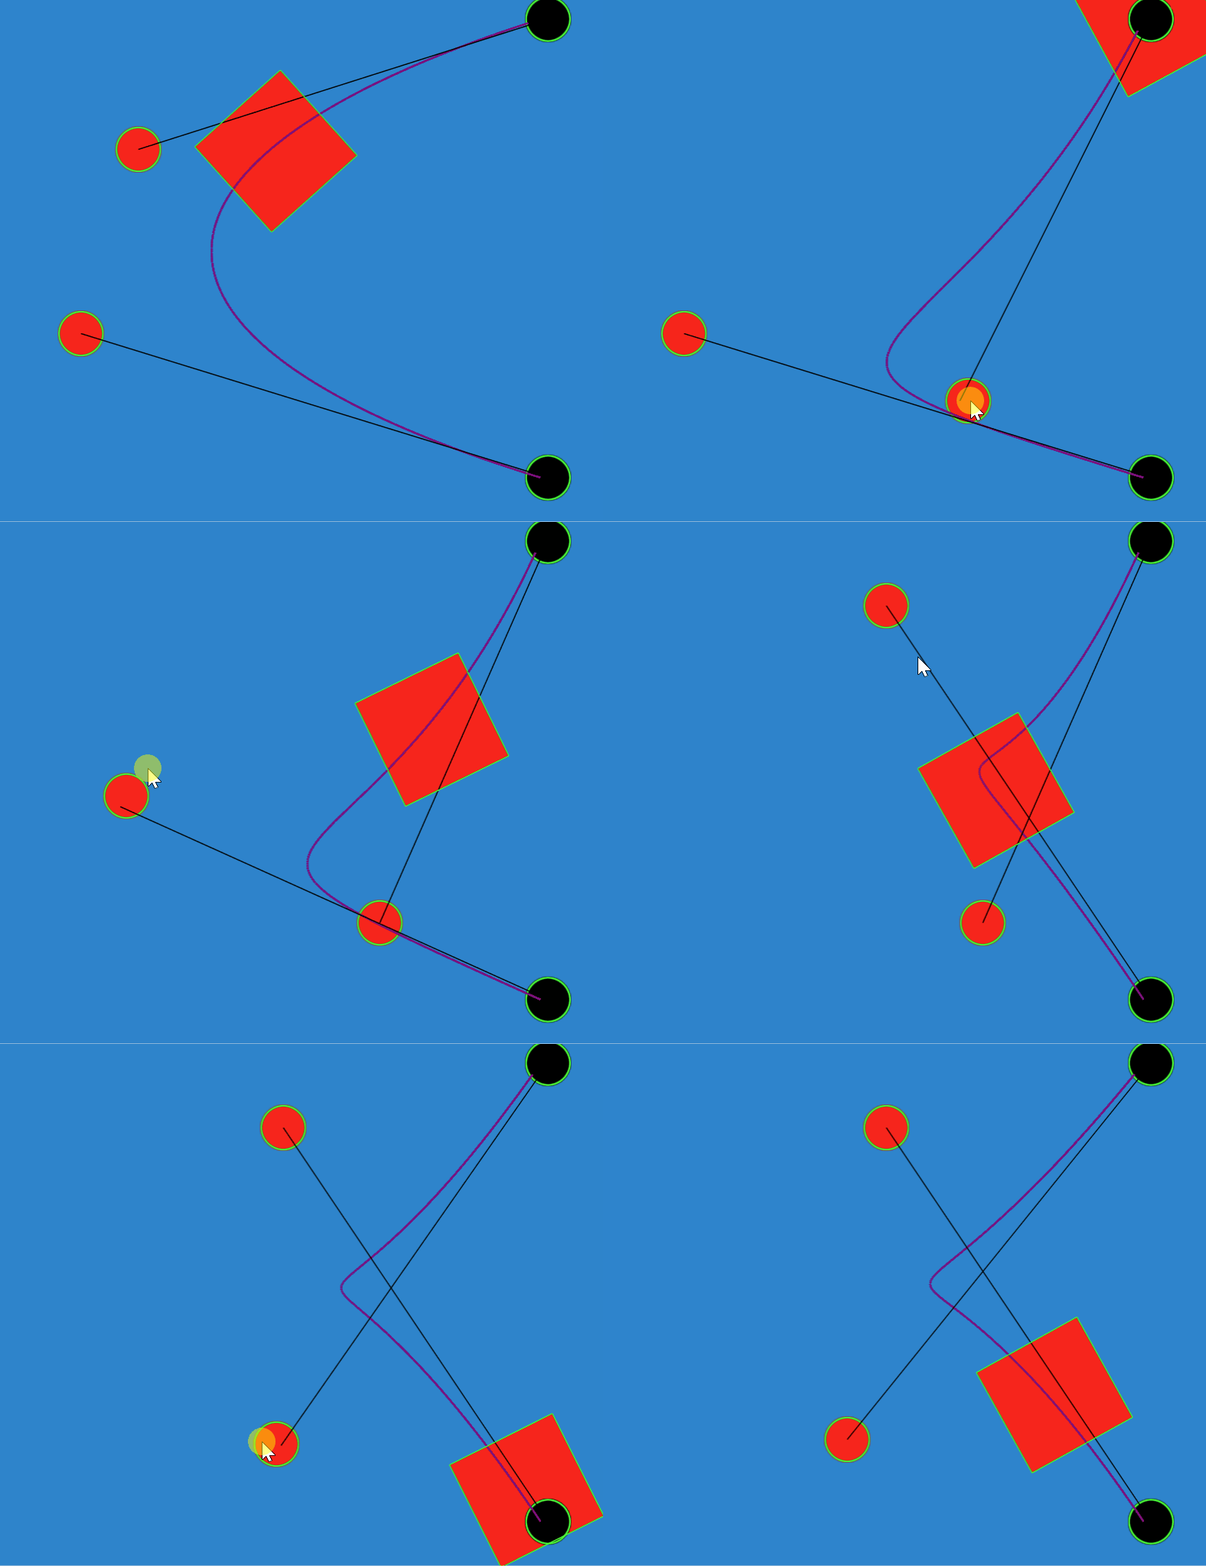
Bezier Curves & Actor.actions.curveTo/curveBy Actions

We have Bezier!!!! Long time requested and desired, we can now use bezier curves and the new curveTo and curveBy actions to move actors around.

typescript
const start1 = ex.vec(500, 500);
const dest = ex.vec(500, 100);
const cp1 = ex.vec(100, 300);
const cp2 = ex.vec(150, 800);
// Curve object for sampling points
const curve = new ex.BezierCurve({
controlPoints: [start1, cp1, cp2, dest],
quality: 10
});
var points: ex.Vector[] = [];
const drawCurve = () => {
points.length = 0;
for (let i = 0; i < 100; i++) {
points.push(curve.getPoint(i / 100));
}
};
drawCurve();
// Use the curve action to move along a curve
actor.actions.repeatForever((ctx) => {
ctx.curveTo({
controlPoints: [cp1, cp2, dest],
duration: 5000,
mode: 'uniform'
});
ctx.curveTo({
controlPoints: [cp2, cp1, start1],
duration: 5000,
mode: 'uniform'
});
});

bezier curve actions

Flash Action

We now have a convenient flash action that can be used to flash a color on your actor's graphics. This is super useful for things that take damage, or if you need to indicate something to the player.

typescript
actor.actions.flash(ex.Color.White, 1000)
typescript
actor.actions.flash(ex.Color.White, 1000)

flash action example

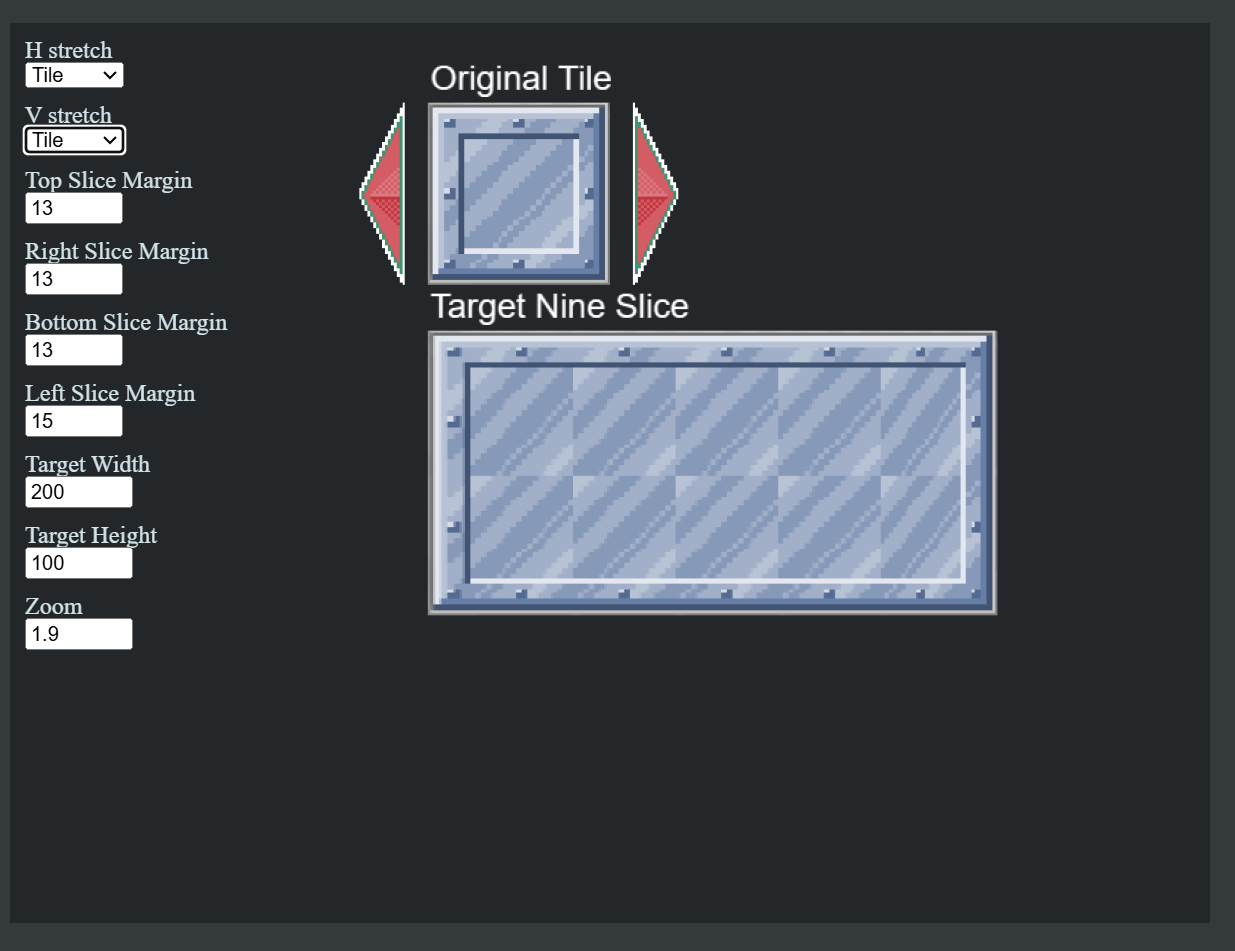
Nine-Slice Sprites

The newex.NineSlice Graphic can be for creating arbitrarily resizable rectangular regions, useful for creating UI, backgrounds, and other resizable elements.

typescript
var nineSlice = new ex.NineSlice({
width: 300,
height: 100,
source: inputTile,
sourceConfig: {
width: 64,
height: 64,
topMargin: 5,
leftMargin: 7,
bottomMargin: 5,
rightMargin: 7
},
destinationConfig: {
drawCenter: true,
horizontalStretch: ex.NineSliceStretch.Stretch,
verticalStretch: ex.NineSliceStretch.Stretch
}
});
actor.graphics.add(nineSlice);

Check out the demo

nine slice demo

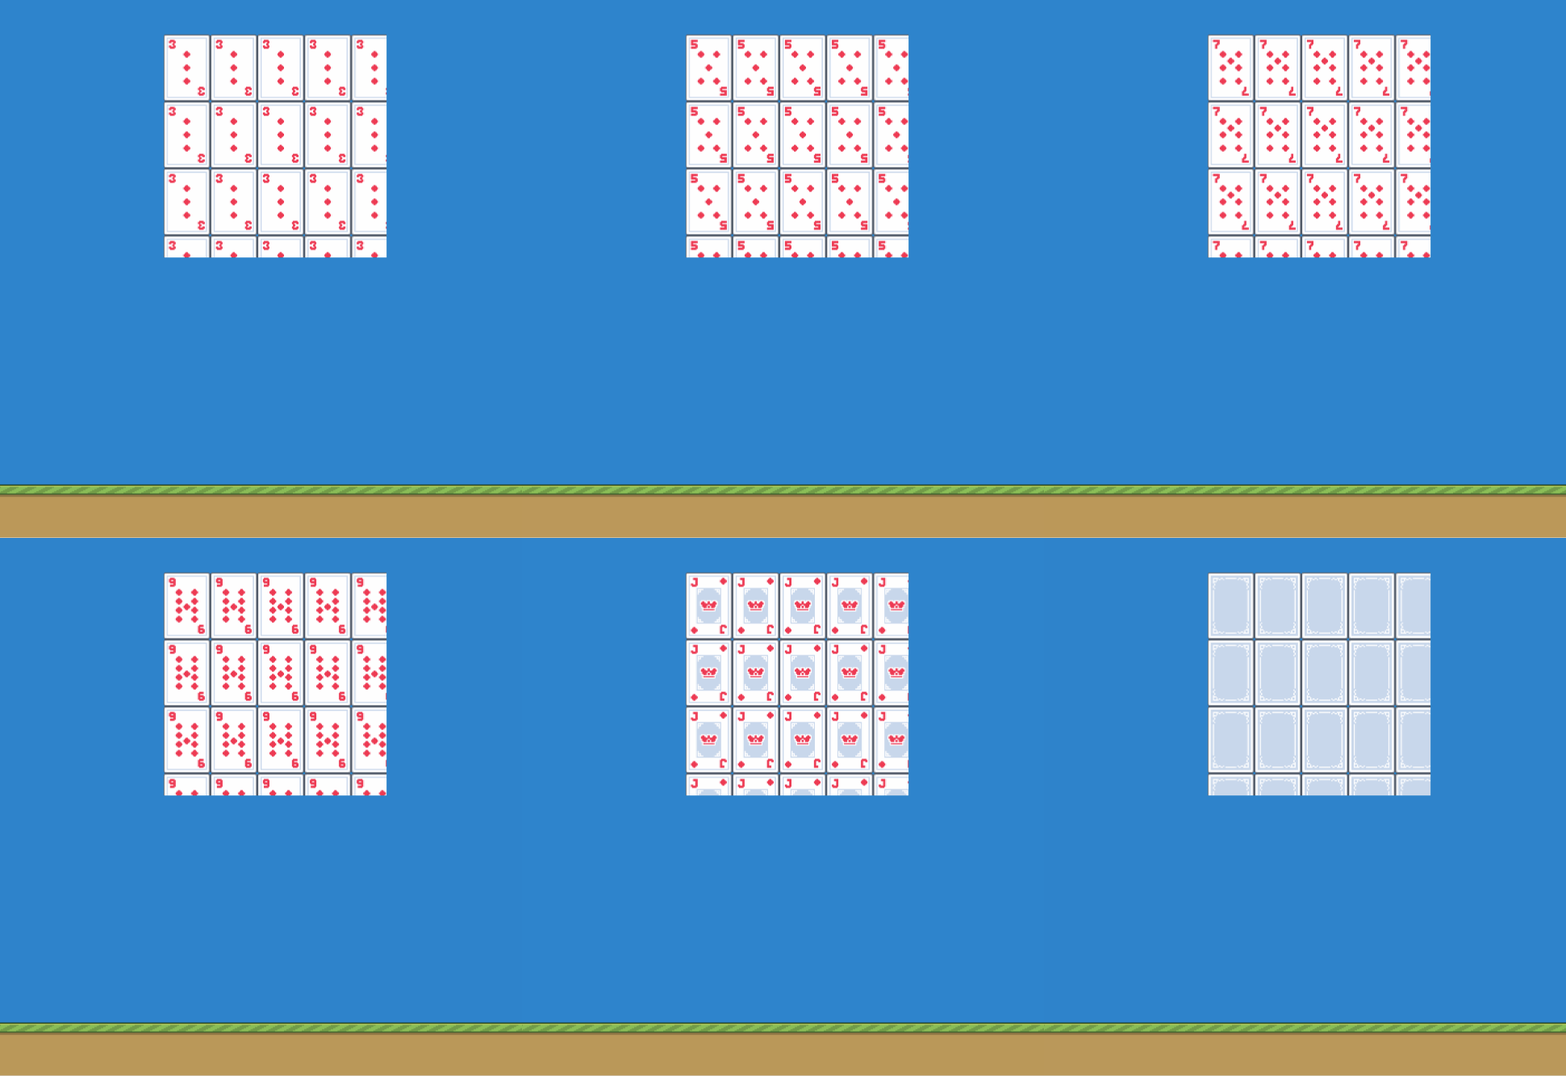
Tiling Sprites & Animations

Brand new convenience types ex.TiledSprite and ex.TiledAnimation for Tiling Sprites and Animations

typescript
const tiledGroundSprite = new ex.TiledSprite({
image: groundImage,
width: game.screen.width,
height: 200,
wrapping: {
x: ex.ImageWrapping.Repeat,
y: ex.ImageWrapping.Clamp
}
});
const tilingAnimation = new ex.TiledAnimation({
animation: cardAnimation,
sourceView: {x: 20, y: 20},
width: 200,
height: 200,
wrapping: ex.ImageWrapping.Repeat
});

tiling example

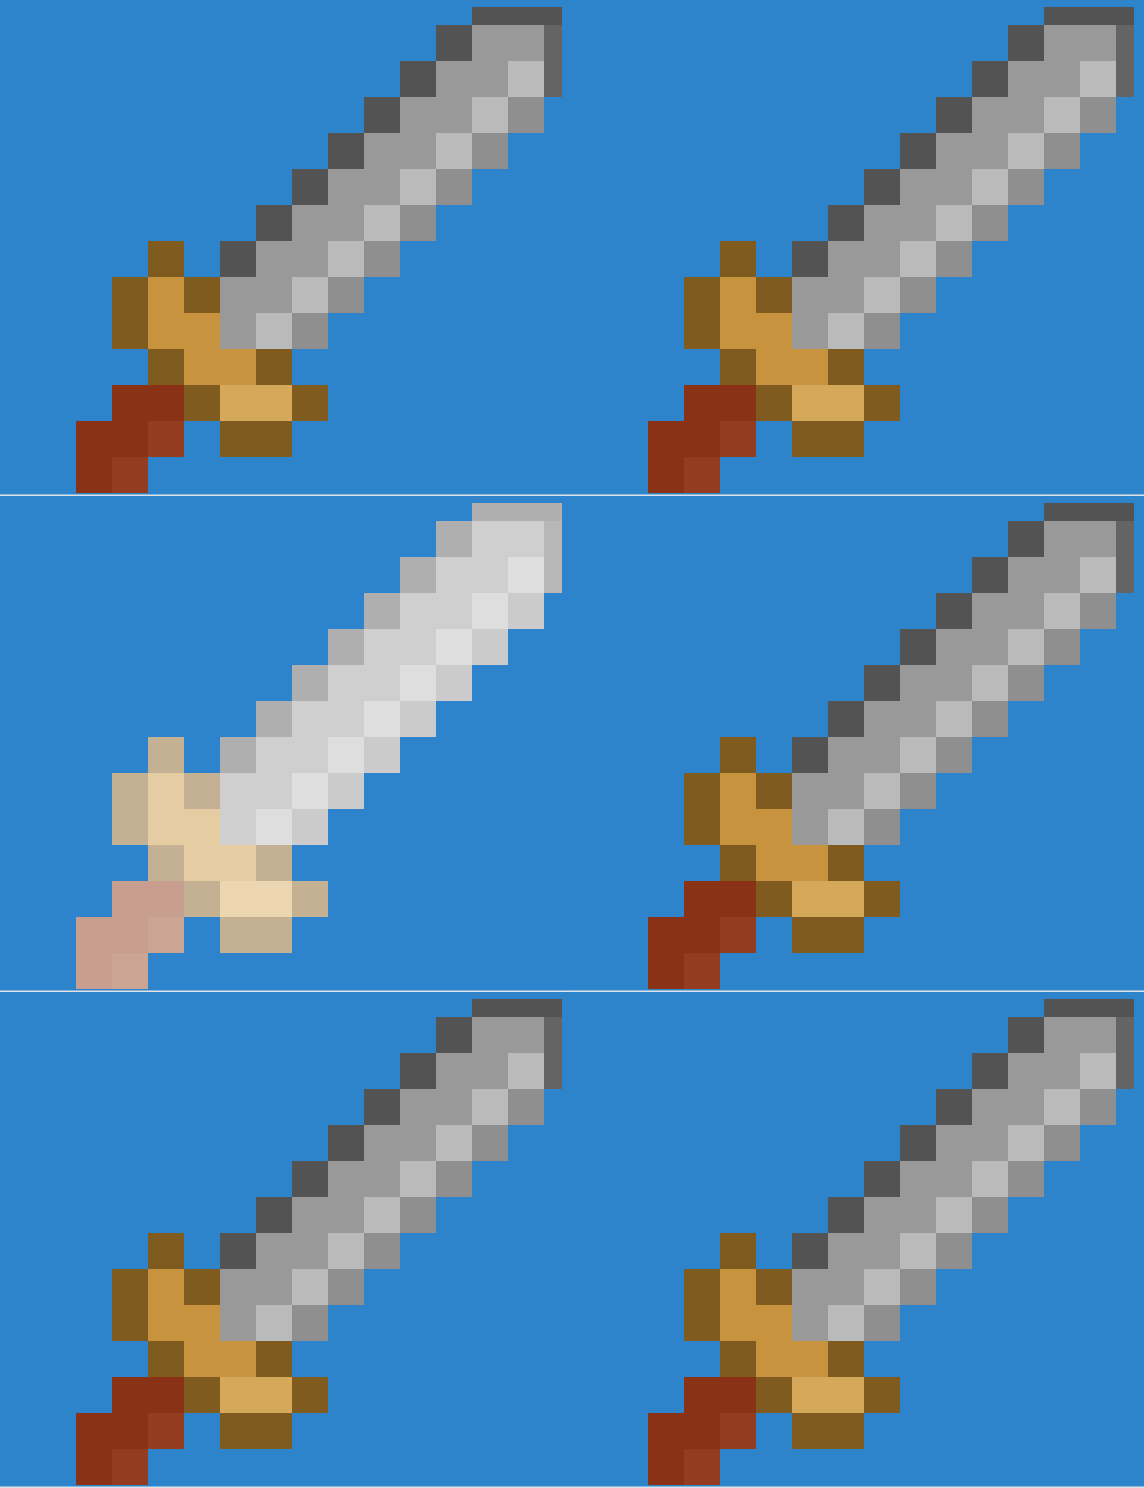
Full GIF Image Spec Support

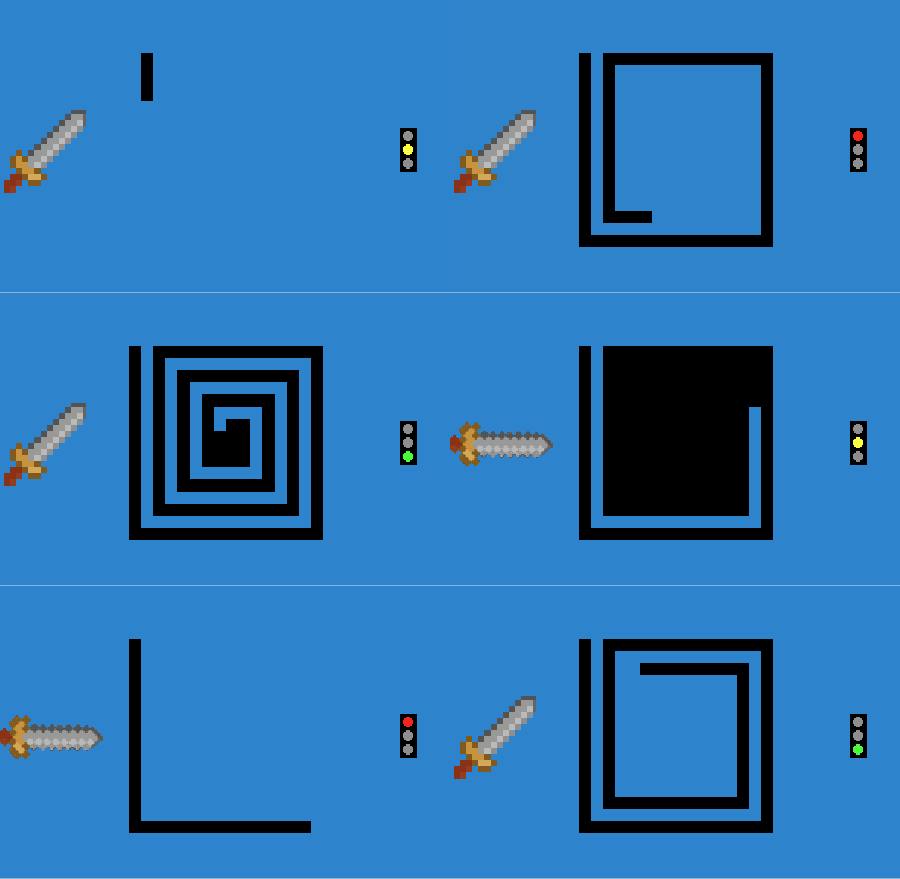
We now support the majority of the gif spec and can parse gif files as resources!

typescript
var gif: ex.Gif = new ex.Gif('./loading-screen.gif');
var gif2: ex.Gif = new ex.Gif('./sword.gif');
var gif3: ex.Gif = new ex.Gif('./stoplight.gif');
var loader = new ex.Loader([gif, gif2, gif3]);
game.start(loader).then(() => {
var stoplight = new ex.Actor({
x: game.currentScene.camera.x + 120,
y: game.currentScene.camera.y,
width: gif3.width,
height: gif3.height
});
stoplight.graphics.add(gif3.toAnimation());
game.add(stoplight);
var sword = new ex.Actor({
x: game.currentScene.camera.x - 120,
y: game.currentScene.camera.y,
width: gif2.width,
height: gif2.height
});
sword.graphics.add(gif2.toAnimation());
game.add(sword);
var loading = new ex.Actor({
x: game.currentScene.camera.x,
y: game.currentScene.camera.y,
width: gif2.width,
height: gif2.height
});
loading.graphics.add(gif.toAnimation());
game.add(loading);
});

gif parsing

GPU Garbage Collection

Excalibur now watches for textures that have not been drawn in 60 seconds and unloads them from the GPU. This is essential for the bigger games with lots of different assets over time.

Coroutine Improvements

  • Nested coroutines
  • Awaitable
  • Custom schedules
  • Stop/start/resume

Caliburn Games

The Excalibur.js contributors are offering consulting services! You can hire us to do game dev, custom dev, or support! If you're interested check out our current list of products https://caliburn.games/products/

Caliburn Games' goal is to build friendly games in TypeScript and support the Excalibur.js community and open source project.

The Glorious Future

We are really excited and optimistic about the future of Excalibur.js and we have a lot of cool plans for 2025. We are re-affirming our commitment to being an open source project, we will always be open source and will never change the license from BSD.

New Ventures

  1. Keep an eye out for Excalibur courses @ https://excaliburjs.tv, we are looking to publish a number of free and paid course options.

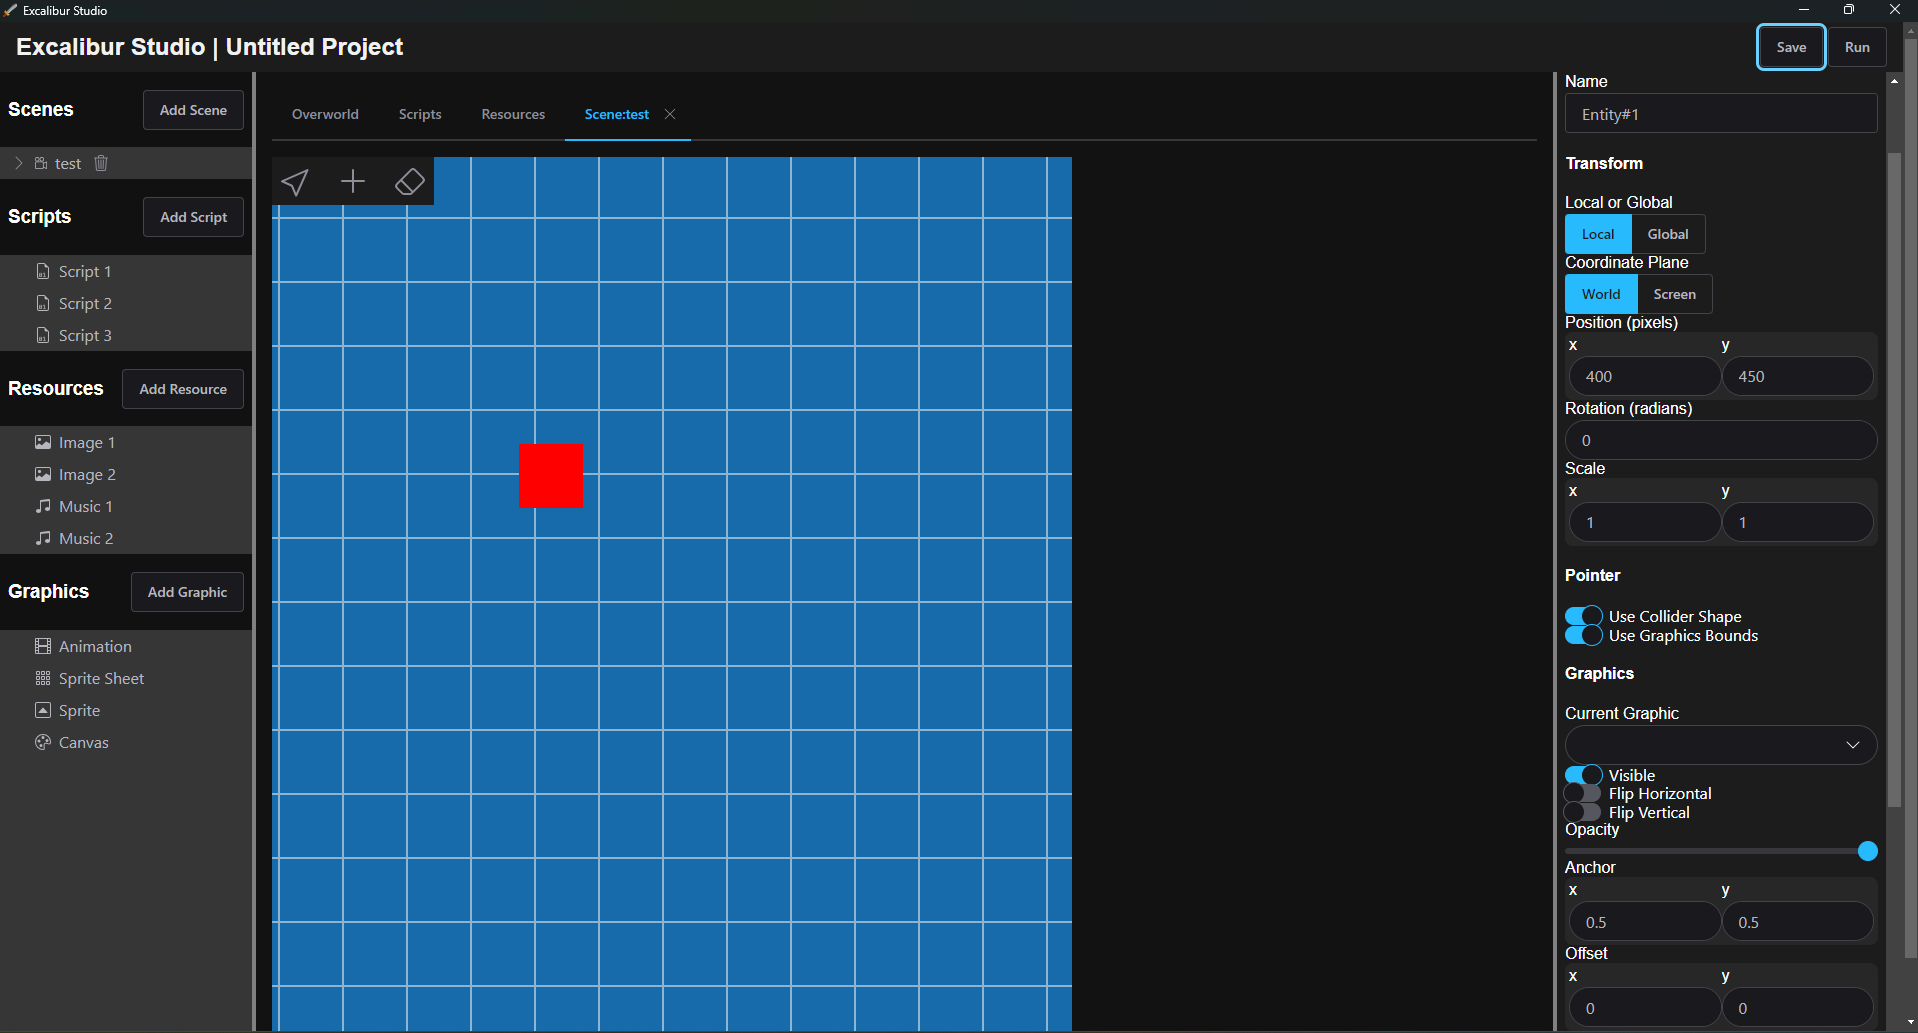
  2. We are building an OPEN SOURCE "Excalibur Studio" visual editor, this is to further our mission to bring game development to as many people as possible. The editor will be a pay what you want model, where $0 is totally acceptable. We don't want income to be a boundary for people to get into making games.

  3. Caliburn Games will be publishing games to various platforms so look out for them in 2025! Also reach out if you are interested in hiring us to help with your games!

Road Excalibur v1

Our plan is to have a release candidate for v1 in early 2025, the core engine is reaching a point where we are really happy with it. Not much will change in the API from v0.30.0 to v1.0.0.

A lot of folks have asked about WebGPU, we are going to wait on a renderer implementation until the standardization of the API to stabilize and for WebGPU implementations to be on by default in browsers.

Next on the plan:

  • More performance!
  • Physics enhancements! Ropes! Inverse Kinematics!
  • Headless Excalibur on the server
  • Input mapping and A11y improvements
  • 2D Lighting support

THANK YOU

We've been working on Excalibur.js for over a decade and it's been a lot of fun

EXCALIBUR!!!

Cal swinging a sword

GIF of Cal courtesy of discord user hintoflime

Excalibur v0.25.2 Released!

· 6 min read
Erik Onarheim
Maintainer of Excalibur

After the winter break, the team has released [email protected] with a lot of improvements to the core engine and plugins! Check the roadmap for our current plans.

Check out the new version on npm!

> npm install [email protected]

"Winter holiday, when developers work on their side projects" - Anonymous Coworker

Dev tools

> npm install @excaliburjs/dev-tools

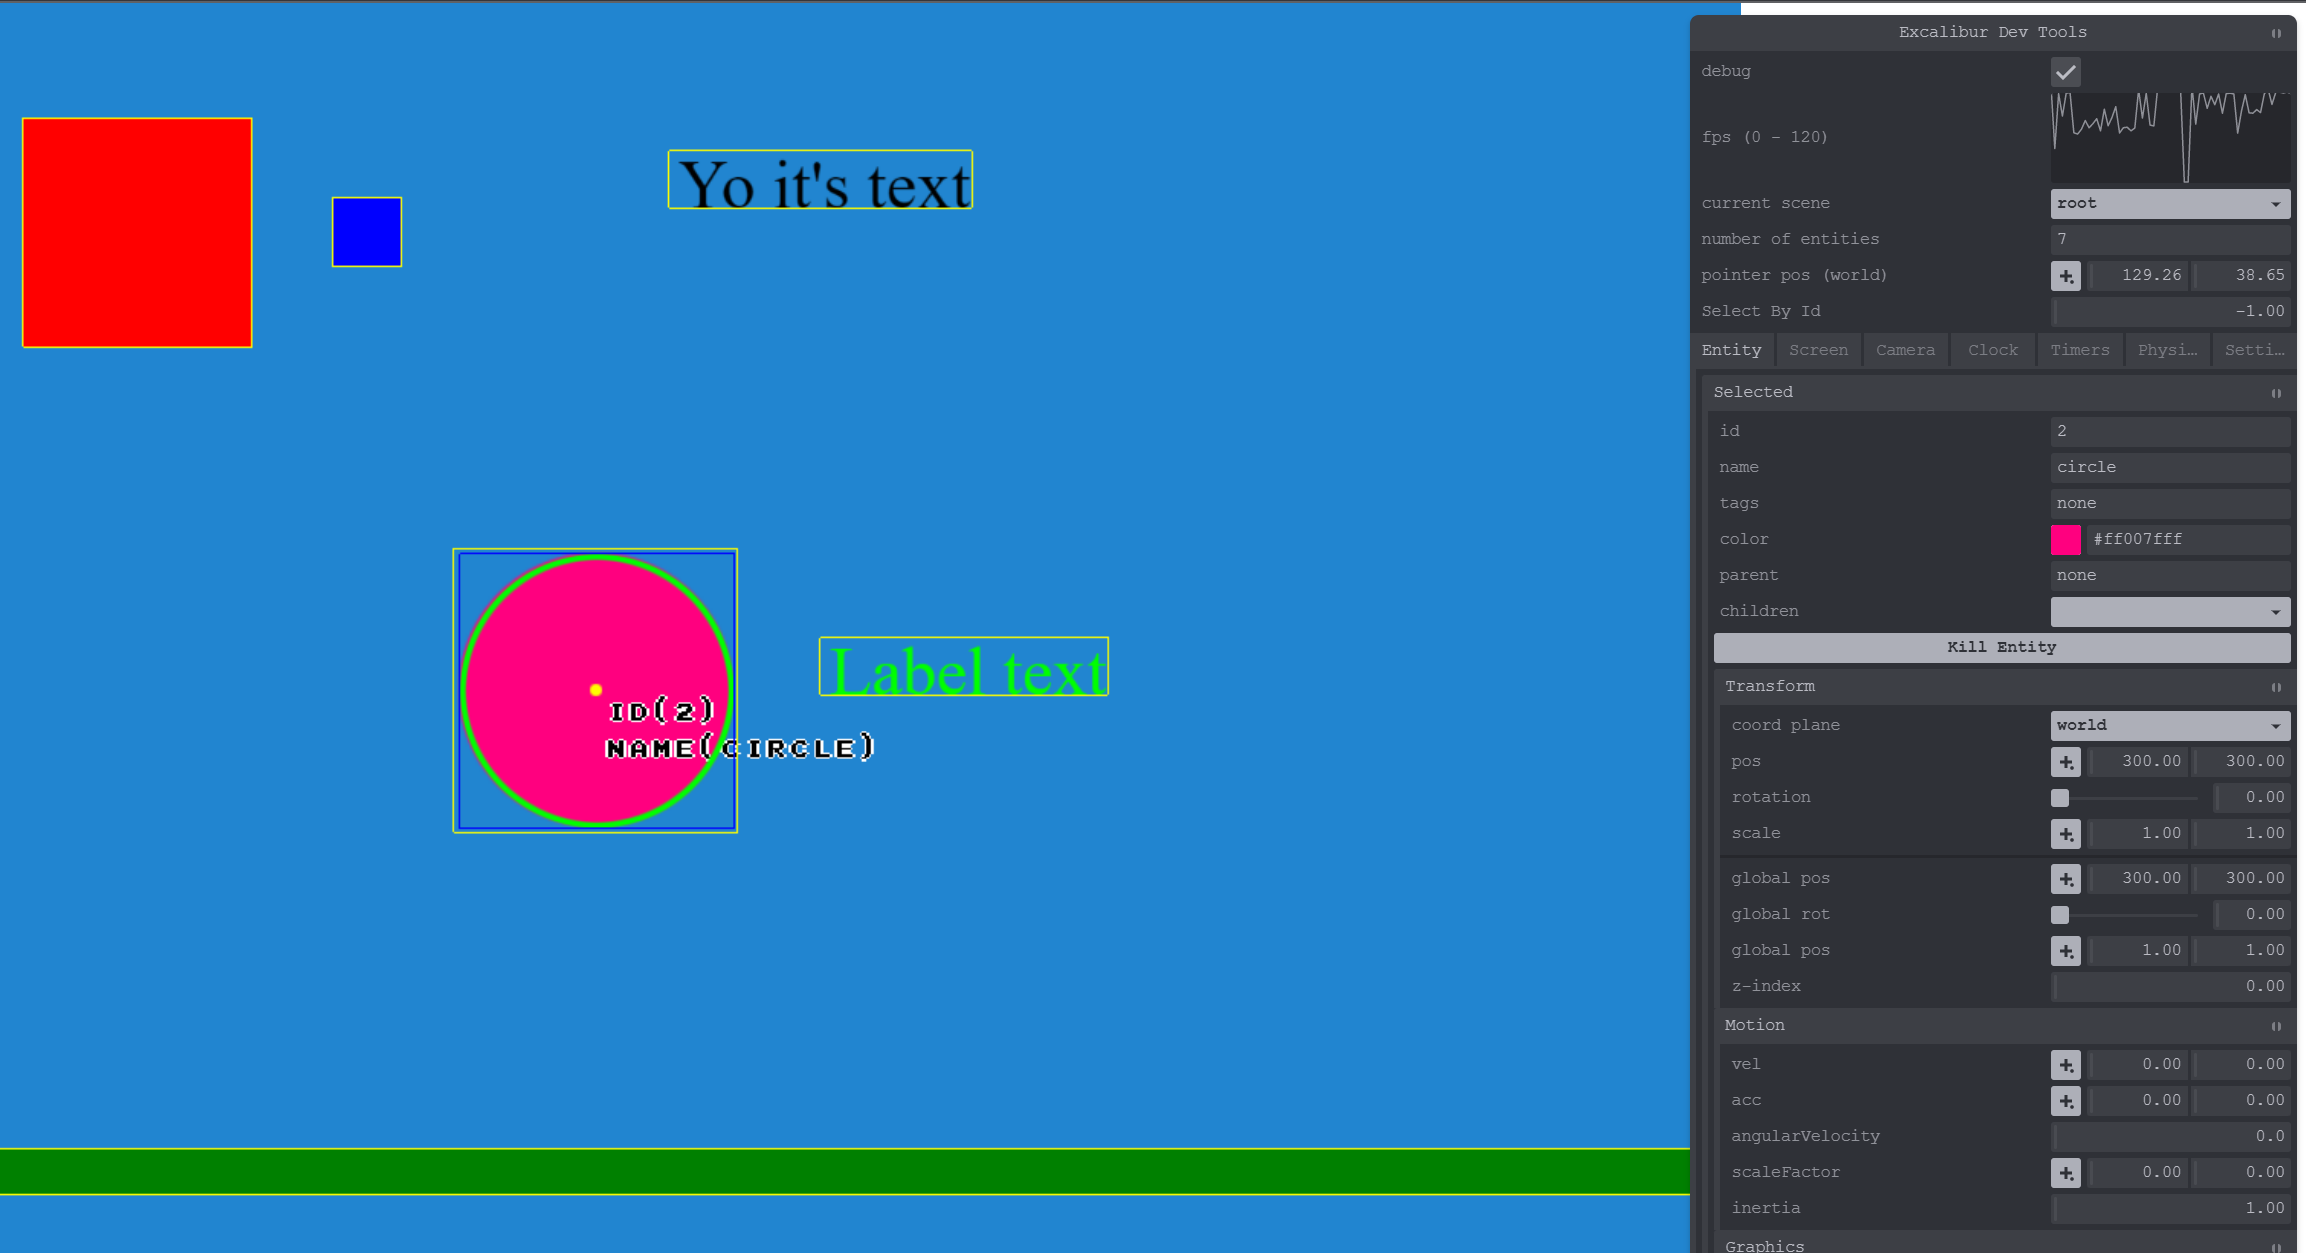
We've built a new tool to help debug Excalibur games! This tool lets you see information about the Excalibur engine, scenes, actors, clocks, and more!

Debugging why things aren't working has historically been pretty difficult. This plugin will greatly assist in the game development cycle. Nearly everything is available and configurable.

It's pretty low effort to install into your game:

typescript
import { DevTool } from '@excaliburjs/dev-tools';
const game = new ex.Engine({...});
const devtool = new DevTool(game);
typescript
import { DevTool } from '@excaliburjs/dev-tools';
const game = new ex.Engine({...});
const devtool = new DevTool(game);

Excalibur dev tools, a sidebar of sliders and graphs on the right, with bounding boxes around all Actors in the game

Tiled updates

> npm install @excaliburjs/plugin-tiled

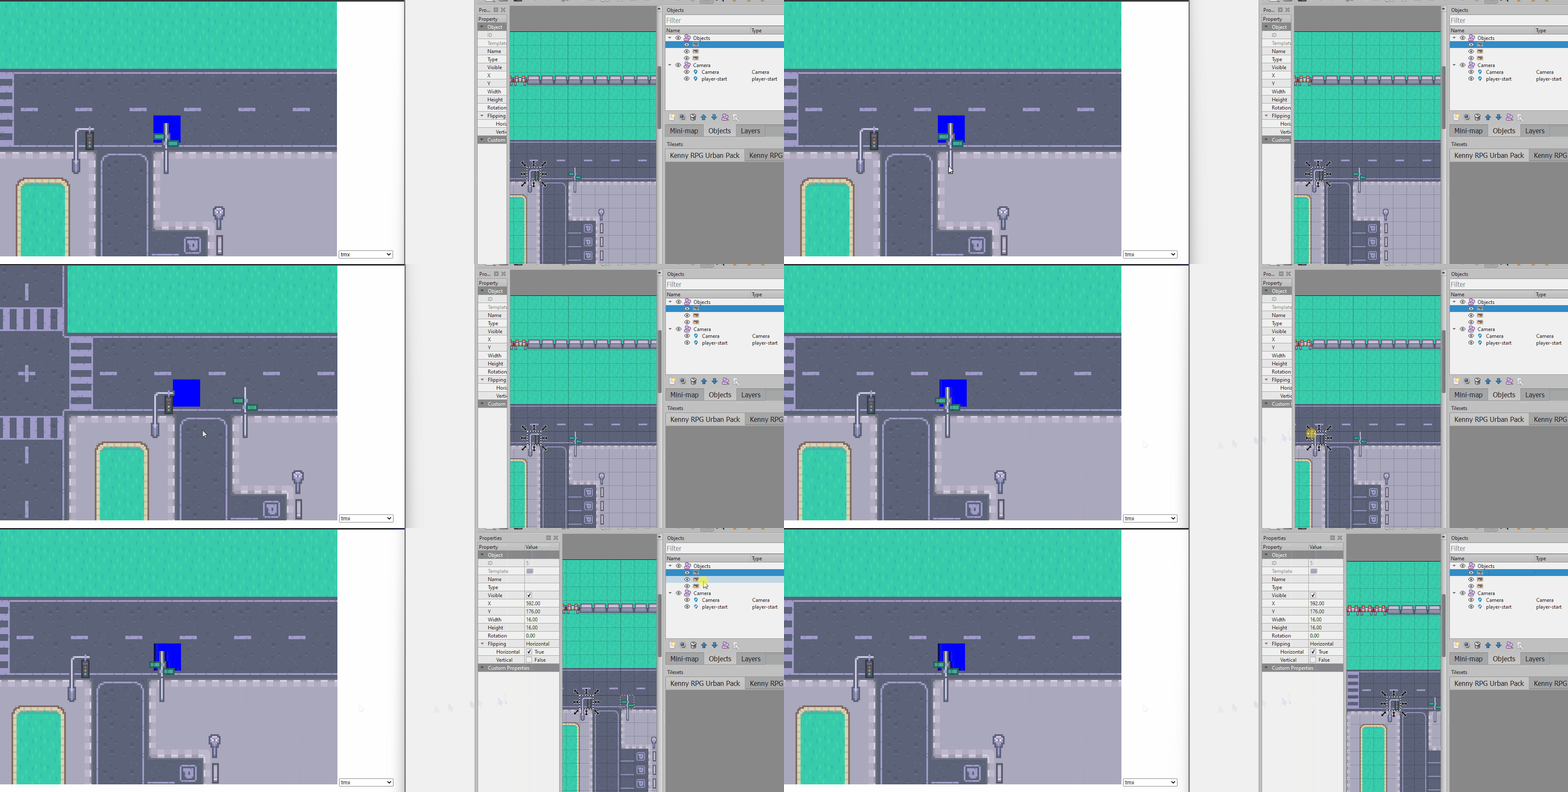
The Tiled plugin now implicitly adds a z-index to each layer (which can be overridden) which means things will look as you expect in Excalibur as they do in the Tiled editor.

Set the starting layer z (defaults to -1) and get gaming!

typescript
const map = new TiledMapResource('path/to/map.tmx', { firstLayerZIndex: -2 });
typescript
const map = new TiledMapResource('path/to/map.tmx', { firstLayerZIndex: -2 });

A side-by-side: on the left, a game with a blue square traveling along city roads. the right side is the level in a tiled map editor

Renderer performance improvements

The performance gains were achieved through some core renderer refactors and identifying places where expensive calculations could be cached!

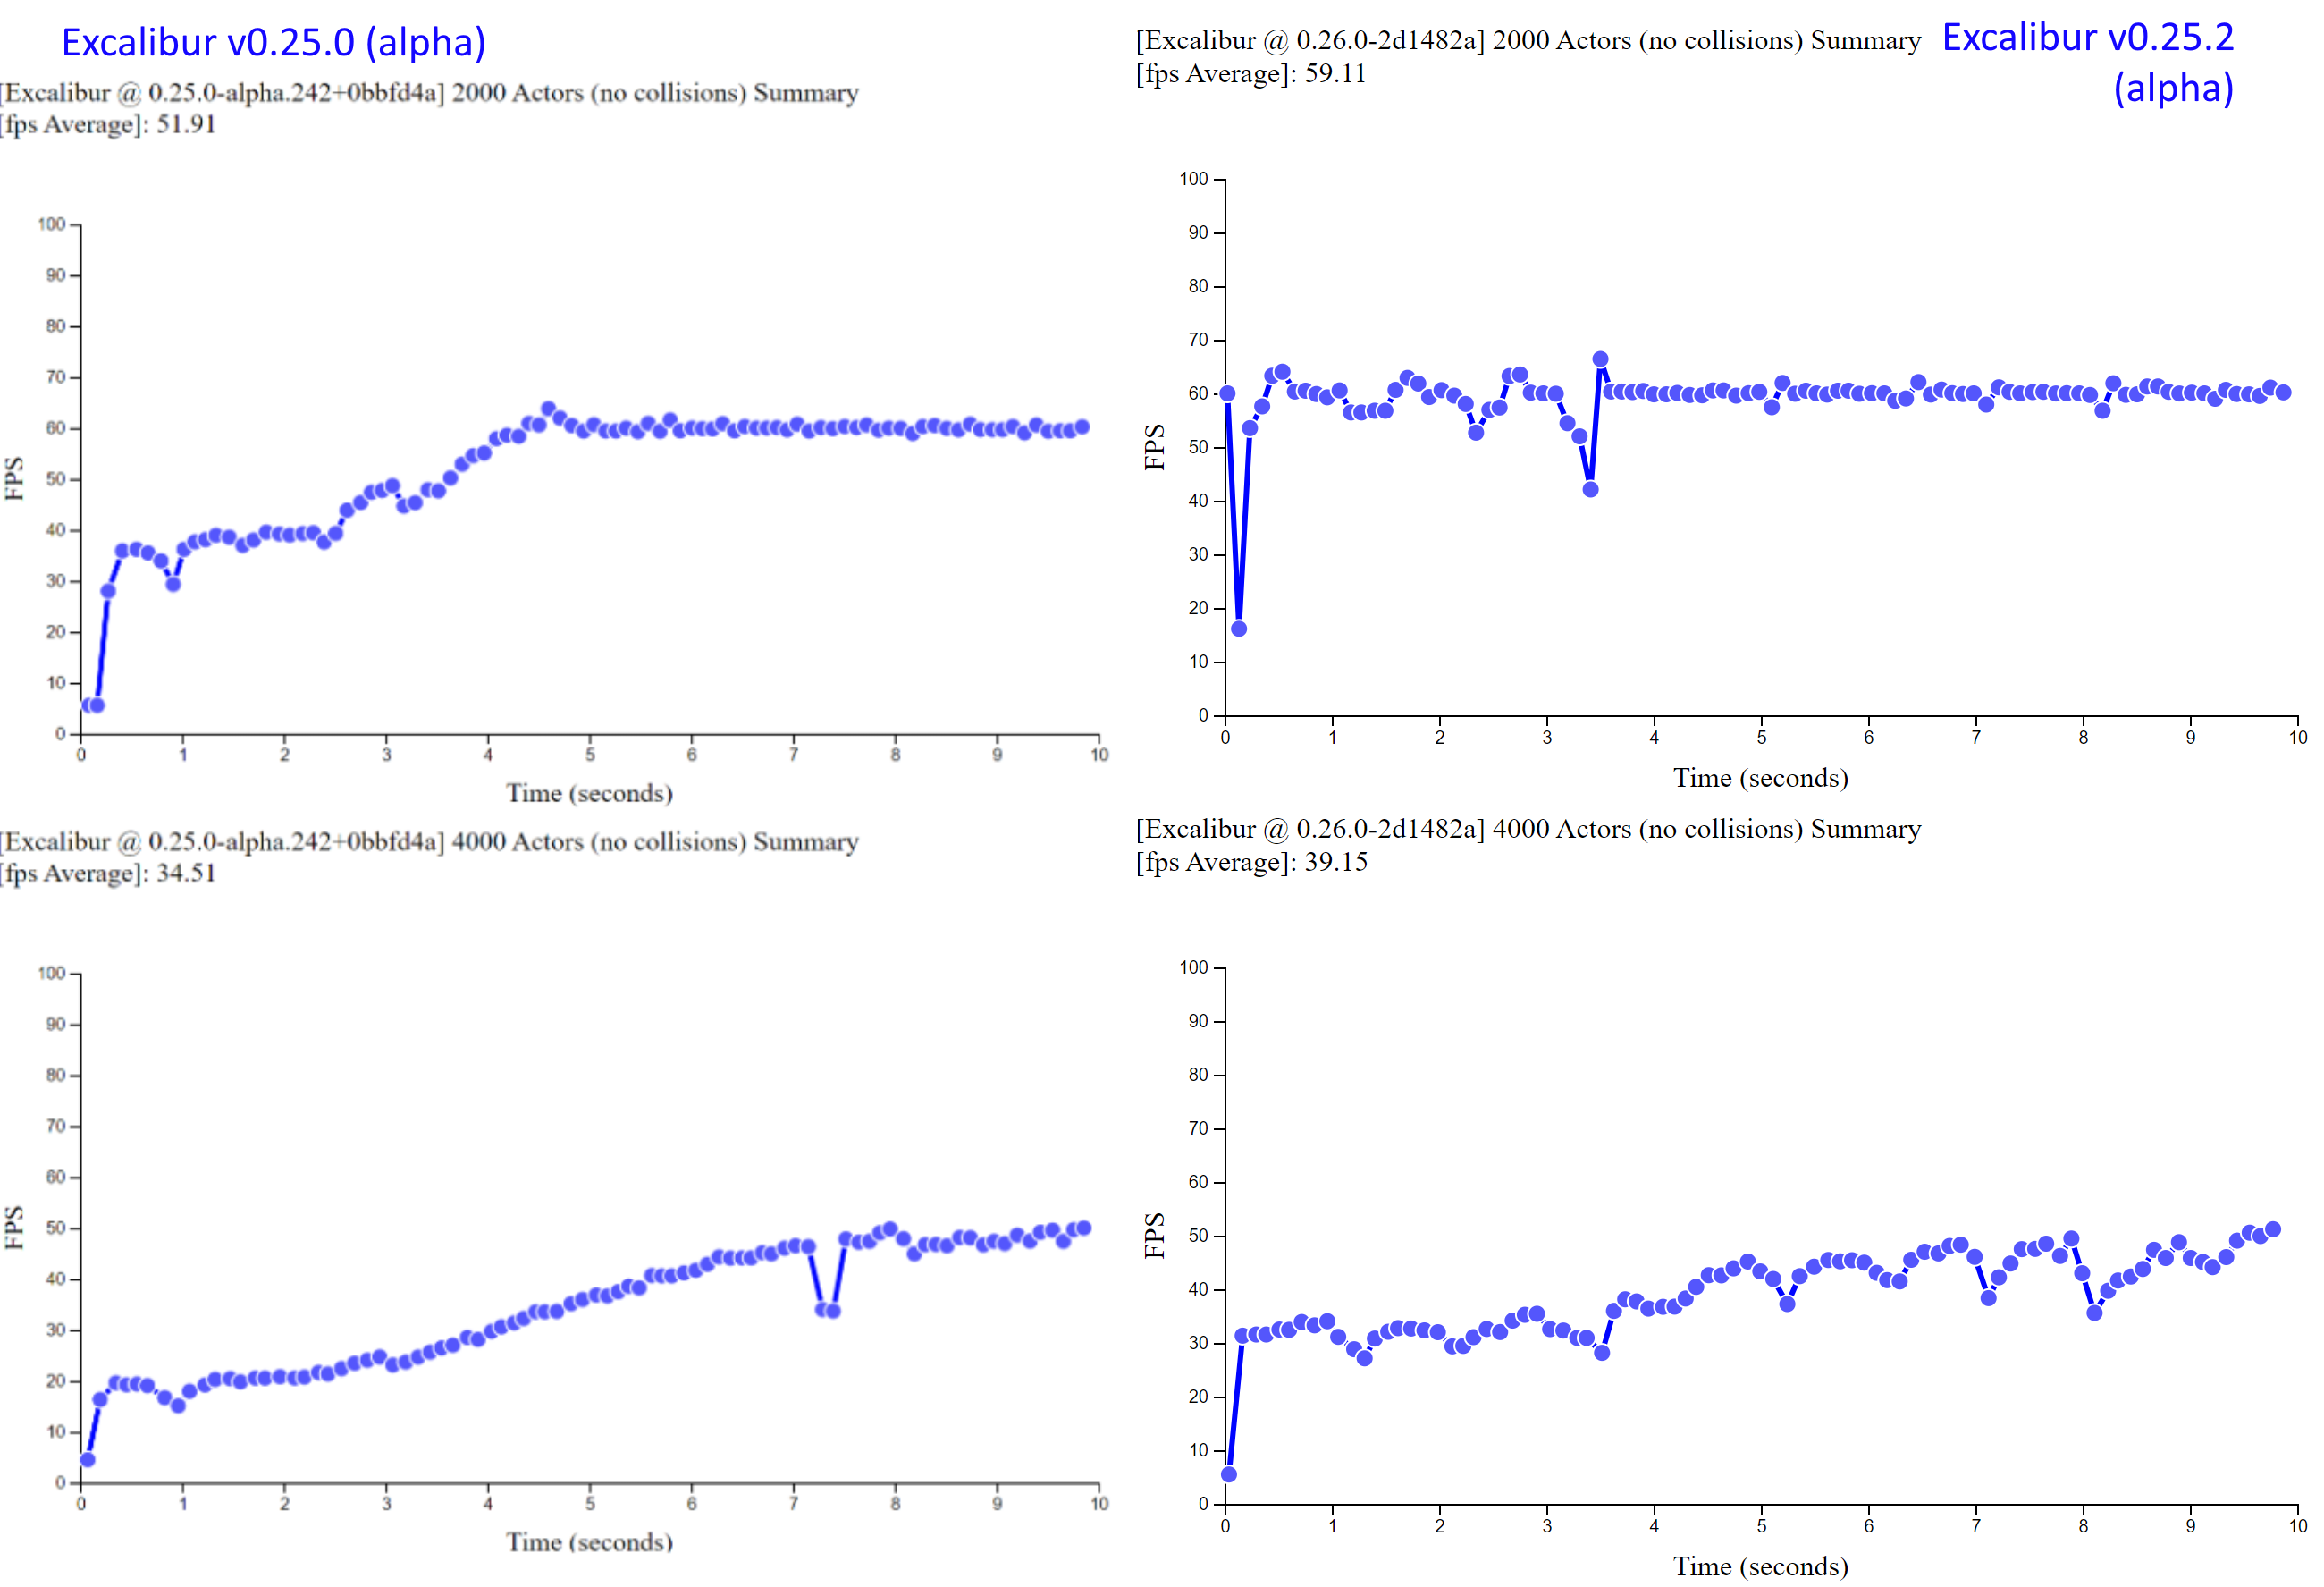
This is huge, we stay above 30fps in the 4000 actor benchmark, and we have dramatic improvement in average fps in both cases!

Excalibur v0.25.0 vs v0.25.2 benchmarks showing that v0.25.2 has much more consistent average FPS

This benchmark was performed in Chrome on a Surface Book 2 with the power plugged in.

  • Processor: Intel(R) Core(TM) i7-8650U CPU @ 1.90GHz, 2112 Mhz, 4 Core(s), 8 Logical Processor(s)
  • Physical Memory: (RAM) 16.0 GB
  • Graphics: NVIDIA GeForce GTX 1060

A number of improvements were made to the Excalibur graphics systems to get to this performance. The big factors to this improvement were:

  1. Avoiding recalculation of graphics transforms and other expensive operations when they can be cached
  2. Refactoring the renderer to be simpler and to use index buffers to share geometry vertices.
  3. Rendering batches at the actual maximum for the batch renderer
  4. Avoid recreating Matrix types, they are somewhat expensive to create then garbage collect

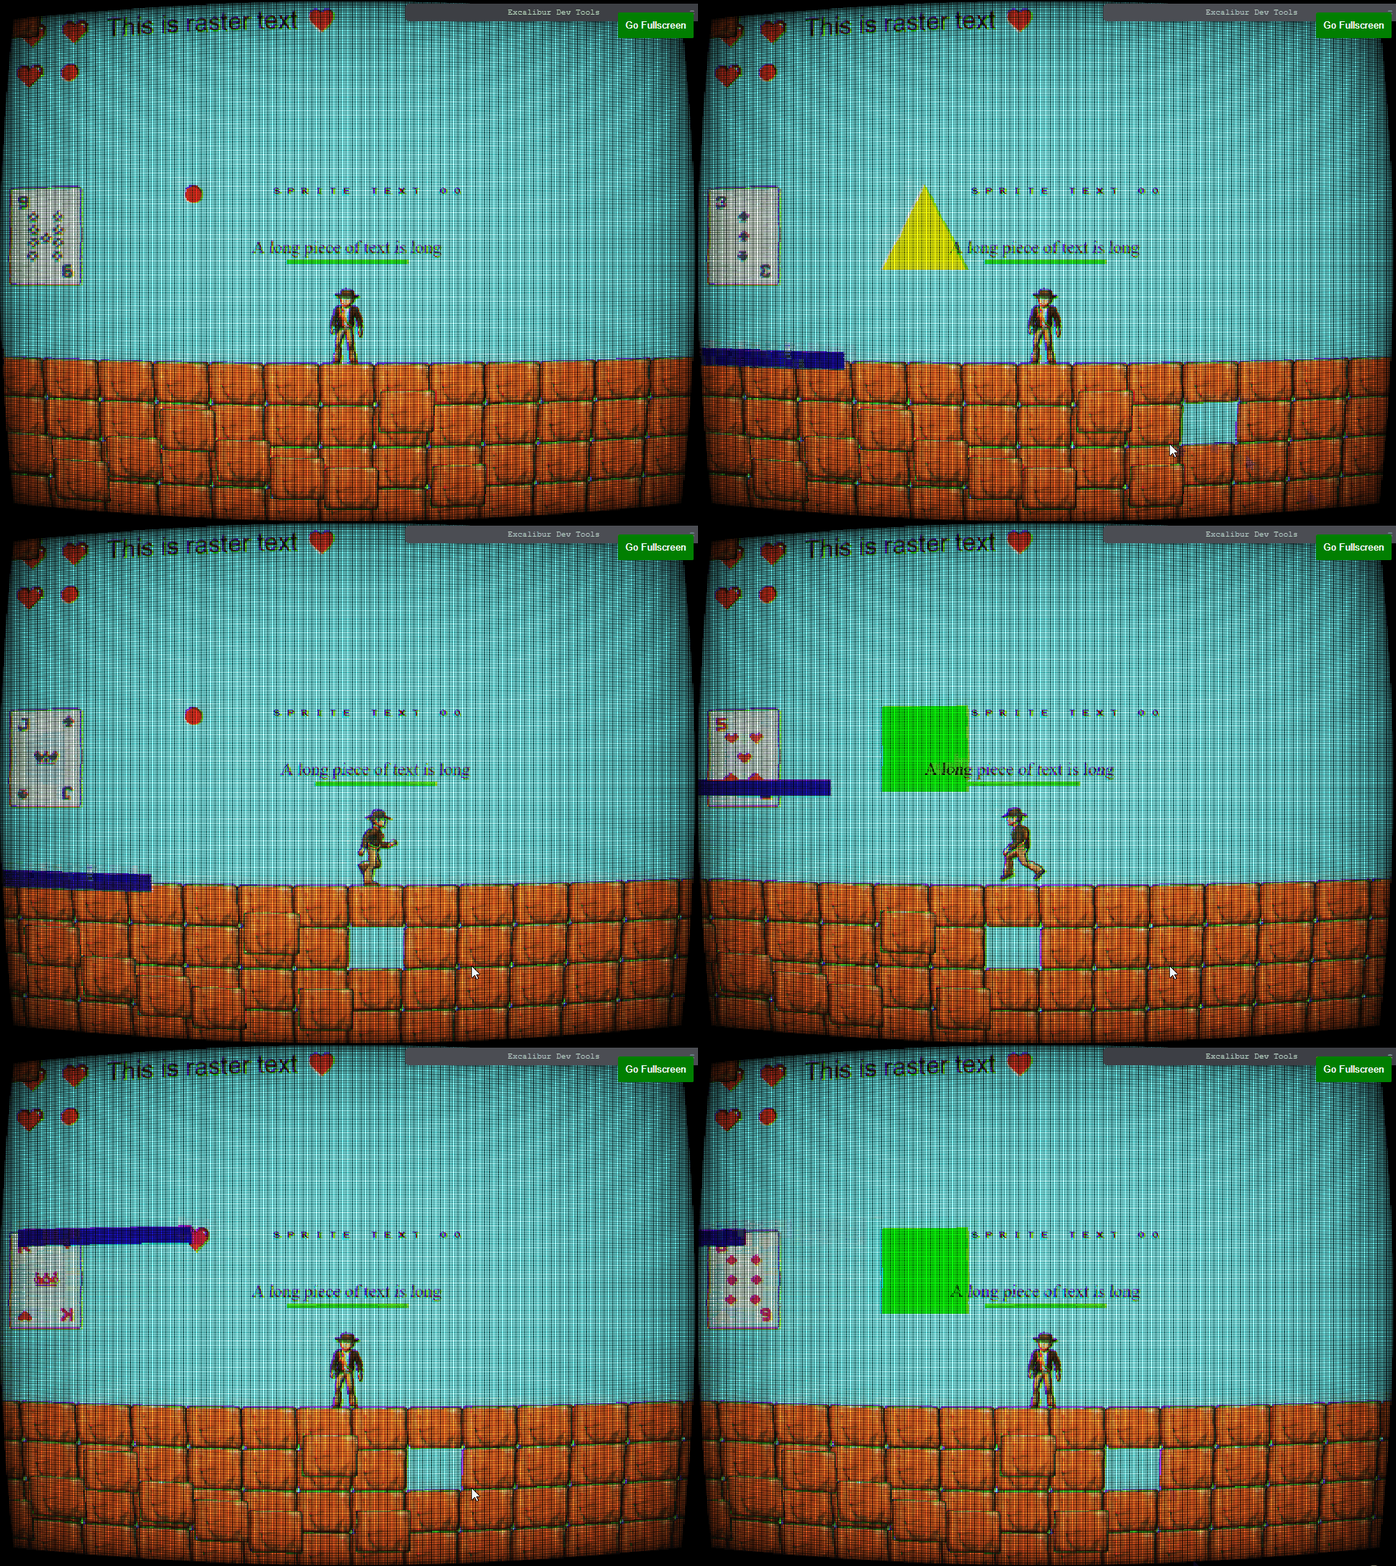
Post processing

The postprocessor improvements allow custom WebGL shaders, which can produce some cool effects! (Minimally modified from this ShaderToy)

Excalibur example running with a CRT television postprocessor

To produce the above effect, Excalibur has a new built in ScreenShader type for doing quick shaders meant for the whole screen.

typescript
class CrtPostProcessor implements ex.PostProcessor {
private _shader: ex.ScreenShader;
initialize(gl: WebGLRenderingContext): void {
const crtEffectSource = document.getElementById("modified-crt-shader-source").innerText;
this._shader = new ex.ScreenShader(crtEffectSource);
}
getLayout(): ex.VertexLayout {
return this._shader.getLayout();
}
getShader(): ex.Shader {
return this._shader.getShader();
}
}
game.graphicsContext.addPostProcessor(new CrtPostProcessor());

Renderer improvements

Renderer design

When v0.25.0 was released, it was a "monolithic" renderer design, meaning everything Excalibur could possibly draw was built into a single renderer and shader program. This became onerous fairly quickly. And as the old adage goes: "you don't know how to build something until you've built it twice".

With v0.25.2, each type of drawing is split internally into separate renderer plugins. While this does come with some overhead when switching shader programs, it's worth it for the the simplicity, maintainability, and extensibility benefits.

Image filtering

Excalibur now allows you the ability to control the WebGL image filtering mode both implicitly and explicitly. Really this means Excalibur will try to pick a smart default, but allows overrides

Explicitly when loading ex.ImageSource:

typescript
const myImage = new ex.ImageSource('path/to/image', false, ex.ImageFiltering.Pixel);
typescript
const myImage = new ex.ImageSource('path/to/image', false, ex.ImageFiltering.Pixel);
  • ex.ImageFiltering.Blended - Blended is useful when you have high resolution artwork and would like it blended and smoothed

    Example of blended mode, where the edges of pixels are smoother

  • ex.ImageFiltering.Pixel - Pixel is useful for pixel art when you do not want smoothing aka antialiasing applied to your graphics.

    Example of pixel mode, where the pixels remain jagged

Implicitly if the ex.EngineOption antialiasing property is set:

  • antialiasing: true, then the blend mode defaults to ex.ImageFiltering.Blended
  • antialiasing: false, then the blend mode defaults to ex.ImageFiltering.Pixel

Custom renderer plugins

Excalibur knows how to draw many types of graphics to the screen by default comes with those pre-installed into the ExcaliburGraphicsContext. However, you may have a unique requirement to provide custom WebGL commands into Excalibur, this can be done with a custom renderer plugin.

A custom renderer can be registered with Excalibur and draw in any draw routine! Read more in the docs about custom rendere plugins

typescript
const game = new ex.Engine({...});
export class MyCustomRenderer extends ex.RendererPlugin {
public readonly type = 'myrenderer';
...
}
game.start().then(() => {
// register
game.graphicsContext.register(new MyCustomRenderer());
});
// call from a graphics callback or event
const actor = new ex.Actor({...});
actor.graphics.onPostDraw = (graphicsContext) => {
graphicsContext.draw<MyCustomRenderer>('myrenderer', ...);
}

Community

We've had a lot of community engagement this iteration, especially through the issues and github discussions. Lots of good issues, and lots of cool things in the show and tell

Big thanks to everyone who helped with this release:

  • @ivasilov
  • @luttje
  • @tsanyqudsi
  • @lampewebdev
  • @joshuadoan
  • @berkayyildiz
  • @simon-jaeger
  • @YJDoc2
  • @JumpLink

The future

We are progressing at full speed toward the v1 vision, there is still a lot to do but the end is in sight. Here are a few things that I'm personally really excited for:

  • Event system redo
  • Particle system refactor
  • Final deprecation of old drawing api
  • New TileMap enhancements for hexagonal and isometric maps

This was a point release, but despite that a lot of exciting things were added! Looking forward to v0.26.0!

-Erik

Excalibur v0.25.0 Released!

· 11 min read
Erik Onarheim
Maintainer of Excalibur

After a year of work, a lot of great additions and improvements have made it into Excalibur, and we are making good progress towards our v1.0 release! Check the development roadmap for our current plans. It's hard to believe how different things are now since the first commit of Excalibur (back when it was called GameTS)!

Excalibur started as a tech demo in a presentation to show how powerful TypeScript can be. The engine has come so far since then, it's really amazing!

We are really excited to share this release with you! This release contains over 30 bug fixes and 50 new features! It's been a labor of love over the last year by many people, and we have some big features to share.

Check out the official release!

npm install [email protected]

Performance

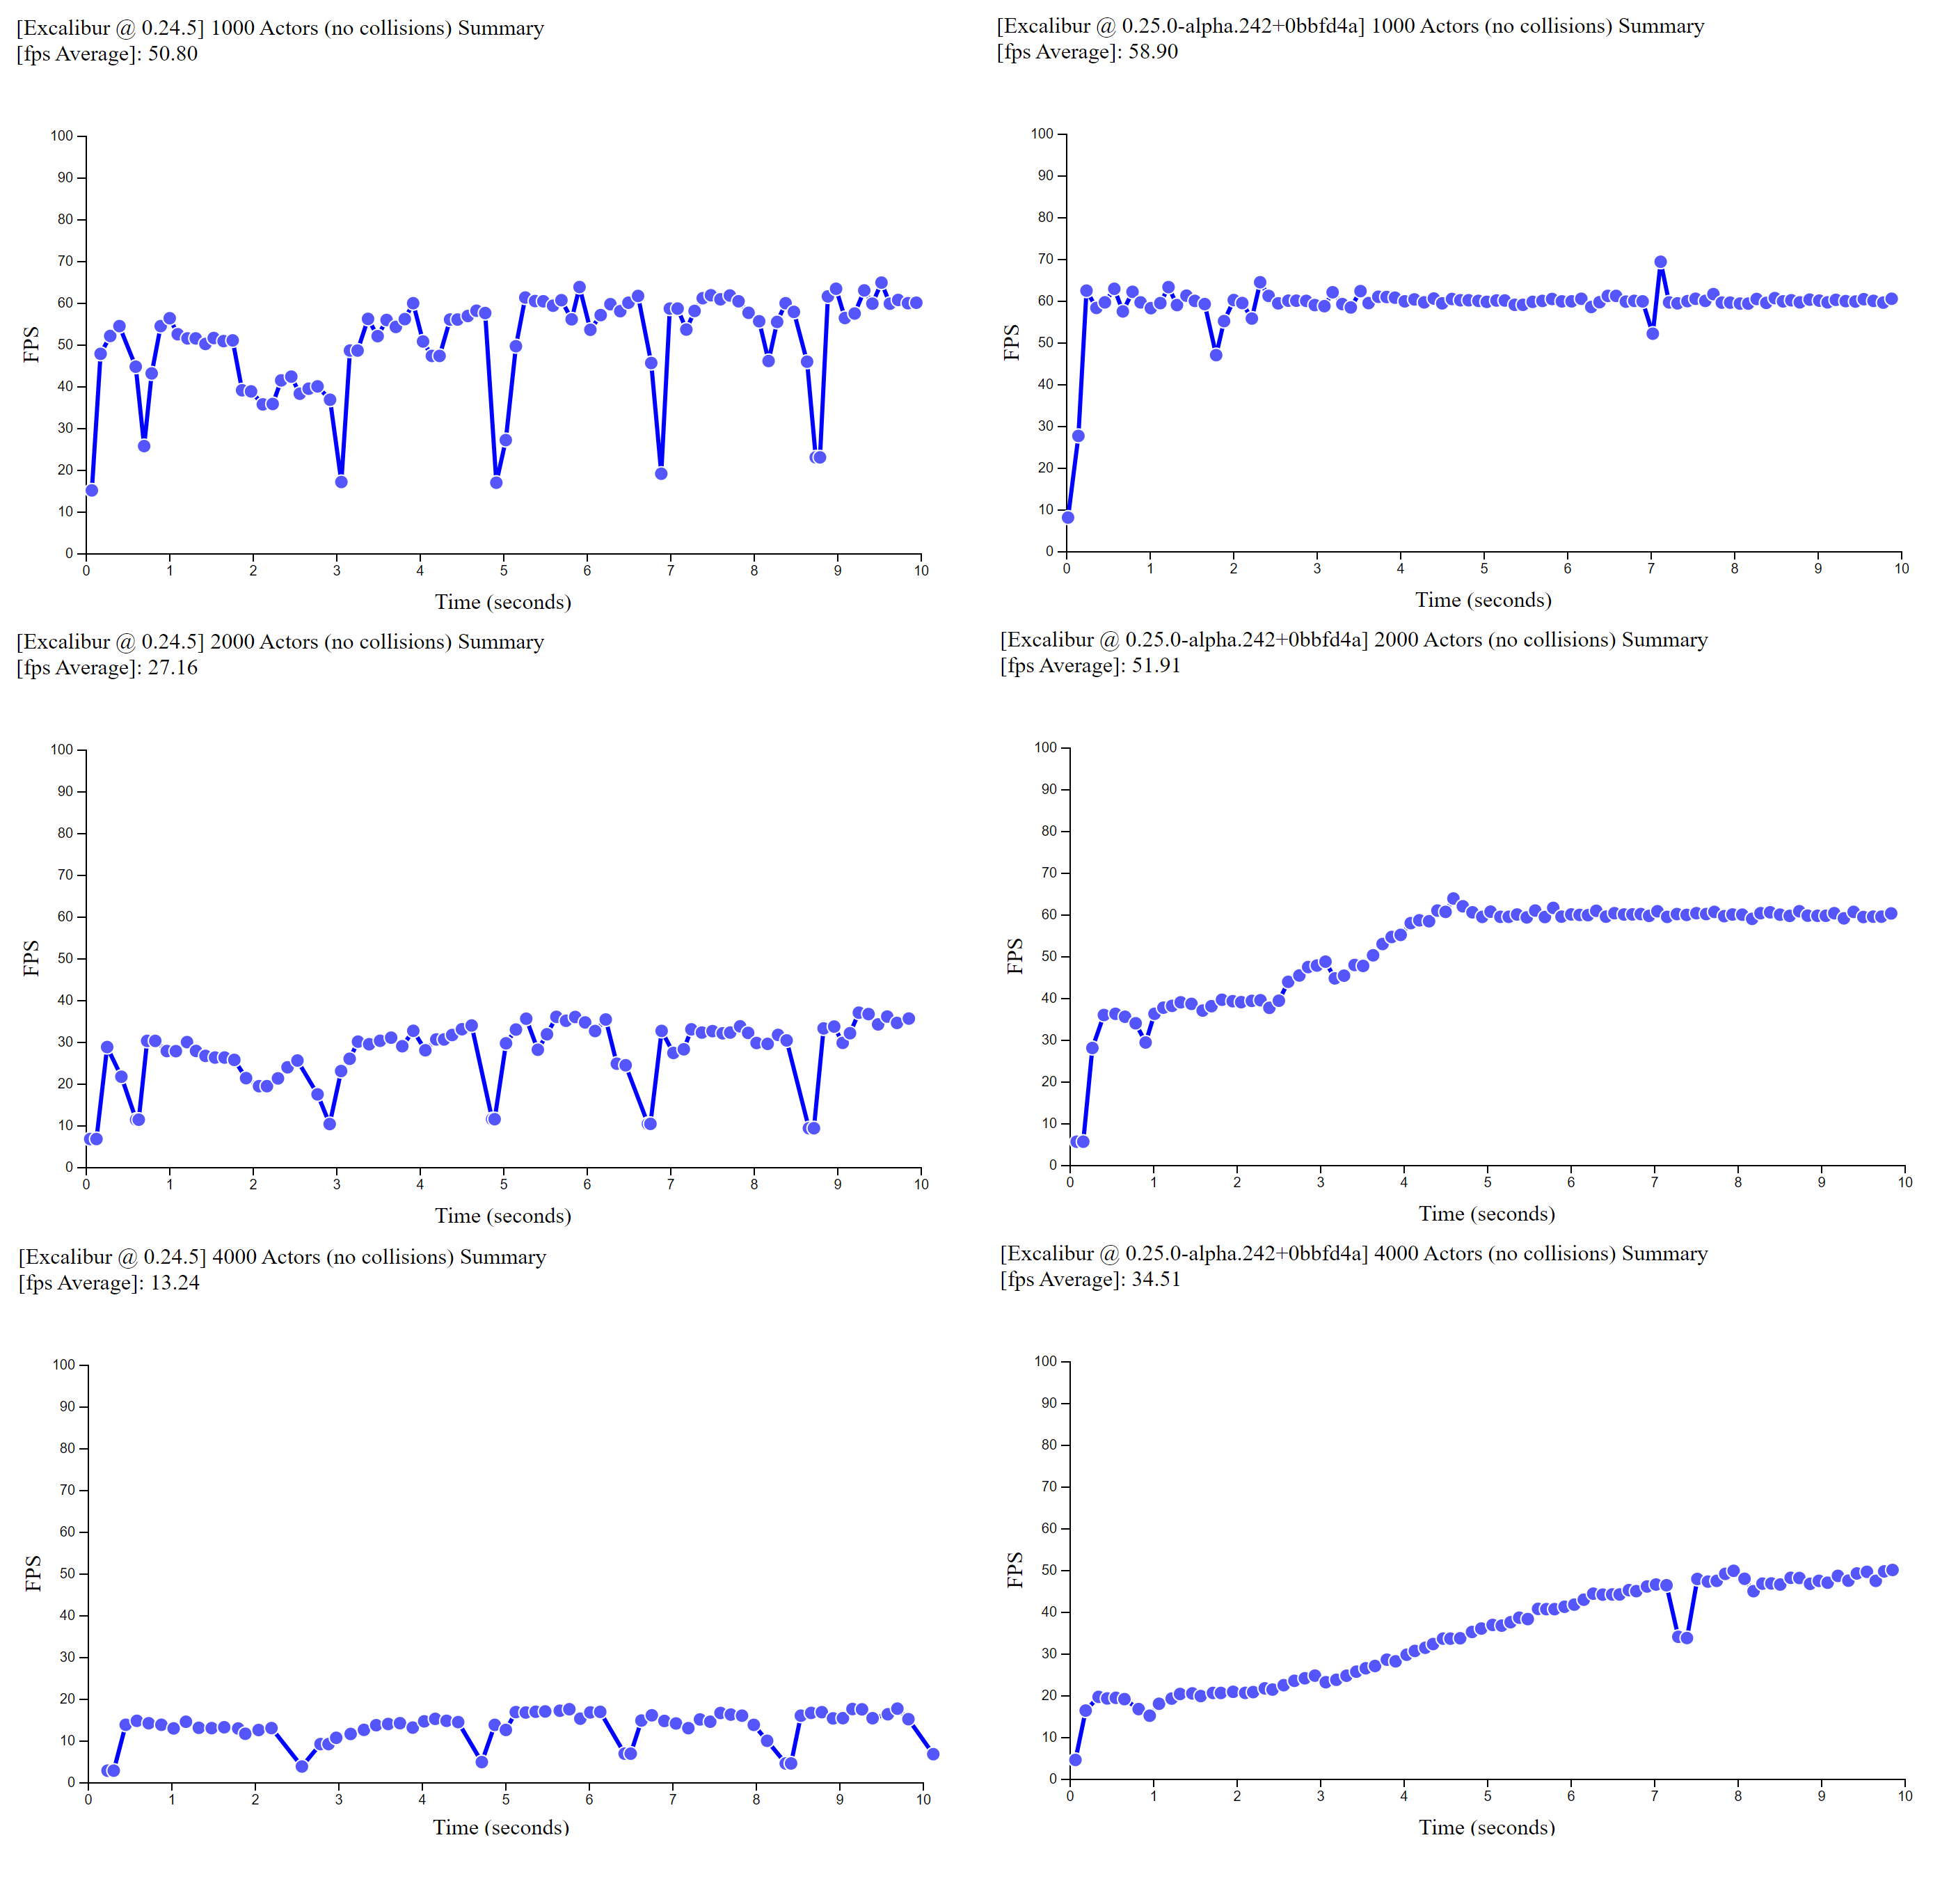
There is a combination of features (mentioned below) that resulted in big performance gains. Across the board, there's been a dramatic increase in what Excalibur can do in v0.25.0 vs v0.24.5.

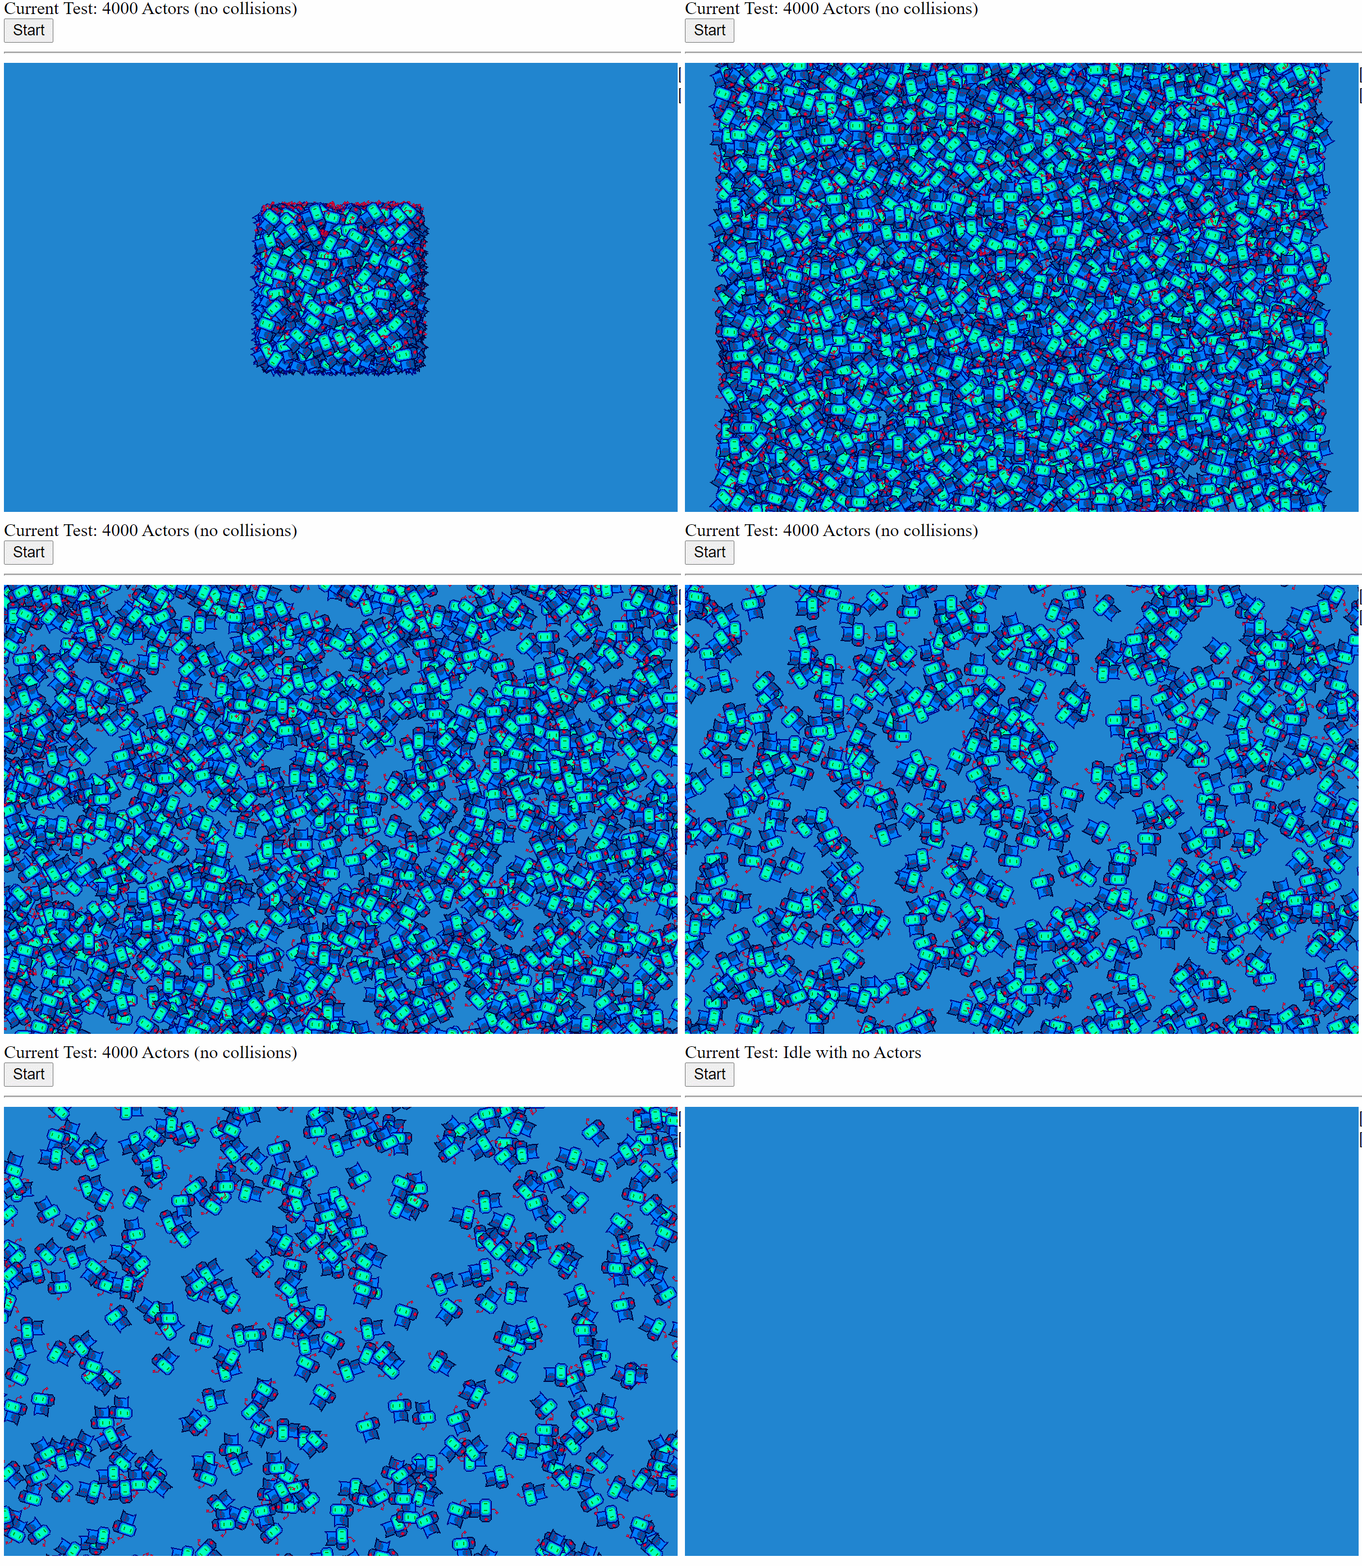
In the gif below, we demonstrate the graphics performance specifically.

4000 small robot Actors (no collisions) exploding outwards from the center of the screen

There is much better performance across the board with a higher baseline FPS in v0.25.0 for the same number of actors. You'll notice that FPS improves over time as more actors are offscreen in v0.25.0 compared to v0.24.5.

graphs showing an average improvement of 8 FPS for 1000 Actors, 24.75 FPS for 2000 Actors, and 21.27 FPS for 3000 Actors

This benchmark was performed in the Chrome browser on a Surface Book 2 with the power plugged in.

  • Processor: Intel(R) Core(TM) i7-8650U CPU @ 1.90GHz, 2112 Mhz, 4 Core(s), 8 Logical Processor(s)
  • Physical Memory: (RAM) 16.0 GB
  • Graphics: NVIDIA GeForce GTX 1060

New plugin versioning strategy

We are adopting a similar versioning strategy to Angular, during pre-1.0. All plugins compatible with the core library will share the same prefix through the minor version. For example, if core Excalibur is [email protected], then the plugins that support that version are formatted like @excaliburjs/[email protected].

DisplayMode updates

Excalibur DisplayModes have been refactored and renamed to clarify their utility.

  • FillContainer - Fill the game viewport to take up as much of the immediate parent as possible
  • FillScreen - Fill the game viewport to take up as much of the screen as possible
  • FitContainer - Fit the game maintaining aspect ratio into the immediate parent
  • FitScreen - Fit the game maintaining aspect ration into the screen
  • Fixed - Specify a static size for the game width/height

Refactor to Entity Component System (ECS) based architecture

The core plumbing of Excalibur has been refactored to use an ECS style architecture. However, developers using Excalibur do not need to know or care about the this underlying change to ECS if they don't want to.

What does ECS mean for Excalibur? At a high level, ECS architecture breaks down into three things:

  • Components contain data needed for various systems.
  • Systems implement the "behavior" by looping over entities that match a list of components.
    • For example, the graphics system processes all entities with a TransformComponent and a GraphicsComponent
  • Entities are the "holders" of components

Actor, Scene, and Engine remain as the familiar interface to build games; they're only implemented differently under-the-hood. The reason for the change was to break down ever-growing and complex logic that had accumulated in the Actor and Scene implementations into Components and Systems for maintainability. This change increases the flexibility of Excalibur, and allows you to add new novel behavior directly into the core loop with custom components ones if you desire.

Excalibur does not have the purest implementation of an ECS by design; our built-in components are more than just data. The built-in components do provide behavior, convenience features, and helper functions to maintain our core mission of keeping Excalibur easy to use. The Excalibur core team goal with ECS is flexibility and maintainability, not performance. If you wish, you can read more about our goals for ECS.

Here's A quick example of using the new ECS features:

typescript
class SearchComponent extends ex.Component<'search'> {
public readonly type = 'search'
constructor(public target: ex.Vector) {
super();
}
}
class SearchSystem extends ex.System<ex.TransformComponent | SearchComponent> {
// Types need to be listed as a const literal
public readonly types = ['ex.transform', 'search'] as const;
// Lower numbers mean higher priority
// 99 is low priority
public priority = 99;
// Run this system in the "update" phase
public systemType = ex.SystemType.Update
private _searchSpeed = 10 // pixels/sec
public update(entities: ex.Entity[], delta: number) {
for (let entity of entities) {
const target = entity.get(SearchComponent)!.target;
// ex.TransformComponent is a built in type
const transform = entity.get(ex.TransformComponent) as ex.TransformComponent;
const direction = target.sub(transform.pos);
const motion = direction.normalize().scale(this._searchSpeed);
// Moves these entities towards the target at 10 pixels per second
transform.pos = transform.pos.add(motion.scale(delta / 1000))
}
}
}
// Actors come with batteries included built in features
const actor = new ex.Actor({
pos: ex.vec(100, 100),
width: 30,
height: 30,
color: ex.Color.Red
});
actor.addComponent(new SearchComponent(ex.vec(400, 400)));
// Create a scene with your new system
const scene = new ex.Scene();
scene.world.add(new SearchSystem());
scene.add(actor);

Collision system improvements

The collision system has been significantly overhauled to improve the quality of the simulation and the stability of collisions. The core simulation loop "solver" has been redone to use an iterative impulse constraint solver, which provides a robust method of computing resolution that has improved performance and stability.

Collision intersection logic has now also been refactored to report multiple contact points at once. Multiple contacts improves the stability of stacks of colliders over single contact collisions (which can result in oscillations of boxes back and forth).

variously-sized rectangles being stacked one at a time on top of each other and not falling over (like they usually would without multiple contact point collisions)

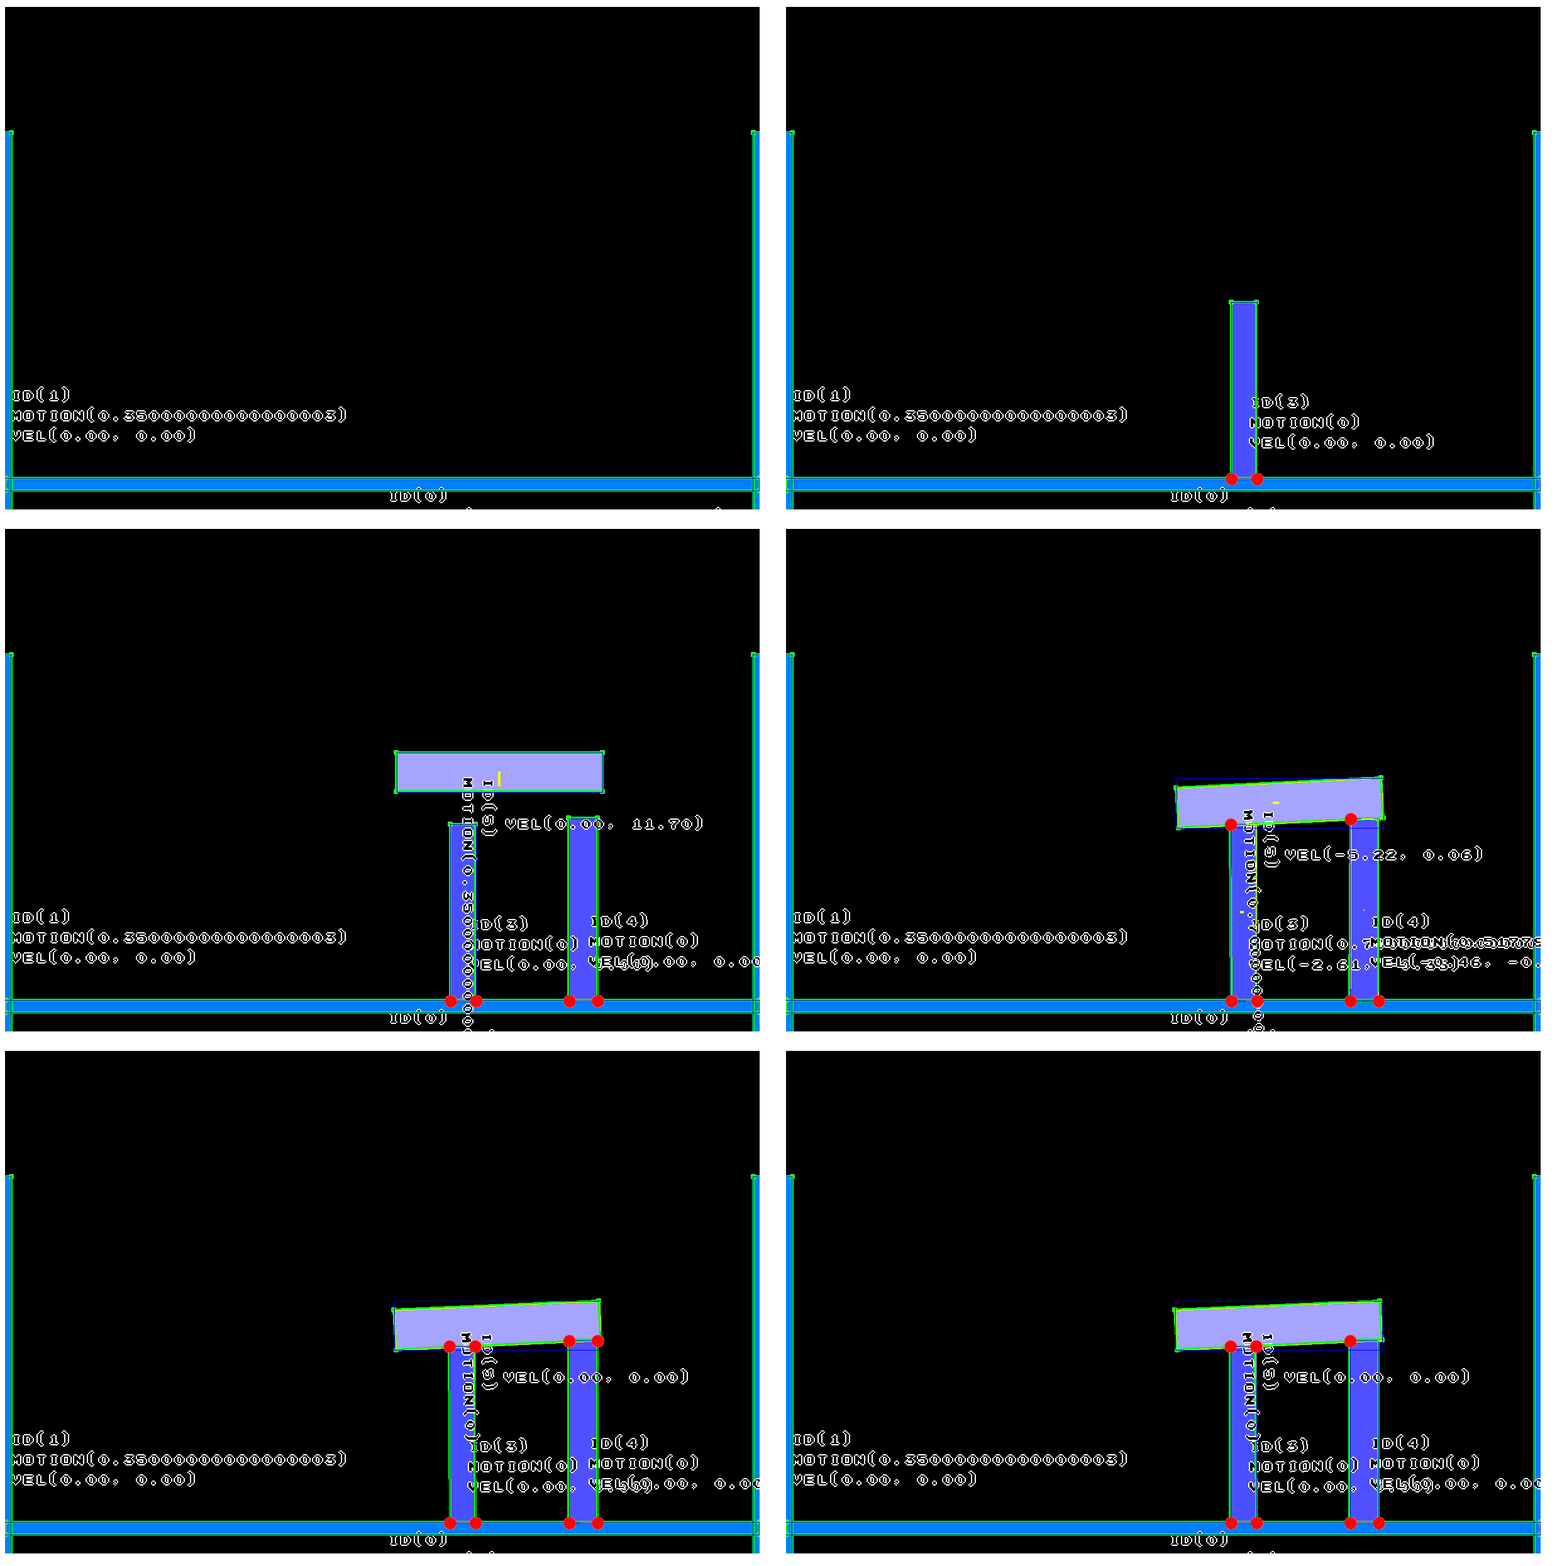
Colliding bodies can now optionally go to sleep. This relieves some of the pressure on the collision solver and improves the stability of the simulation by not moving these objects if they don't need to move. Colliders can be started asleep before a player in a game might interact with them

a sleeping collisions demo, where a horizontal rectangle is dropped onto two parallel vertical rectangles; the wobbling ceases quickly, and the structure remains stable because the collisions went to sleep

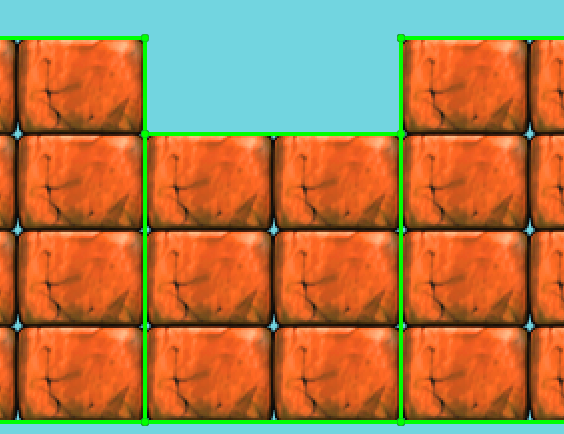
New CompositeColliders now make it possible to combine Excalibur Collider primitives (PolygonCollider, CircleCollider, and EdgeCollider) to make any arbitrary collision geometry. These new composite colliders power the new TileMap cell collisions and also power the new ex.Shape.Capsule(width, height) collider.

a grid of red bricks with composite collider lines drawn around groups of multiple bricks at a time

The Capsule collider is a useful geometry tool for making games with ramps or slightly jagged floors you want a character to glide over without getting stuck. This collider also helps with any "ghost collisions" that you might run into under certain conditions in your game.

an image of two green circles connected on each outer side by two green lines. the structure is standing on a platform

CollisionGroups allow more granular control over what collides above and beyond collision type. Collsion groups allow you to create named groups of colliders like "player", "npc", or "enemy". With these groups, you can specify that players and enemies collide, player and npcs don't collide, and that npcs and enemies don't collide without needing to implement that logic in a collision event handler.

typescript
// Create a group for each distinct category of "collidable" in your game
const playerGroup = ex.CollisionGroupManager.create('player');
const npcGroup = ex.CollisionGroupManager.create('npcGroup');
const floorGroup = ex.CollisionGroupManager.create('floorGroup');
const enemyGroup = ex.CollisionGroupManager.create('enemyGroup');
// Define your rules
const playersCanCollideWith = ex.CollisionGroup.collidesWith([
playersGroup, // collide with other players
floorGroup, // collide with the floor
enemyGroup // collide with enemies
]);
const player = new ex.Actor({
collisionGroup: playersCanCollideWith
});

New graphics system

The new Excalibur graphics system has been rebuilt from the ground up with speed in mind. It is now built on a WebGL foundation with a built-in batch renderer. This means that Excalibur will batch up draw commands and submit the minimum amount of draw calls to the machine when the screen is updated. This dramatically improves the draw performance and also the number of things wec can display on screen (as noted in the benchmarks earlier).

For drawing hooks the ExcaliburGraphicsContext is replacing the browser CanvasRenderingContext2D. If you still need to do some custom drawing using the CanvasRenderingContext2D the new Canvas graphic can help you out.

typescript
const canvas = new ex.Canvas({
cache: true, // If true draw once until flagged dirty again, otherwise draw every time
draw: (ctx: CanvasRenderingContext2D) => {
ctx.fillStyle = 'red';
ctx.fillRect(0, 0, 200, 200);
}
});
actor.graphics.use(canvas);
typescript
const canvas = new ex.Canvas({
cache: true, // If true draw once until flagged dirty again, otherwise draw every time
draw: (ctx: CanvasRenderingContext2D) => {
ctx.fillStyle = 'red';
ctx.fillRect(0, 0, 200, 200);
}
});
actor.graphics.use(canvas);

TileMap and Tiled updates

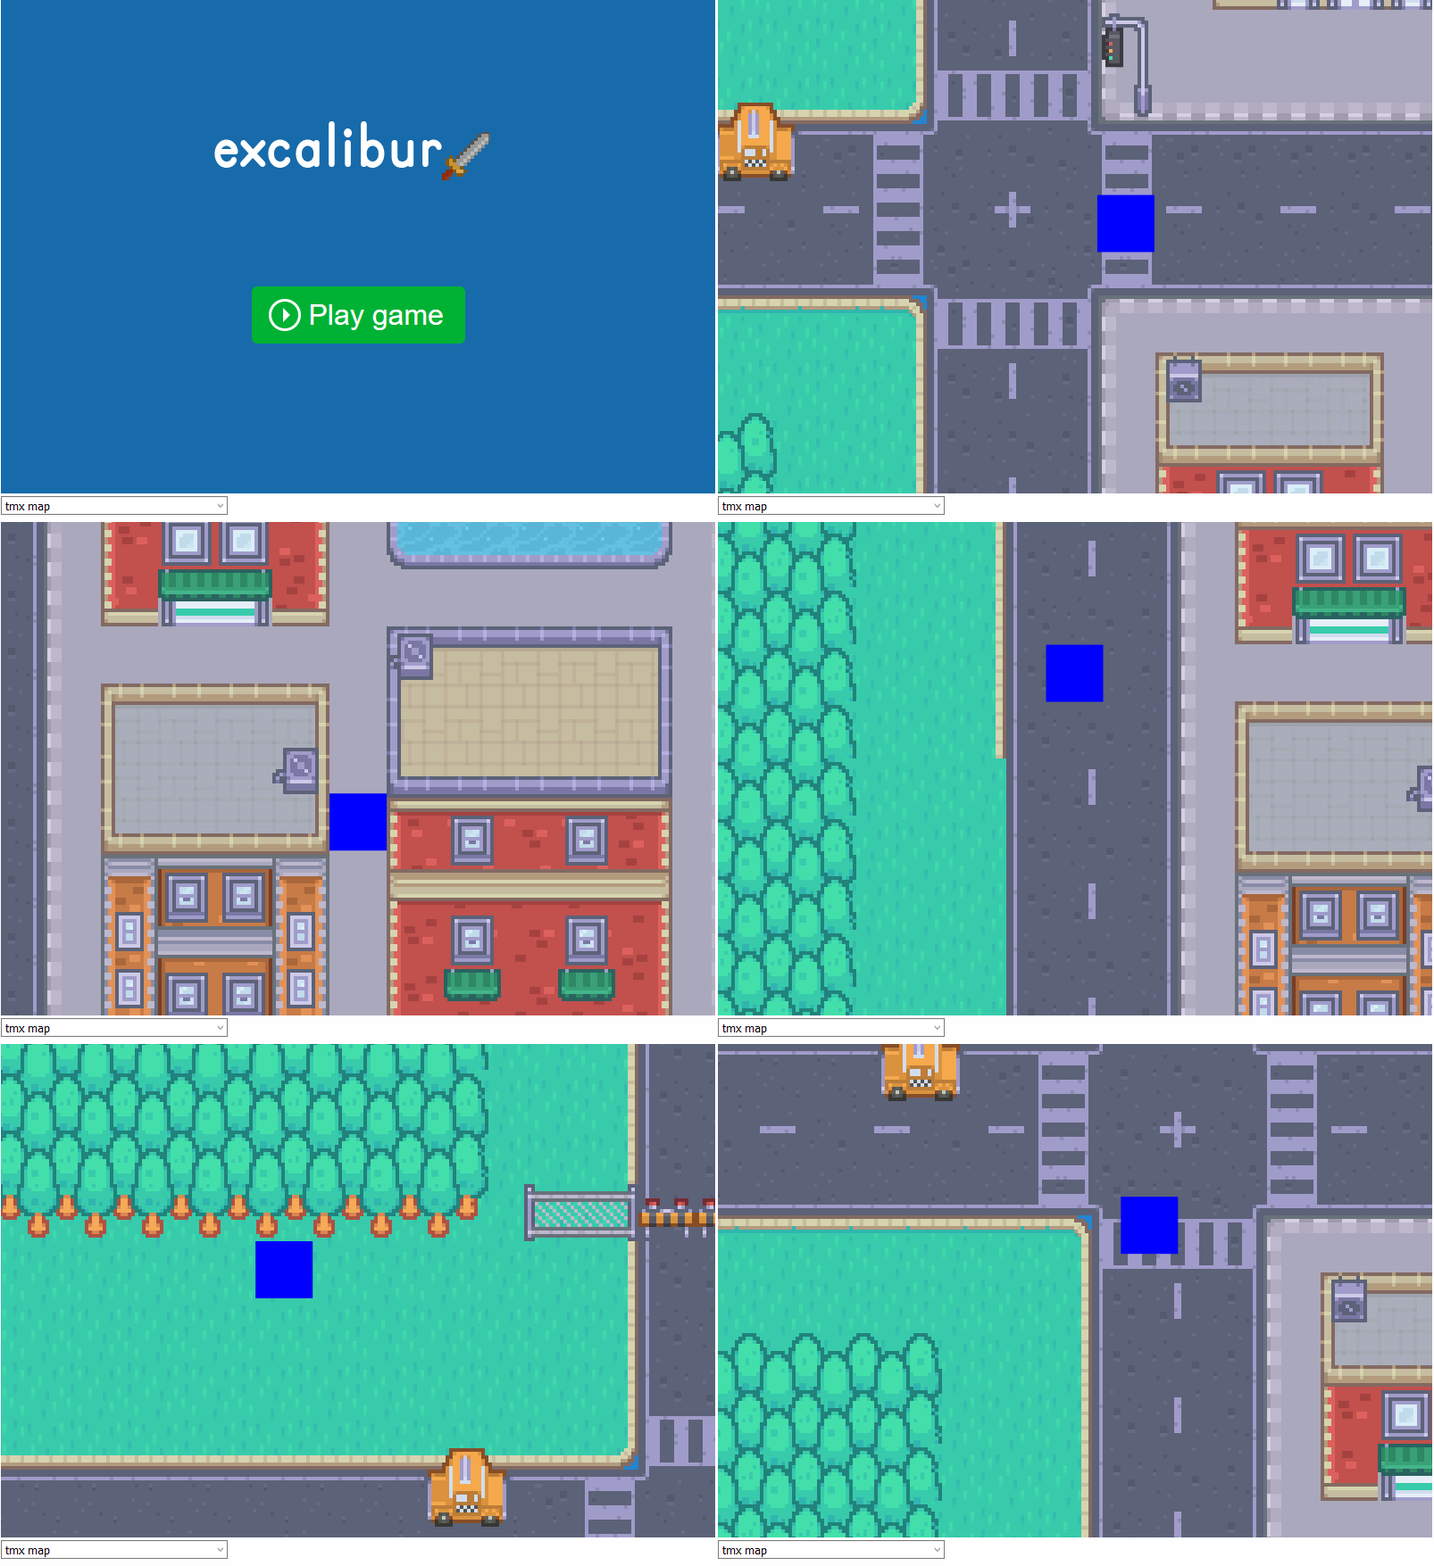
Tiled is easily one of the best tools out there for building and designing levels for your game. It has certainly been a valuable tool in our toolbox. We have doubled down on our efforts to provide a first class Tiled integration with Excalibur via the excaliburjs/plugin-tiled. This work also involved a few improvements to the TileMap to improve it's graphics API and collision performance.

Check out the Tiled Excalibur Plugin!

  • Full support for the Tiled object model
  • Full support for all Tiled file types
  • Excalibur built ins
  • Not yet supported
    • Tiled Group Layers
    • Custom Tile colliders
    • Isometric/Hexagonal maps
    • Parallax

a blue square moving around a pixelated cityscape build in the Tiled map editor

Documentation

A lot of time was spent reviewing and improving our documentation. Part of this work was ensuring that the snippets don't go stale over time by building them in GitHub Actions.

Please check out the new and shiny doc site with new code examples at excaliburjs.com!
Testing

The Excalibur core repo now has WallabyJS enabled to improve the VS Code test development and debugging experience. Wallaby is a paid tool; because of that Excalibur will always also support the Karma based testing framework for official tests.

A useful update to excalibur-jasmine allows async matchers, which greatly simplifies checking image diffs in Jasmine unit tests.

typescript
it('should match images', async () => {
let engine = new ex.Engine({width: 100, height: 100});
await expectAsync(engine.canvas).toEqualImage('images/expectedcanvas.png', .99);
});
typescript
it('should match images', async () => {
let engine = new ex.Engine({width: 100, height: 100});
await expectAsync(engine.canvas).toEqualImage('images/expectedcanvas.png', .99);
});

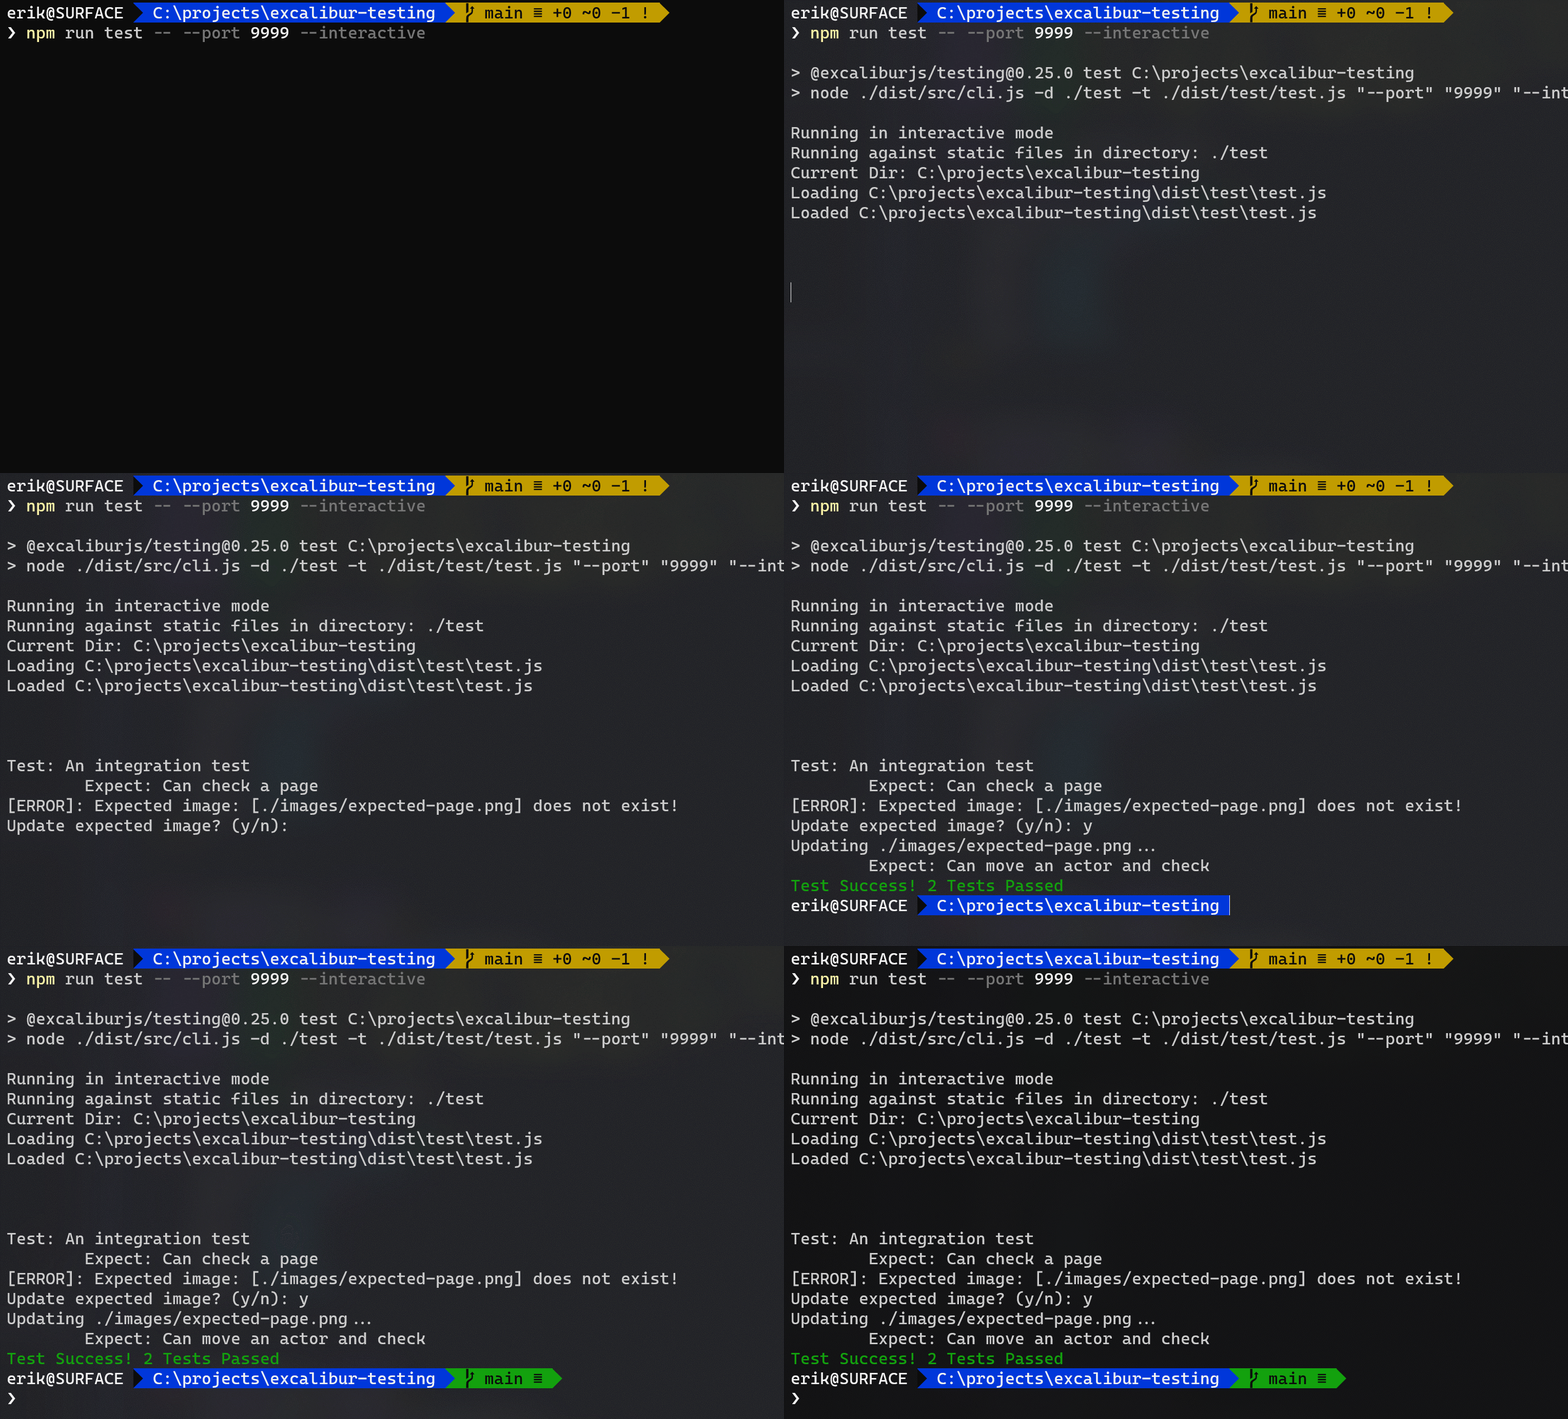
A brand new integration test utility has been created called @excaliburjs/testing, which provides a quick way to drive Excalibur games with Puppeteer and do image-based snapshot testing.

typescript
// excalibur testing
test('An integration test', async (page) => {
// Check for the excalibur loaded page
await expectLoaded();
// Compare game to expected an expected image
await expectPage('Can check a page', './images/actual-page.png').toBe('./images/expected-page.png');
// Use puppeteer page object to interact
await page.evaluate(() => {
var actor = ((window as any).actor);
actor.pos.x = 400;
actor.pos.y = 400;
});
// Compare game to a new expected image
await expectPage('Can move an actor and check', './images/actual-page-2.png').toBe('./images/expected-page-2.png');
});

running an interactive image integration test and showing the ability to update the expected image snapshot

Templates

There are a lot of different ways to build web apps; we've created repo templates for some of the popular ones:

Samples

Community

We've had tons of community contributions since the last release. Heartfelt thanks to everyone in the discussions, issues and pull requests!

Contributors:

  • @jedeen
  • @kamranayub
  • @alanag13
  • @DaVince
  • @DrSensor
  • @djcsdy
  • @catrielmuller
  • @AndrewCraswell
  • @miqh
  • @rledford
  • @SirPedr
  • @helloausrine
  • @dpayne5
  • @herobank110
  • @didii
  • @Charkui
  • @muirch
  • @rumansaleem
  • @mogoh
  • @kala2
  • @MrBartusek
  • @josh-greenlaw
  • @LokiMidgard
  • @romaintailhurat
  • @EduardoHidalgo
  • @jaredegan

Breaking changes

There are some breaking changes in v0.25.0 from v0.24.5; see the changelog and release notes for more specifics, but they generally fall into the categories below. See the migration guide for guidance.

  • New APIs replacements
    • Graphics API
    • Actor drawing functions moved to graphics component
  • API renames for clarity
  • Bug fixed necessitated change
  • Extracted behavior to a plugin
    • Perlin noise is now offered as a plugin and is no longer included in the core library @excaliburjs/plugin-perlin
  • Big plugin changes
    • The Tiled plugin is now published under @excaliburjs/plugin-tiled and will start with version v0.25.0

Looking towards "version 1"

  • Pointer events plumbing refactor; the current system is hard to follow and debug/enhance
  • Particle system refactor
  • Graphics enhancements to support advanced postprocessing/shaders
  • ExcaliburGraphicsContext enhancements to grant more flexibility
  • Event system redo
  • Better Scene management and granular asset loading
  • Expand and enhance TileMap
  • Progressive WebAssembly enhancements in the physics simulation
  • Potential new plugins on the horizon
  • AI patterns and plugins like A* search
  • API finalization

I want to thank everyone who helped make this version of Excalibur possible. A lot of effort went into it and I'm really proud of what we achieved.

- Erik

Excalibur v0.23.0 Release

· 2 min read
Erik Onarheim
Maintainer of Excalibur

This is a big release for Excalibur on our journey to 1.0.0. If you’d like to follow along, we now have a tentative roadmap available! The goal for this release was to simplify our collision infrastructure and utilities.

Thanks to our community contributors for all of their help! (see the full release notes)

Notable highlights

  • Collision groups have been re-implemented to be more in line with industry practice. They allow you to determine which colliders collide with others.
  • Collision behavior and properties are now contained within the new type ex.Collider
    • Collision types are now sourced from ex.Collider
    • Collision groups now live on ex.Collider
    • Collision shapes dictate collision geometry live on ex.Collider
    • Collision pixel offset allows shifting of colliders by a pixel amount
    • Properties like mass, torque, friction, inertia, bounciness are now all part of ex.Collider instead of ex.Body
  • Decoupling Actor from the collision system
    • ex.CollisionPair now works on a pair of Colliders instead of a pair of Actors to represent a potential collision
    • ex.CollisionContact now works on a pair of Colliders instead of a pair of Actors to represent an actual collision
  • New helpful methods for colliders
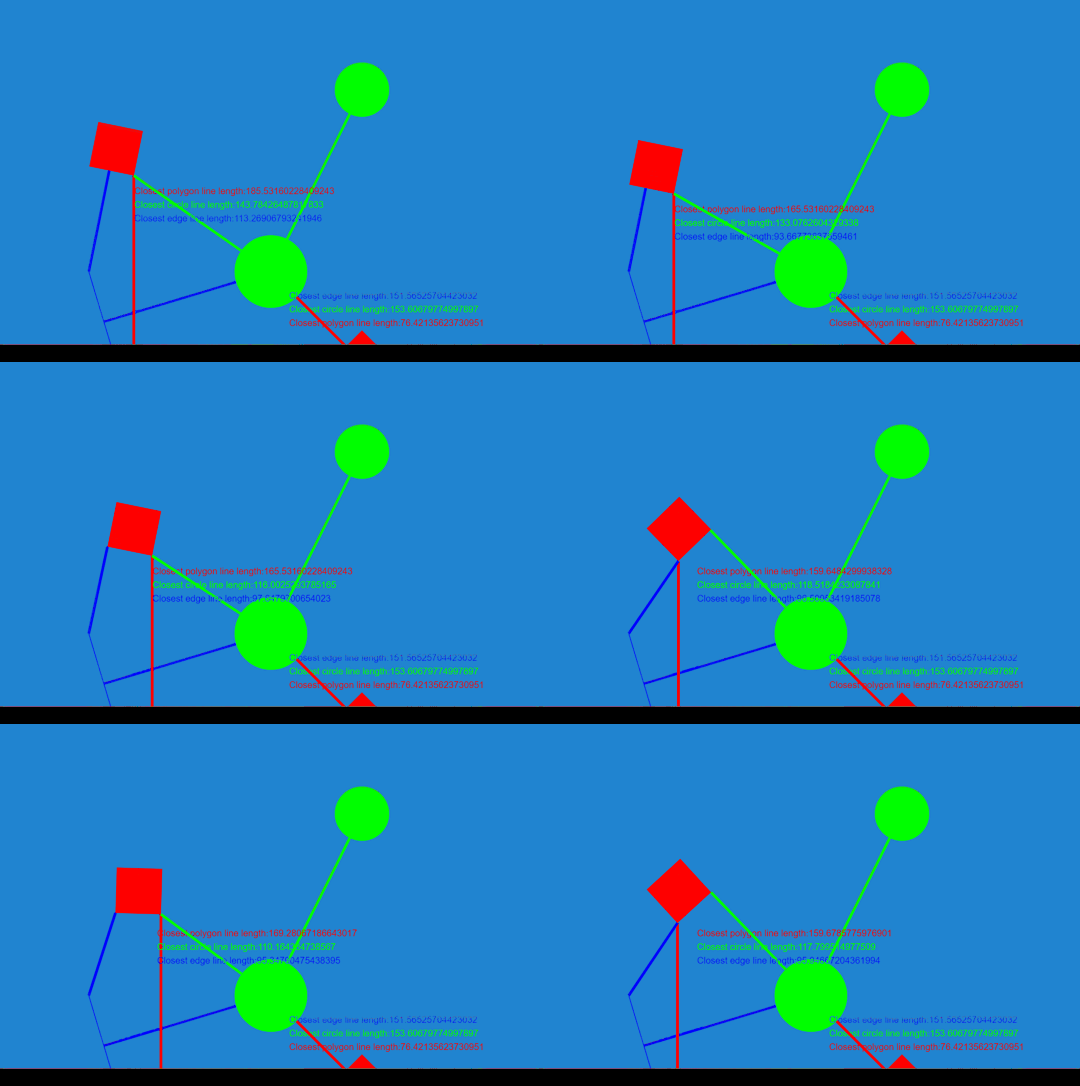
    • Find the closest line between 2 colliders or shapes
    • ex.Actor.within now works based on the surface of the geometry, not the center of the object

animated gif demonstrating finding the closest lines between several shapes

  • Actions moveBy, rotateBy, and scaleBy have been changed to move an actor relative to the current position
    • This change makes implementing patrolling behavior moving 400 pixels left and right forever as easy as: actor.actions.moveBy(-400, 0, 50).moveBy(400, 0, 50).repeatForever();

repeated patrolling behavior demo for the above Actions code example, showing the Actor moving back and forth along a platform

  • Many name refactorings and deprecations to improve usability (see the full release notes)

New sample game

We have a new sample game to illustrate best practices when developing with Excalibur.

sample platformer animation, showing the player, a patrolling NPC, and patrolling enemies

Look forward to many more updates in the months ahead!

Excalibur 0.8.0 Release

· 2 min read
Erik Onarheim
Maintainer of Excalibur

Excalibur version 0.8.0 is now available! We have several new features in this release.

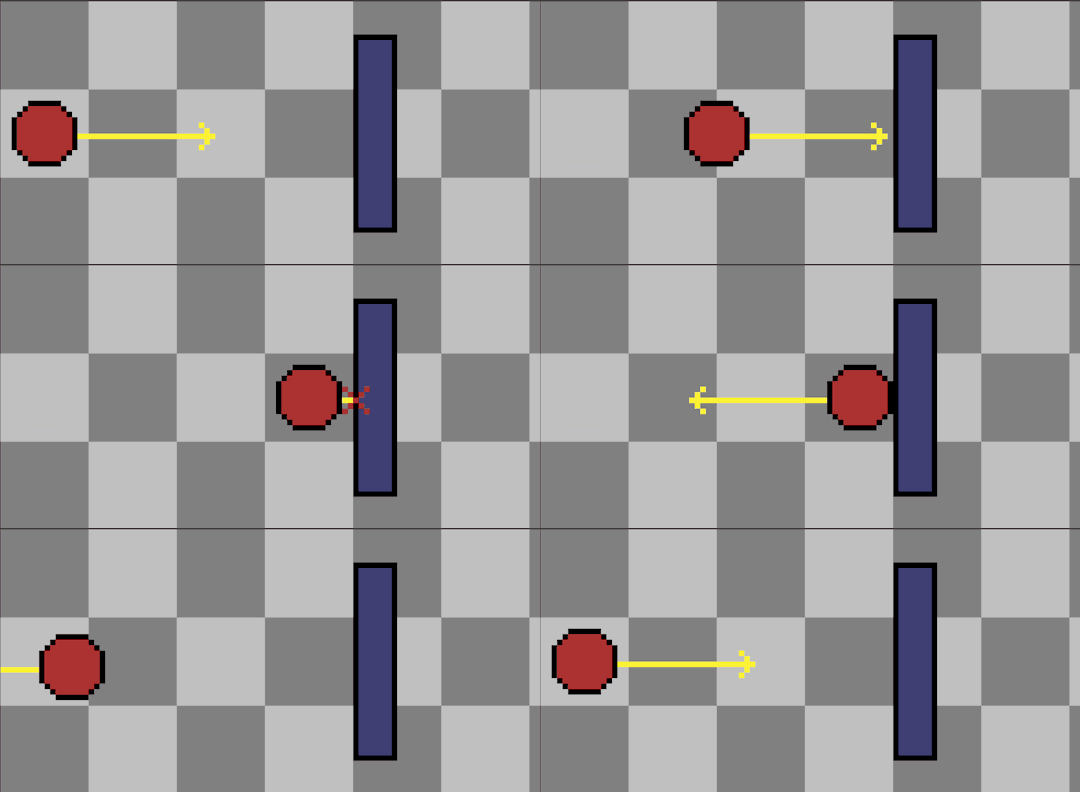
Fast body collision checking

Actors can now move much faster without fear of unexpectedly passing through other collision bodies.

visualization fo fast body collision checking: a ball heads towards a wall, but a line ahead of the ball detects that the ball may collide soon with the wall, and prevents it from accidentally passing through it

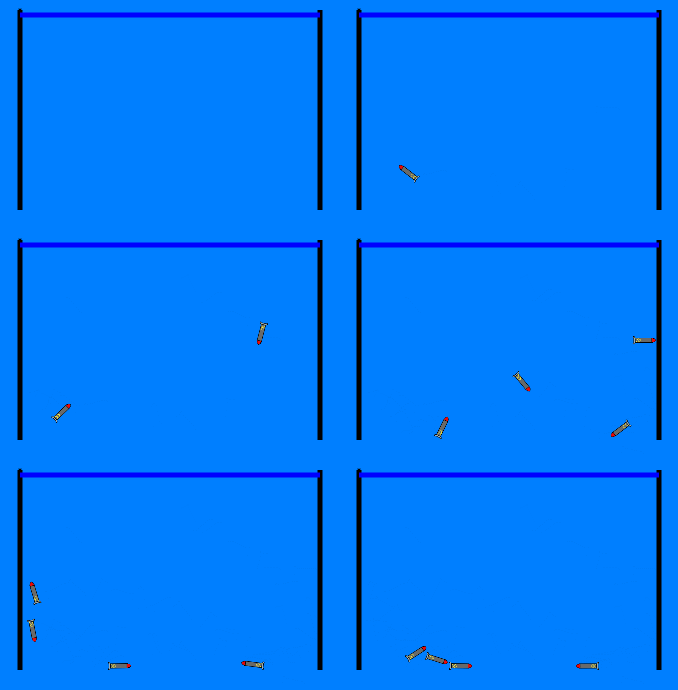
demo of fast body collision checking: projectiles are thrown around inside a box at high speeds and do not escape the box

New vector and line functionality

We’ve added a few helpful things to Line and Vector, including determining points, calculating distance, and a vector magnitude alias.

Debug statistics

We now have a utility from which Excalibur will provide useful statistics to help you debug your game. For now the stats are focused on Actors and specific frames; look for more helpful stats in future releases!

PhantomJS testing structure

Behind the scenes, we have new testing tools that will allow us to visually test complicated interactions on the canvas.

There were quite a few commits from the Excalibur community in this release. Thanks to FerociousQuasar and hogart for your contributions, and check out the full release notes for all of the details for this release.

Excalibur 0.7.0 Release

· One min read
Erik Onarheim
Maintainer of Excalibur

Excalibur version 0.7.0 is now available! This is a very exciting milestone, as we have added a major feature!

New physics system

We’ve implemented a rigid-body physics system, complete with edges, circles, and convex polygon primitives. This enables you to build fully-featured physics games in Excalibur! Fear not, the old physics system is still around for you to use.

a demo of the new physics system, showing birds with a knight helmets being thrown into a tower of blocks to knock them over

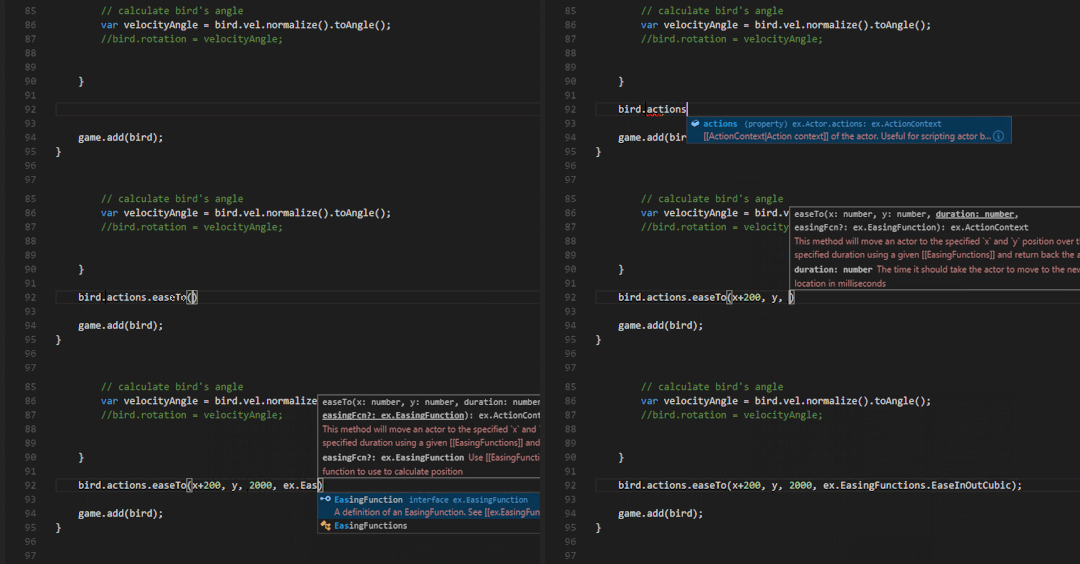
Generic lerping and easing

Excalibur now has generic functions for lerping and easing!

the new Excalibur easing function autocompleting in a code editor

the results of the above code, causing a bird to move according to a cubic easing function

Code cleanup

We’ve removed a number of deprecated methods. Check the changelog for a complete list.

Contributing

We have improved our contributing document to make it easier to jump into Excalibur development. If you’re interested in helping out, read through our new Contributing documentation

Overall there were over 27 issues addressed in this release. Check out the full release notes for all of the details, including bug fixes and enhancements.

Excalibur 0.5.0 Release

· 2 min read
Erik Onarheim
Maintainer of Excalibur

We’ve been steadily working on the newest release of ExcaliburJS, and it’s finally here! Version 0.5.0 brings with it many new features!

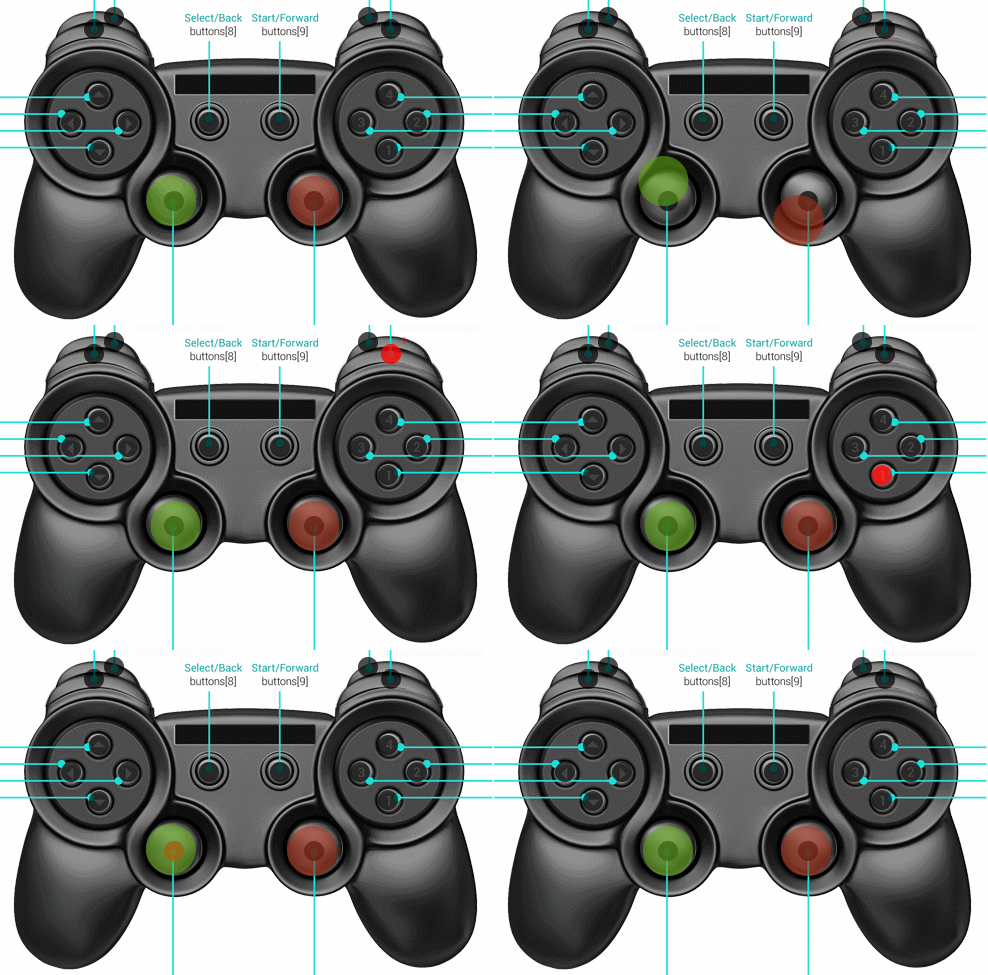
Controller support

controller support input detection

Excalibur now supports the HTML5 Gamepad API. Most modern controllers can be used as game input.

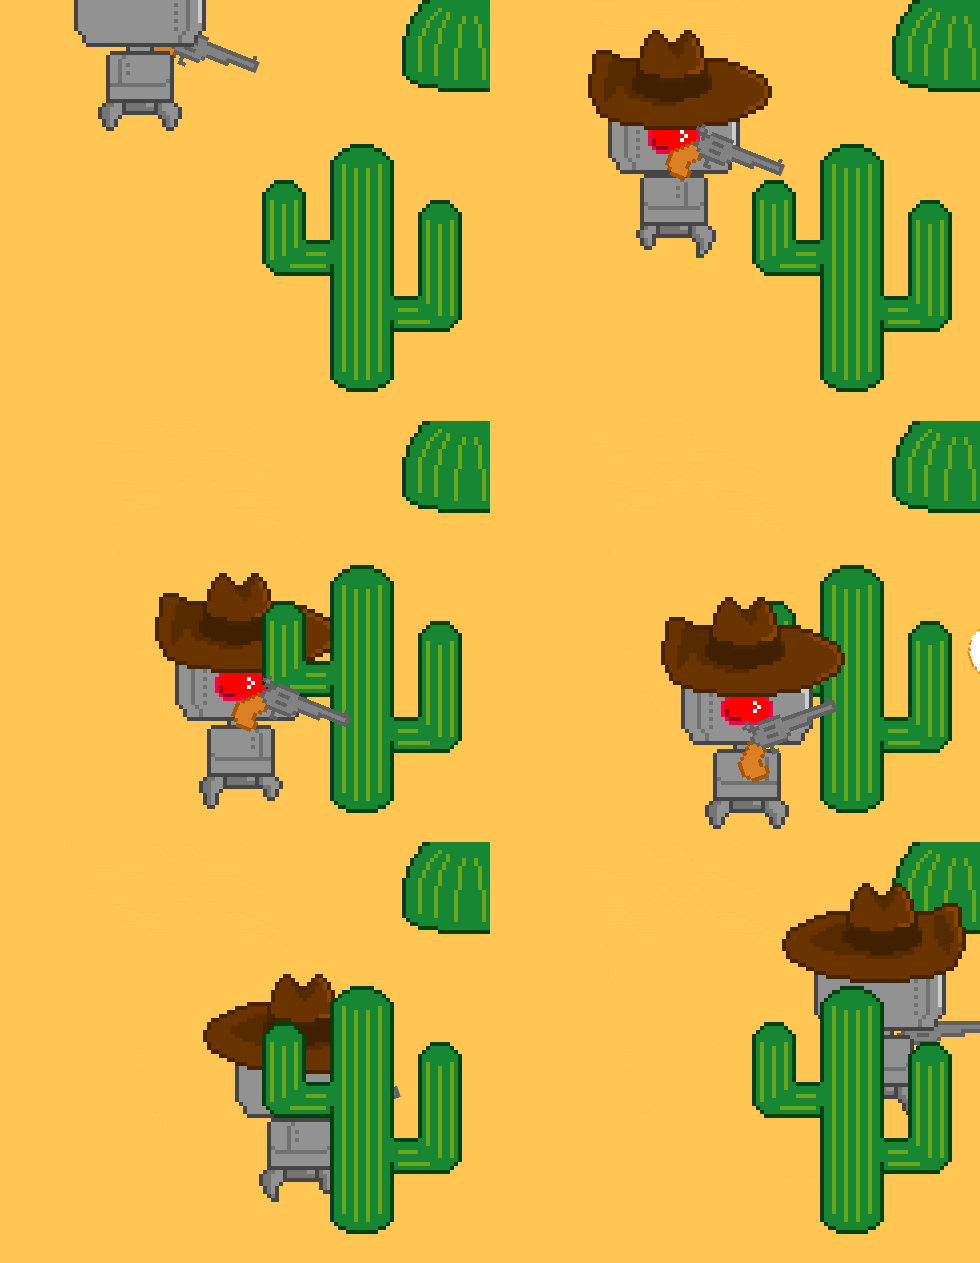
Z-indexing

demo of z-indexing, showing a robot moving in front of and behind a cactus

You can now specify layering for actors in your game. Higher index values draw on top of lower values.

Faster collision detection

Excalibur now uses an axis aligned bounding box tree for better performance during collision checks.

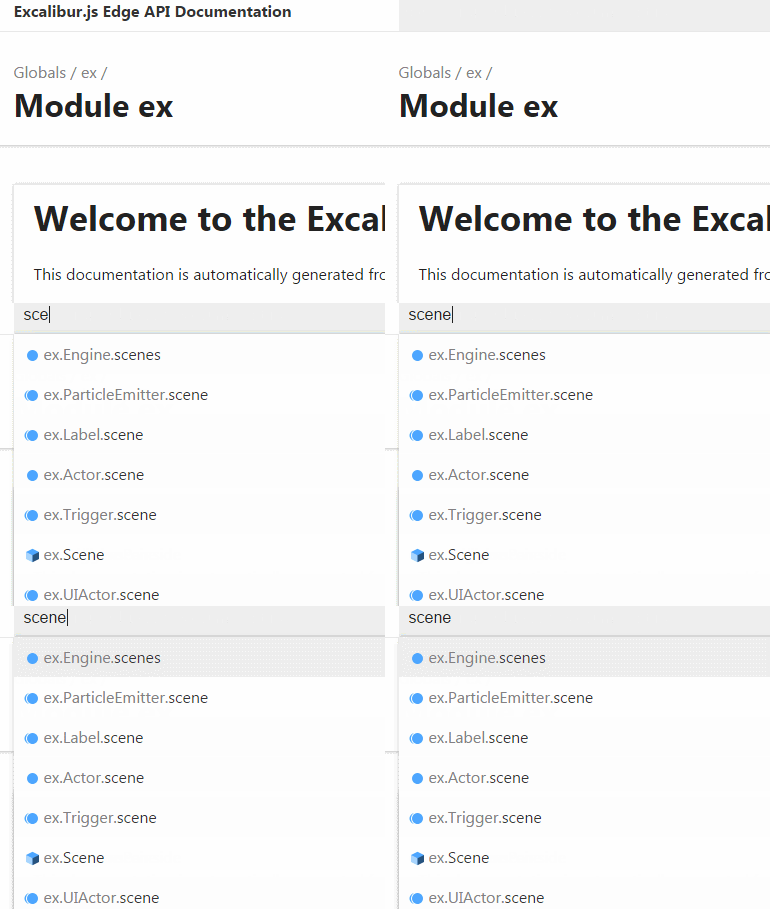
New documentation

demo of documentation search bar autocomplete

The Excalibur docs are now cleaner and easier to navigate. Use the search bar at the top to help you find what you’re looking for.

There are also a number of improvements and bug fixes to make Excalibur faster and easier to use. If you’re so inclined, check out the full release notes.

Releases are also available in Bower and NuGet; please reference the installation guide for more information. If you’re brand new, welcome! Check out the Getting Started guide to start working with Excalibur.

The main Excalibur branch is constantly being improved by the team. If you crave living on the edge, reference the edge documentation to keep up with what we’re working on. It is automatically updated with every commit.

If you’ve used Excalibur for a project, please send it our way so we can consider showcasing it on the website!

Excalibur 0.2.0 Released!

· One min read
Erik Onarheim
Maintainer of Excalibur

We are very proud to announce Excalibur v0.2.0! There are tons of awesome new features!

Check out the full release notes on GitHub!

Release notes summary

  • Collision Map Implementation for building large static collidable levels
  • Support for redundant fallback sound sources for cross browser support
  • Particle Emitter Implementation
  • Trigger Implementation
  • Timer Implemenation
  • Camera Effects: zoom, shake
  • Polygon IDrawable
  • Alias ‘on’ and 'off’ for 'addEventListener’ and 'removeEventListener’
  • Optimized draw so only on screen elements are drawn
  • Support Scale in the x and y directions for actors
  • Added notion of collision grouping
  • New Events like 'enterviewport’, 'exitviewport’, and 'initialize’
  • Textures allow direct pixel manipulation
  • Static Logger improvements with ’.debug()’, ’.info()’, ’.warn()’ and ’.error()’
  • Added callMethod() action to actor
  • Added fade() action to actor
  • Added follow() and meet() action to actor

Installation options

  • Install with NugGet: Install-Package Excalibur
  • Install with npm: npm install excalibur
  • Install with bower: bower install excalibur